 Connect with Google
 Connect with Facebook
How to design a 3D printed turbine
Posted By Kat Plewa on Nov 21, 2018 | 0 comments
Our Design Studio works closely with our clients to give them the best production solutions and 3D printing experience. And that’s how we know what your needs are and how you might struggle with some design challenges. However, Additive Manufacturing can give you an amazing design freedom that will highly improve your manufacturing process. We are here with our latest tutorial to help you achieve it.
Today you will learn with us how to 3D model a turbine and prepare it for 3D printing. If you follow each step closely, you should have no problem creating the end product, as we will explain every step in depth. This tutorial is aimed for users with at least basic knowledge of 3D modeling. Let’s get started!
Which software did we choose?
We’ve decided to go with 3D software Fusion 360. It is one of the latest products from Autocad and holds a great potential for both designers and engineers. The audience for this 3D software grew wide quickly and there are plenty of tutorials and support forums. To help you find the best software for your needs, we compared Fusion 360 with Solidworks in one of our previous blog posts. It’s crucial for you to decide which software will meet your production needs.
Choosing the perfect 3D software might be tough, as there are plenty of options. To make it easier for you, we have also prepared the Top 25 free CAD Software list, one of them surely will be suitable for your production requirements.
This 3D printing guide will explain the steps of creating a 3D printed turbine, but will not go over the most basic commands, such as creating a line or circle. If you’re new to 3D modeling, make sure you start with our tutorials or learn more with online 3D modeling classes.
Why would you 3D print a turbine?
One would ask, why would you get mechanical parts 3D printed when we have CNC or traditional casting? The answer is simple: Innovation. All the traditional manufacturing methods were invented at some point, and at the time, they were innovative and new. Now it’s time for Additive Manufacturing.
3D printing has been introduced to mechanical engineering and turbine engineering a while ago. Among other emerging technologies, it gives absolutely new design freedom. You can now access inside of your parts, create lattices for better material management, and give your parts new properties. With those new possibilities, you can make your production much more efficient as you can also just 3D print your parts when you need it, which eliminates the problem of spare parts storage and brings the production costs down.
Additive Manufacturing also offers various production methods and materials solutions, allowing you to fit the technology exactly with your needs. The most obvious 3D printing material choice is plastic, but did you know you can also use metal 3D printing or resin? Or maybe you need heat resistant materials or a waterproof solution? With 3D printing, even the sky is no longer a limit.
3D printed Turbine: design
We will start with blade design, then we will move to the rotor. Each step will be explained in detail to make sure your model turns out correctly. The parameters, of course, are adjustable, we only provide you with the example ones to showcase different tools.
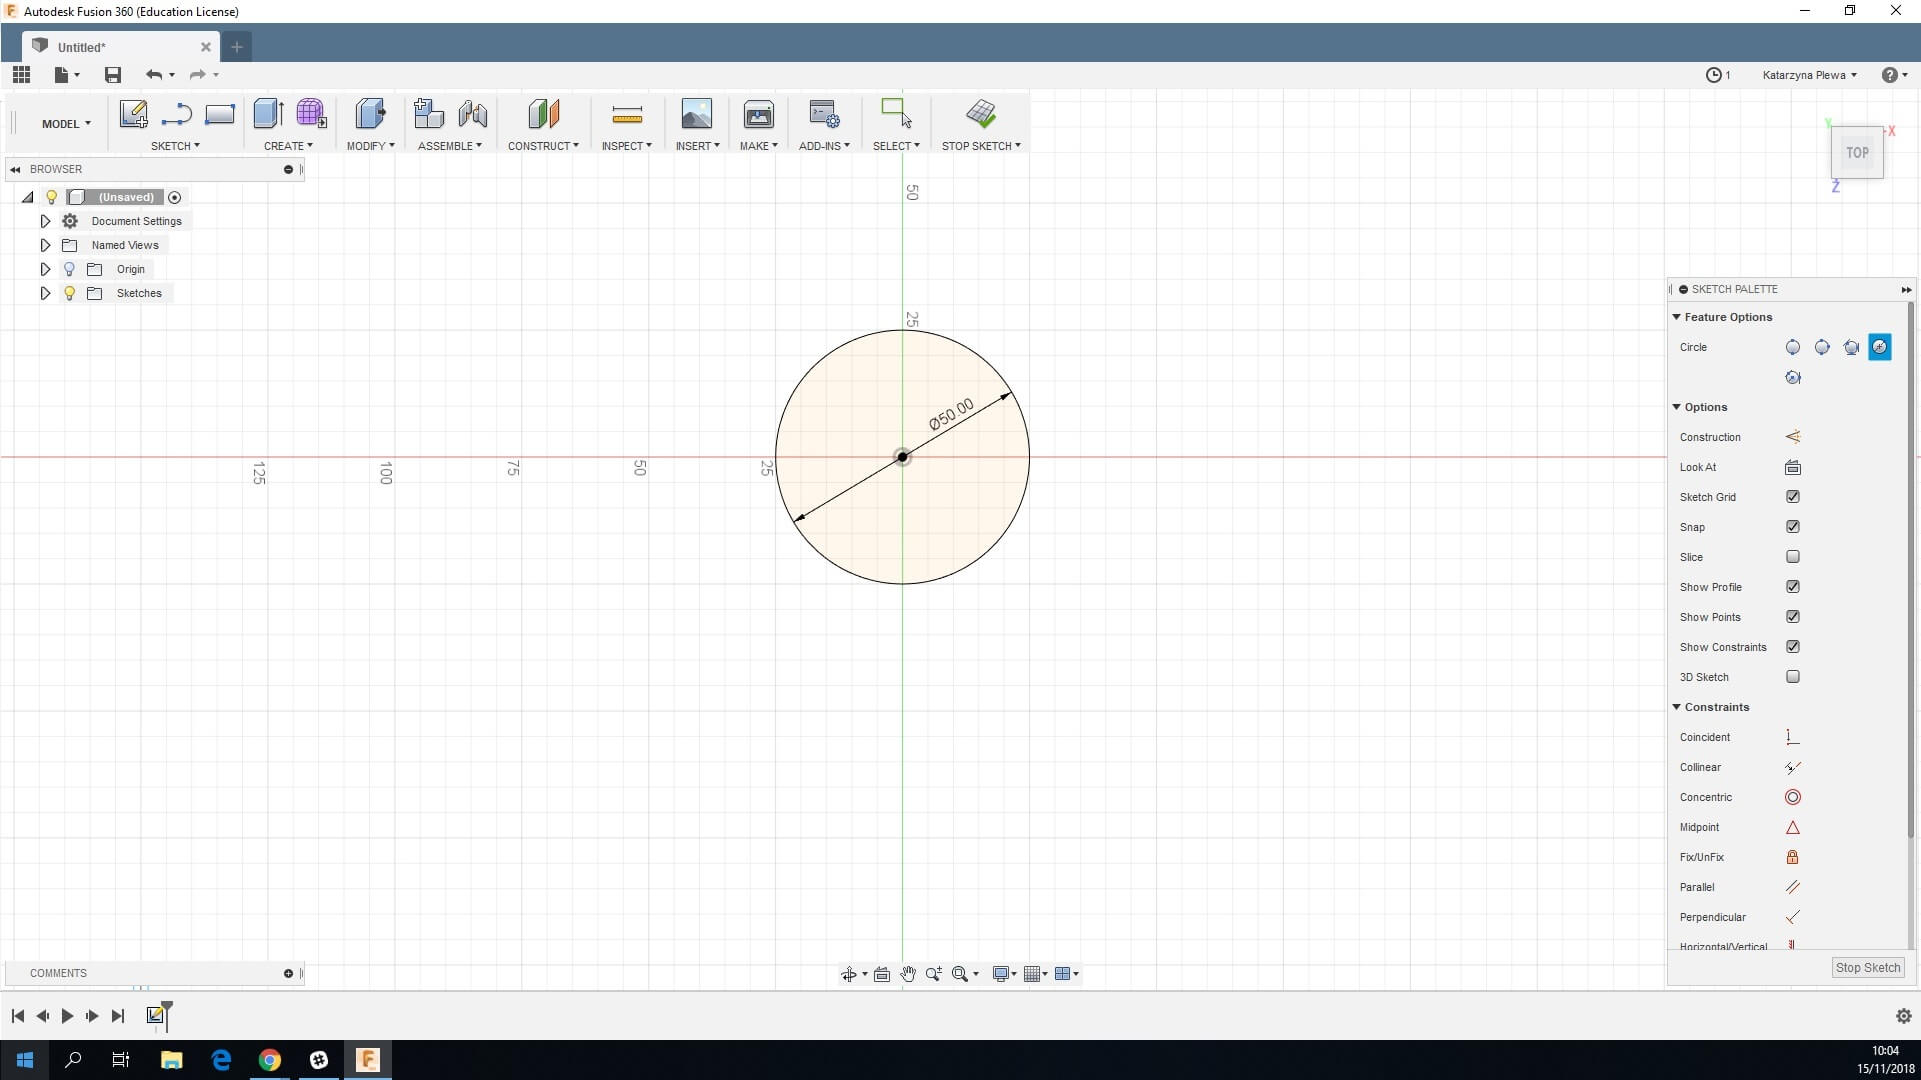
1. On the Top plane create a circle, 50 mm in diameter, and stop the sketch
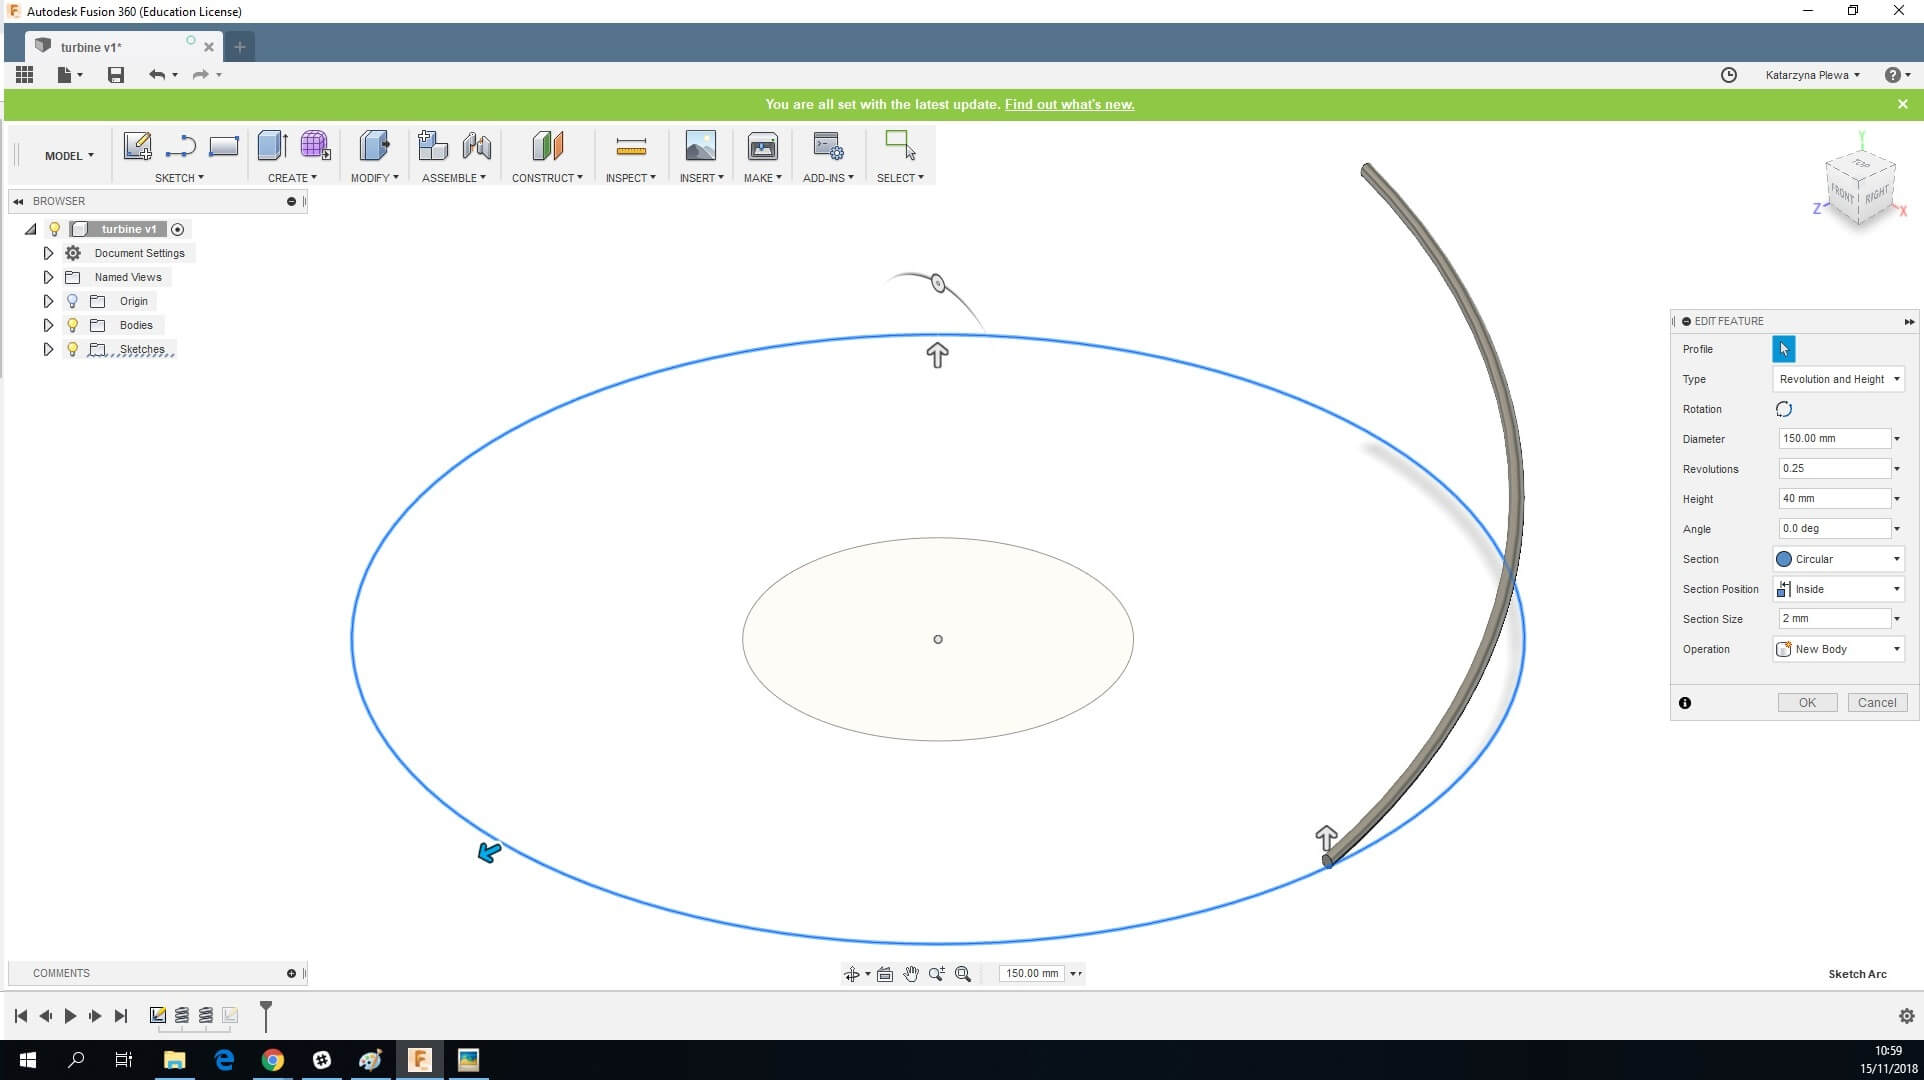
2. Carry on working on the top plane, create a coil. We explained this tool in our previous blog post.
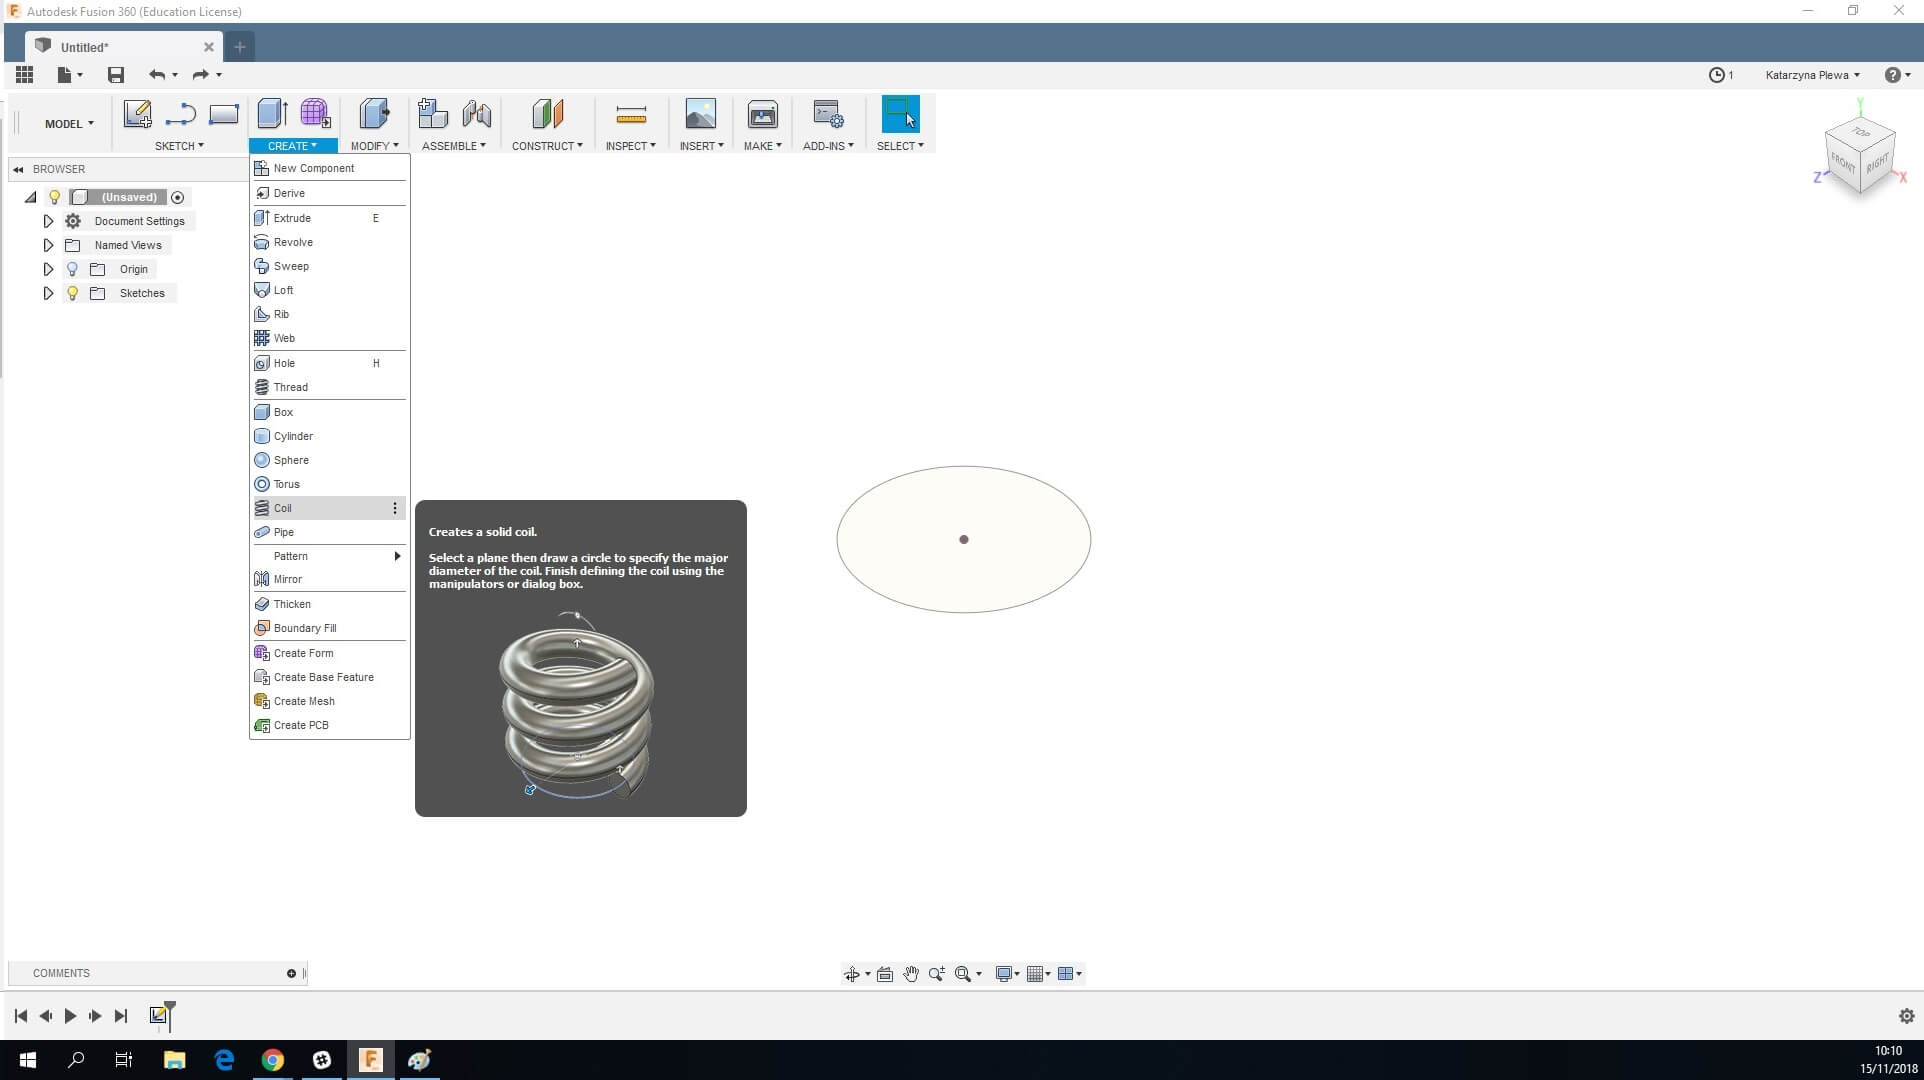
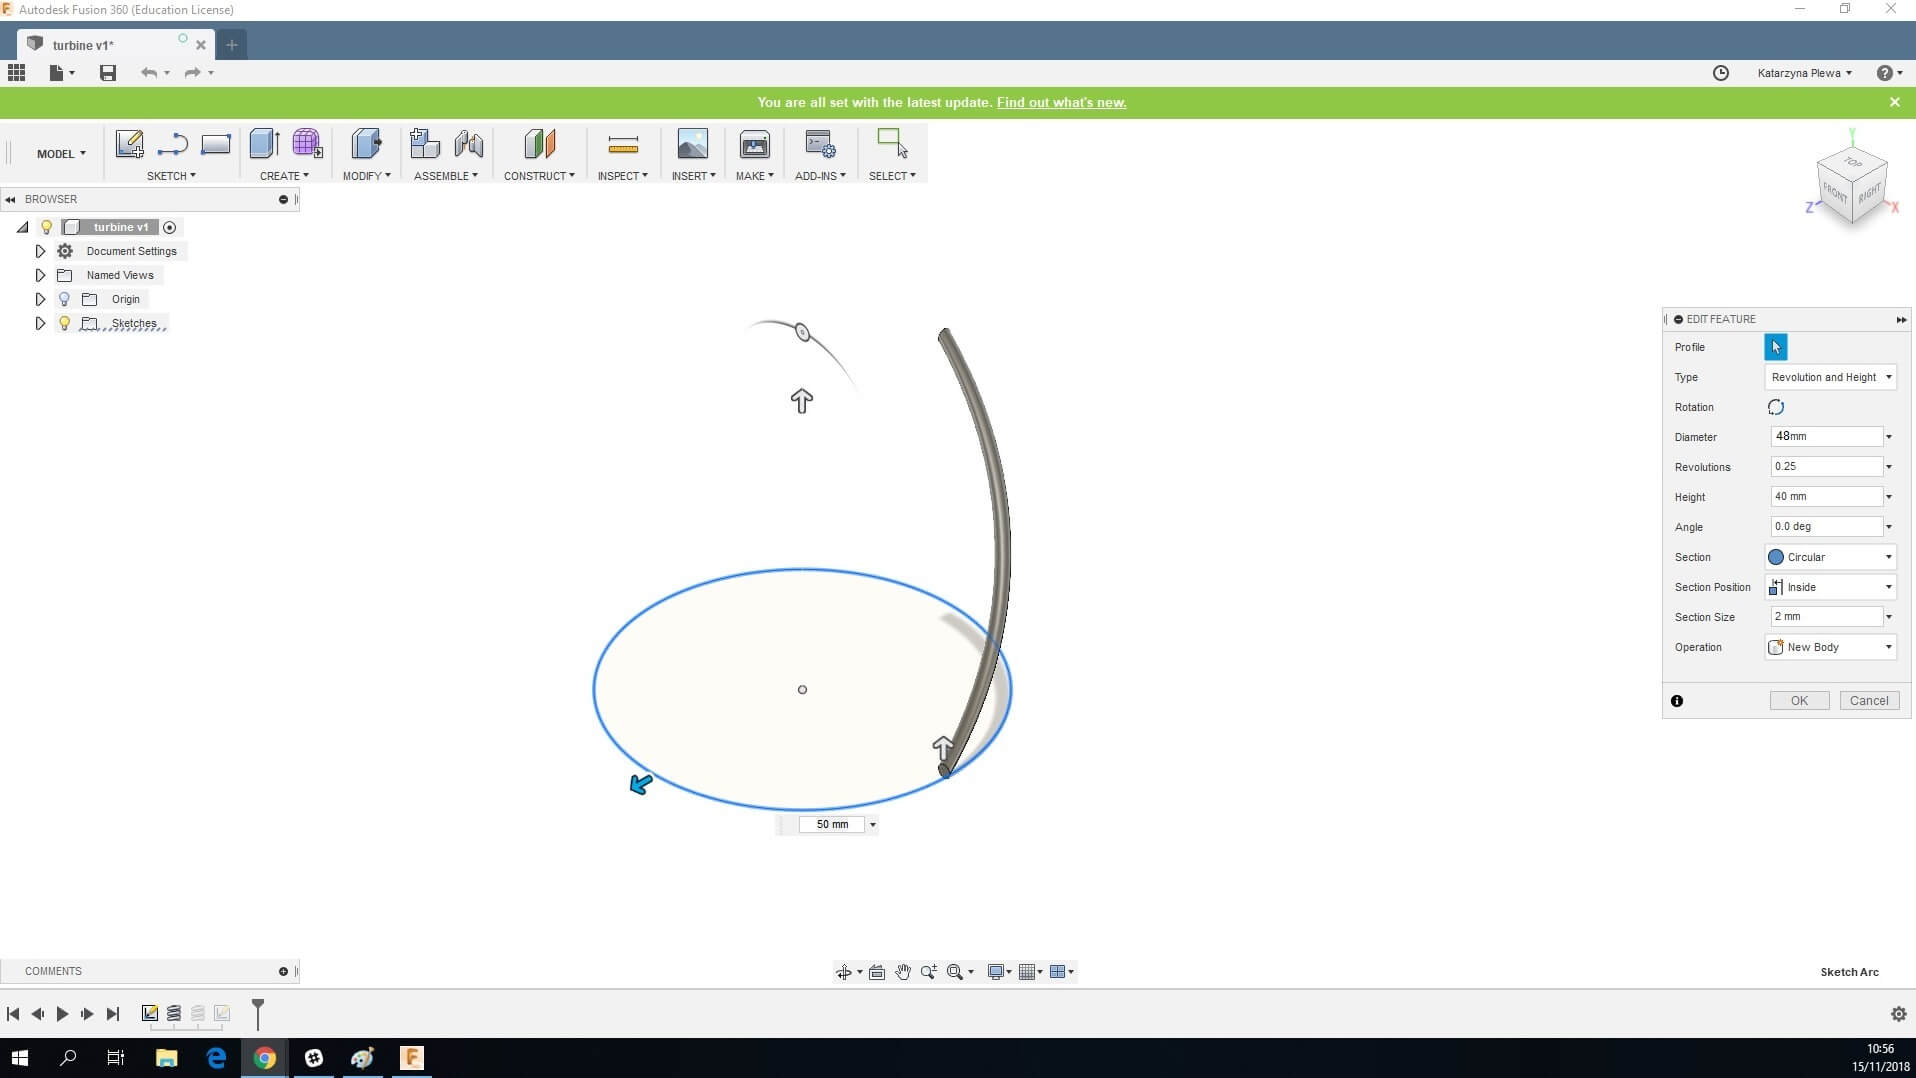
Make sure you have the exact settings:
Type: Revolution and Height
Diameter 48 mm
Revolutions: 0.25
Height: 40 mm
Angle 0.0 deg
Selection Circular
Section Position: Inside
Section Size: 2 mm
Operation: New Body
3. Create a second coil with diameter 150 mm.
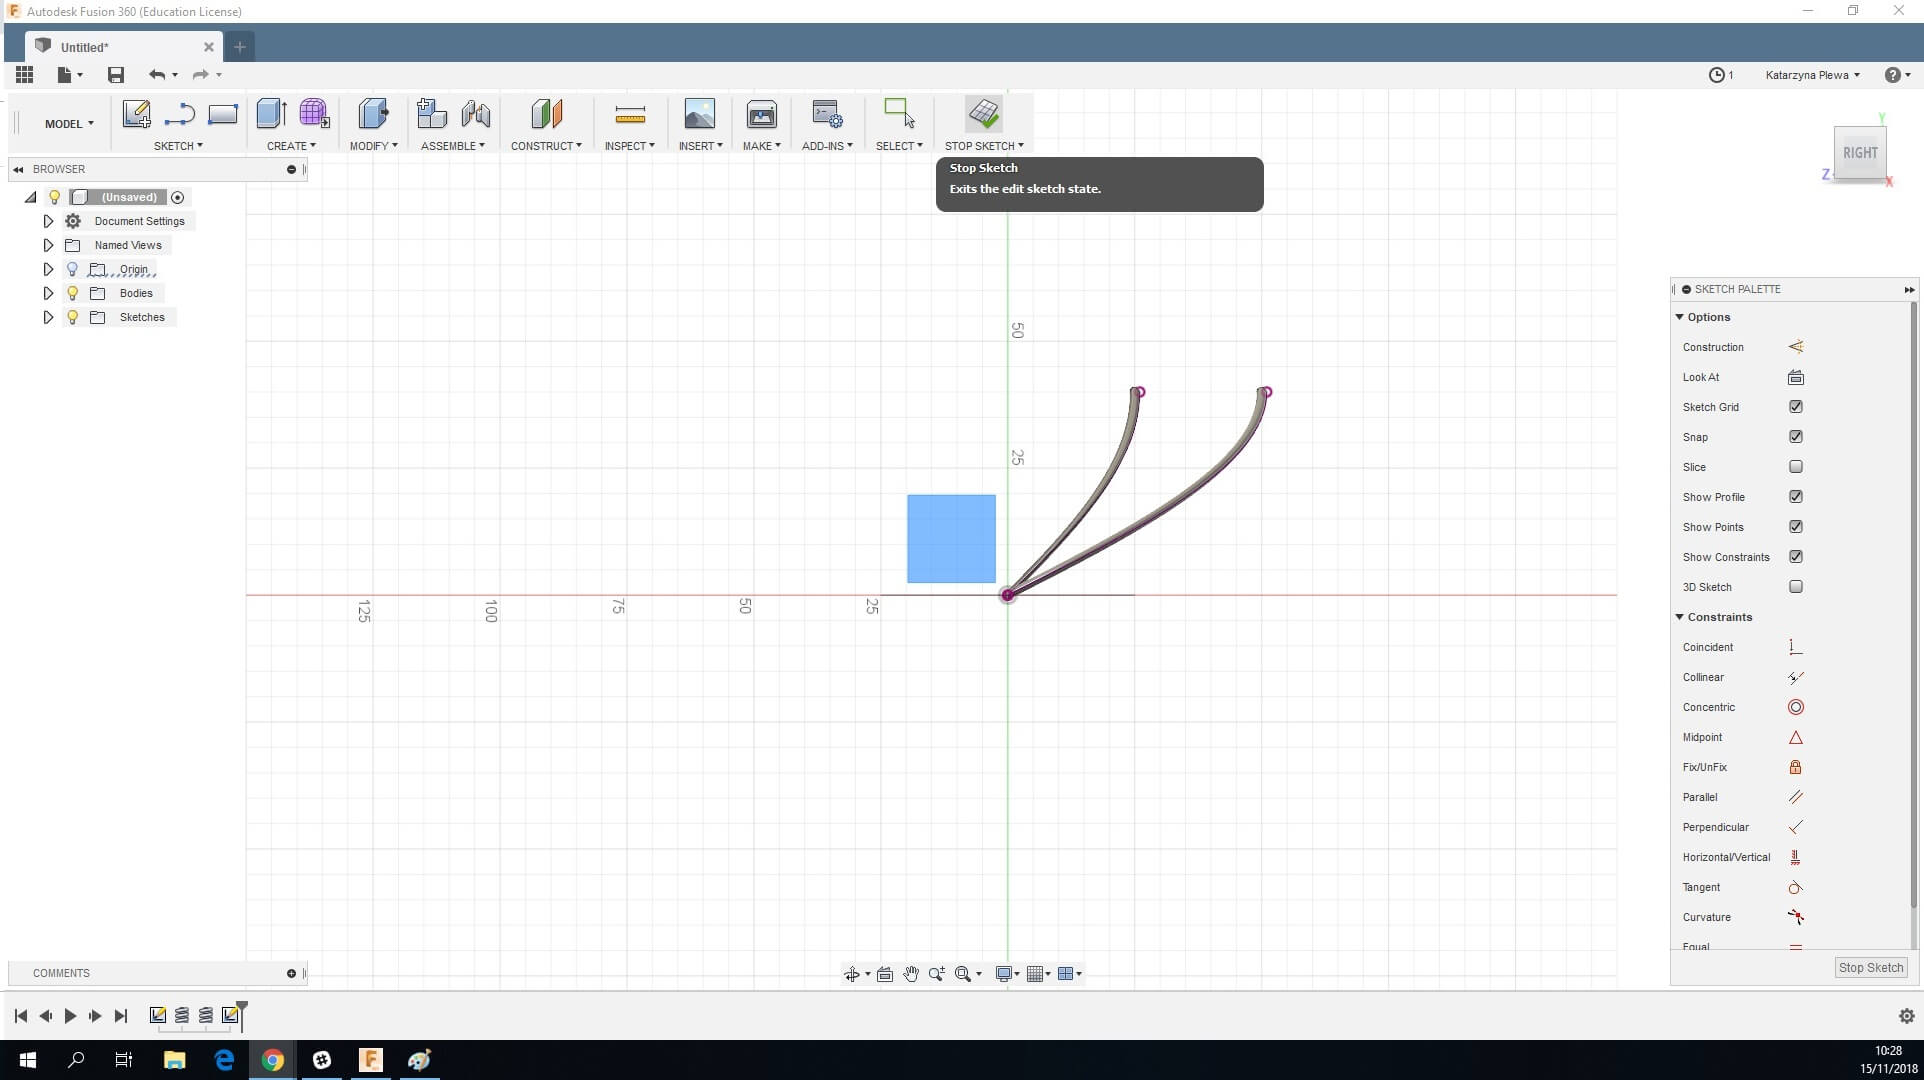
4. Under the Create toolbar select Project/ Include and Include 3D Geometry. Select the right plane.
5. Select both coils, make sure you select the sketch (line) and the tube. Stop the sketch.
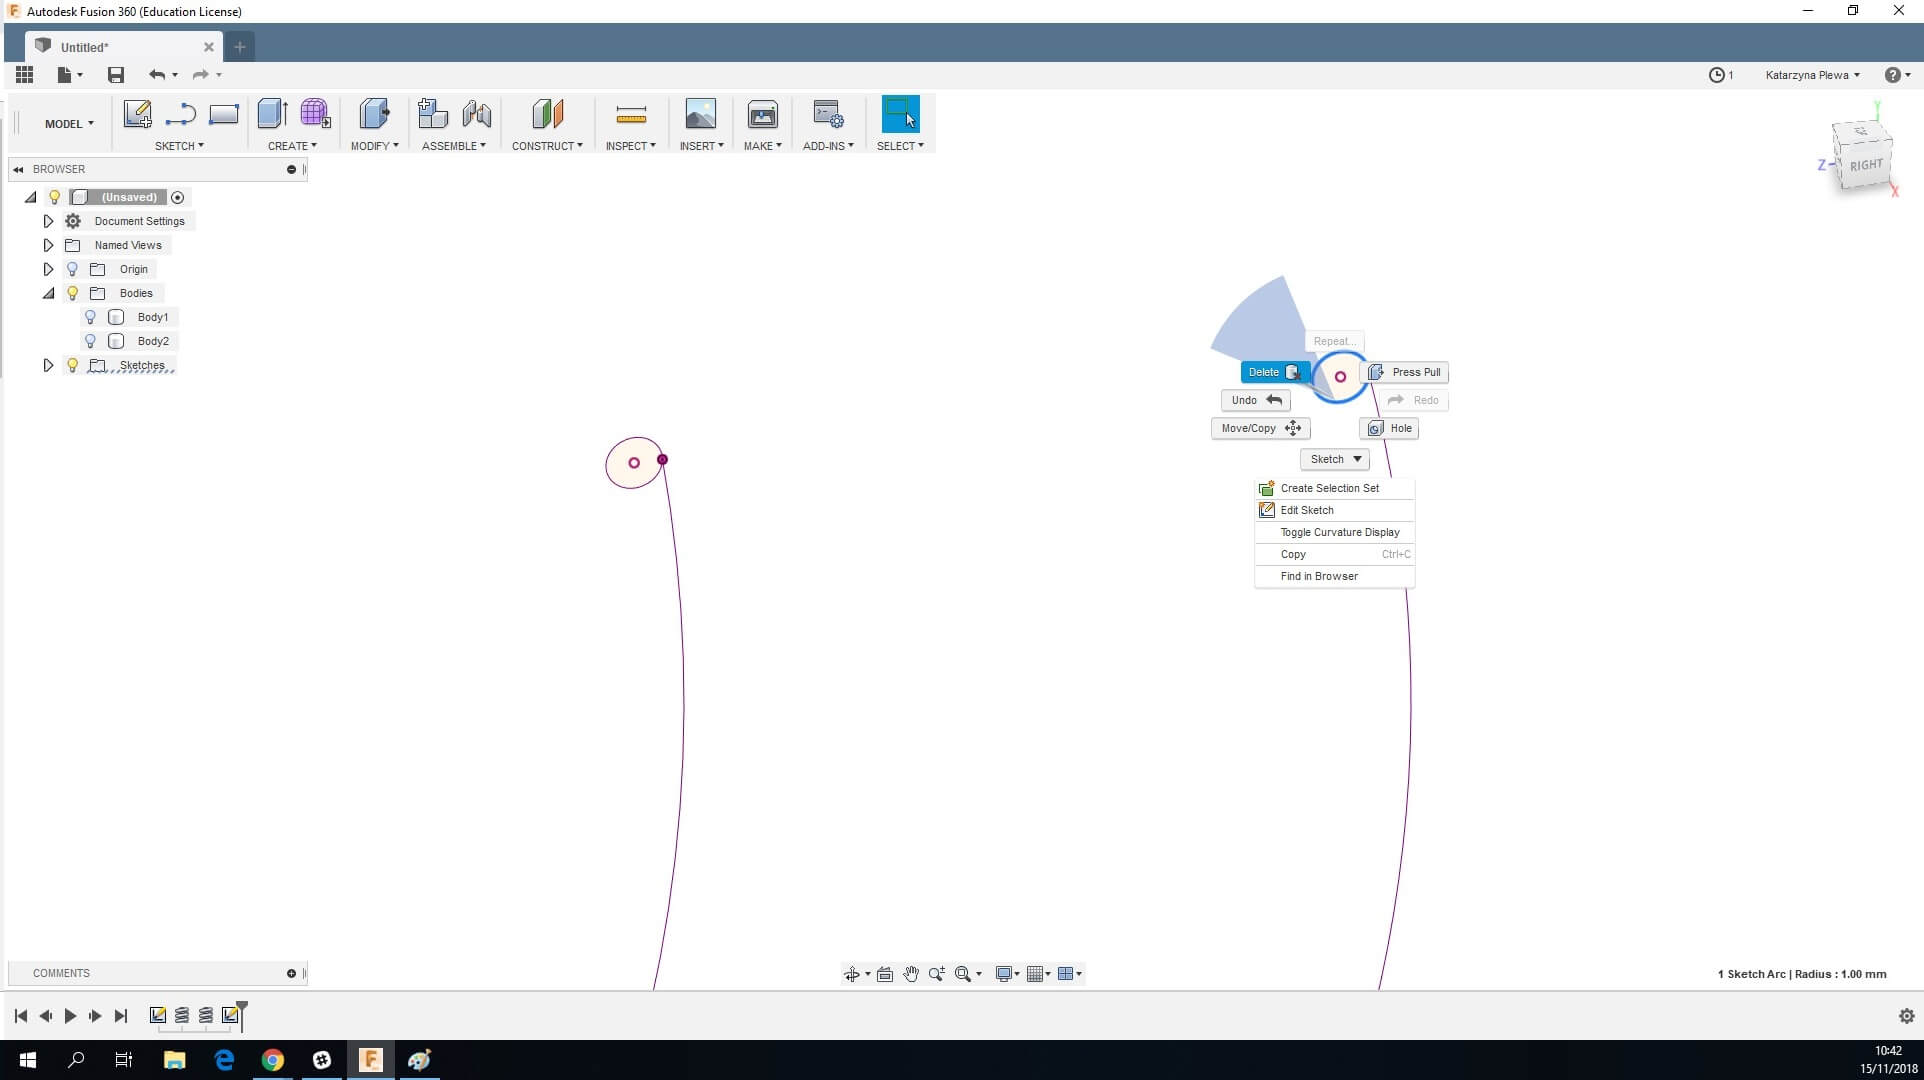
6. Go to bodies on the left-hand side menu and turn off visibility for both of them.
7. Select the outer circle of the sketch, right click and delete. Repeat for all the ends of coils.
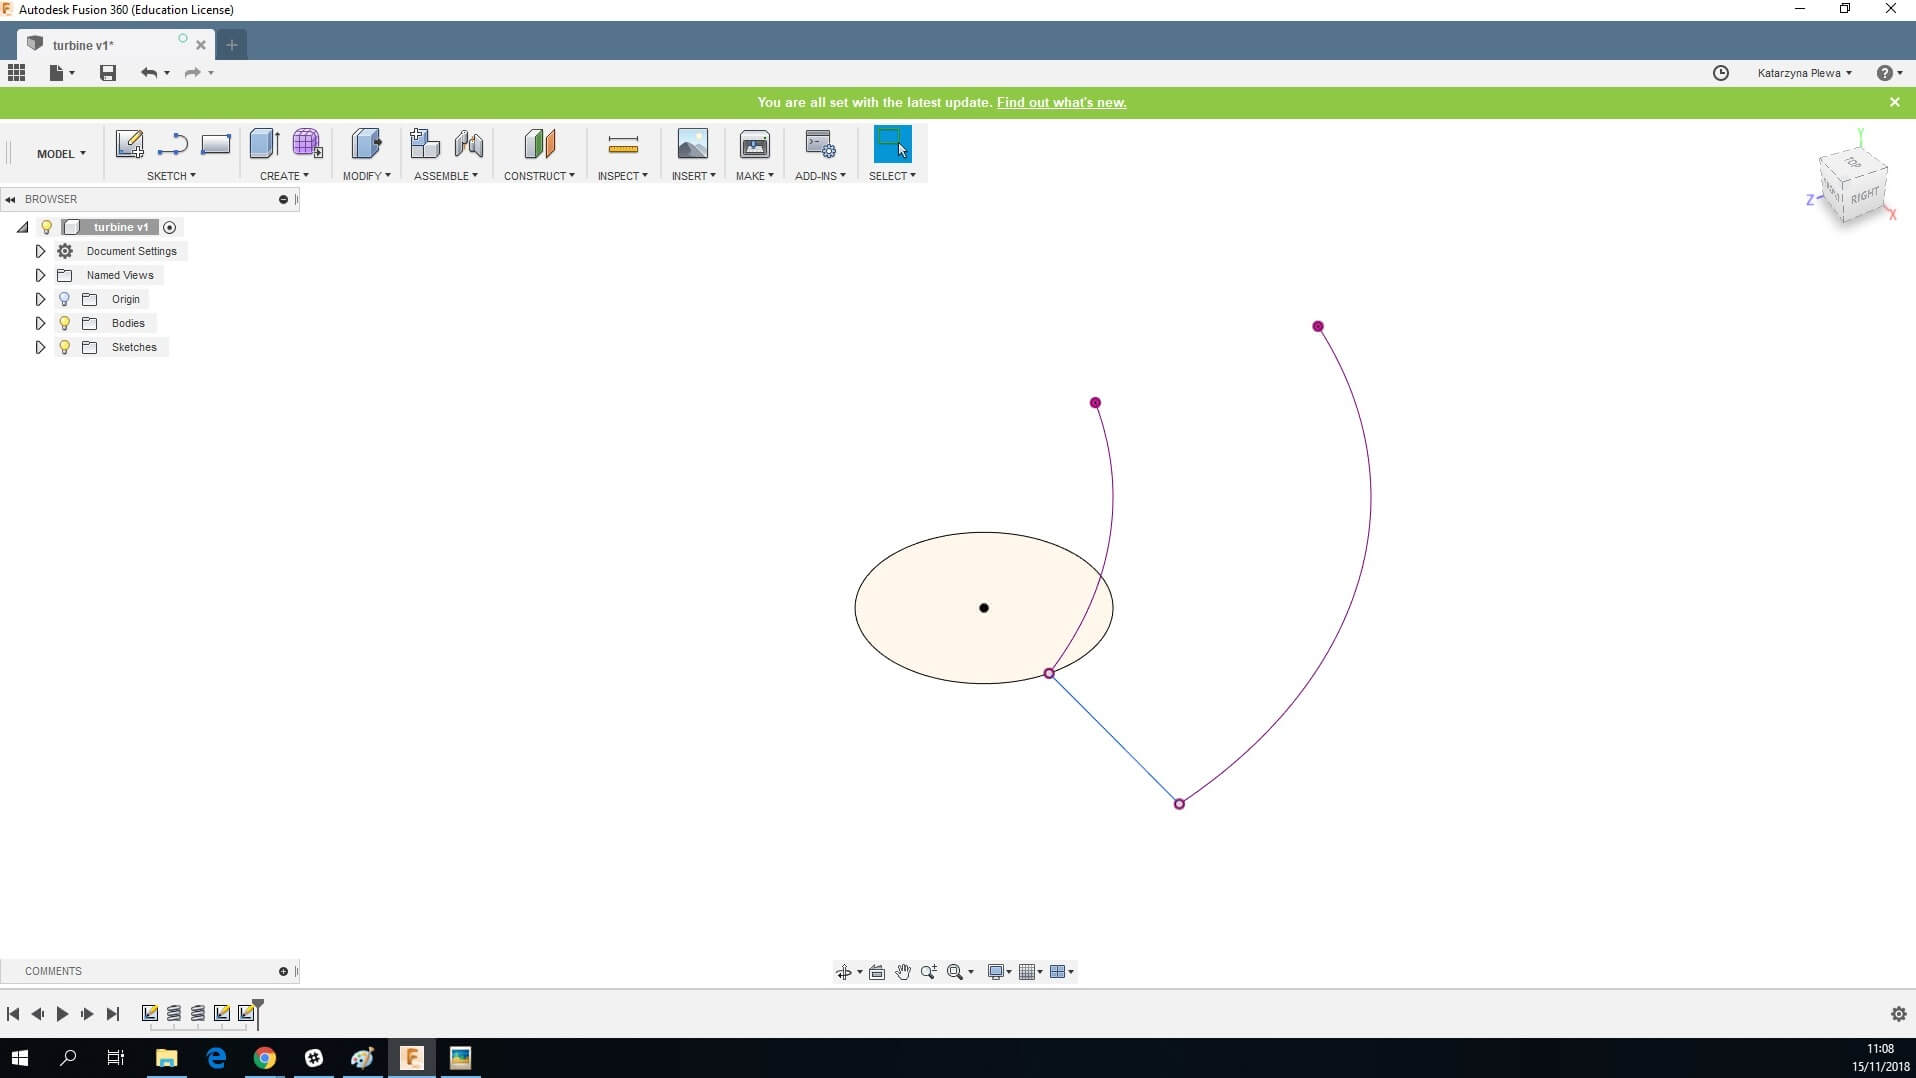
8. Sketch a line connecting the ends of the lines at the bottom
9. Change the mode from Model to Patch.
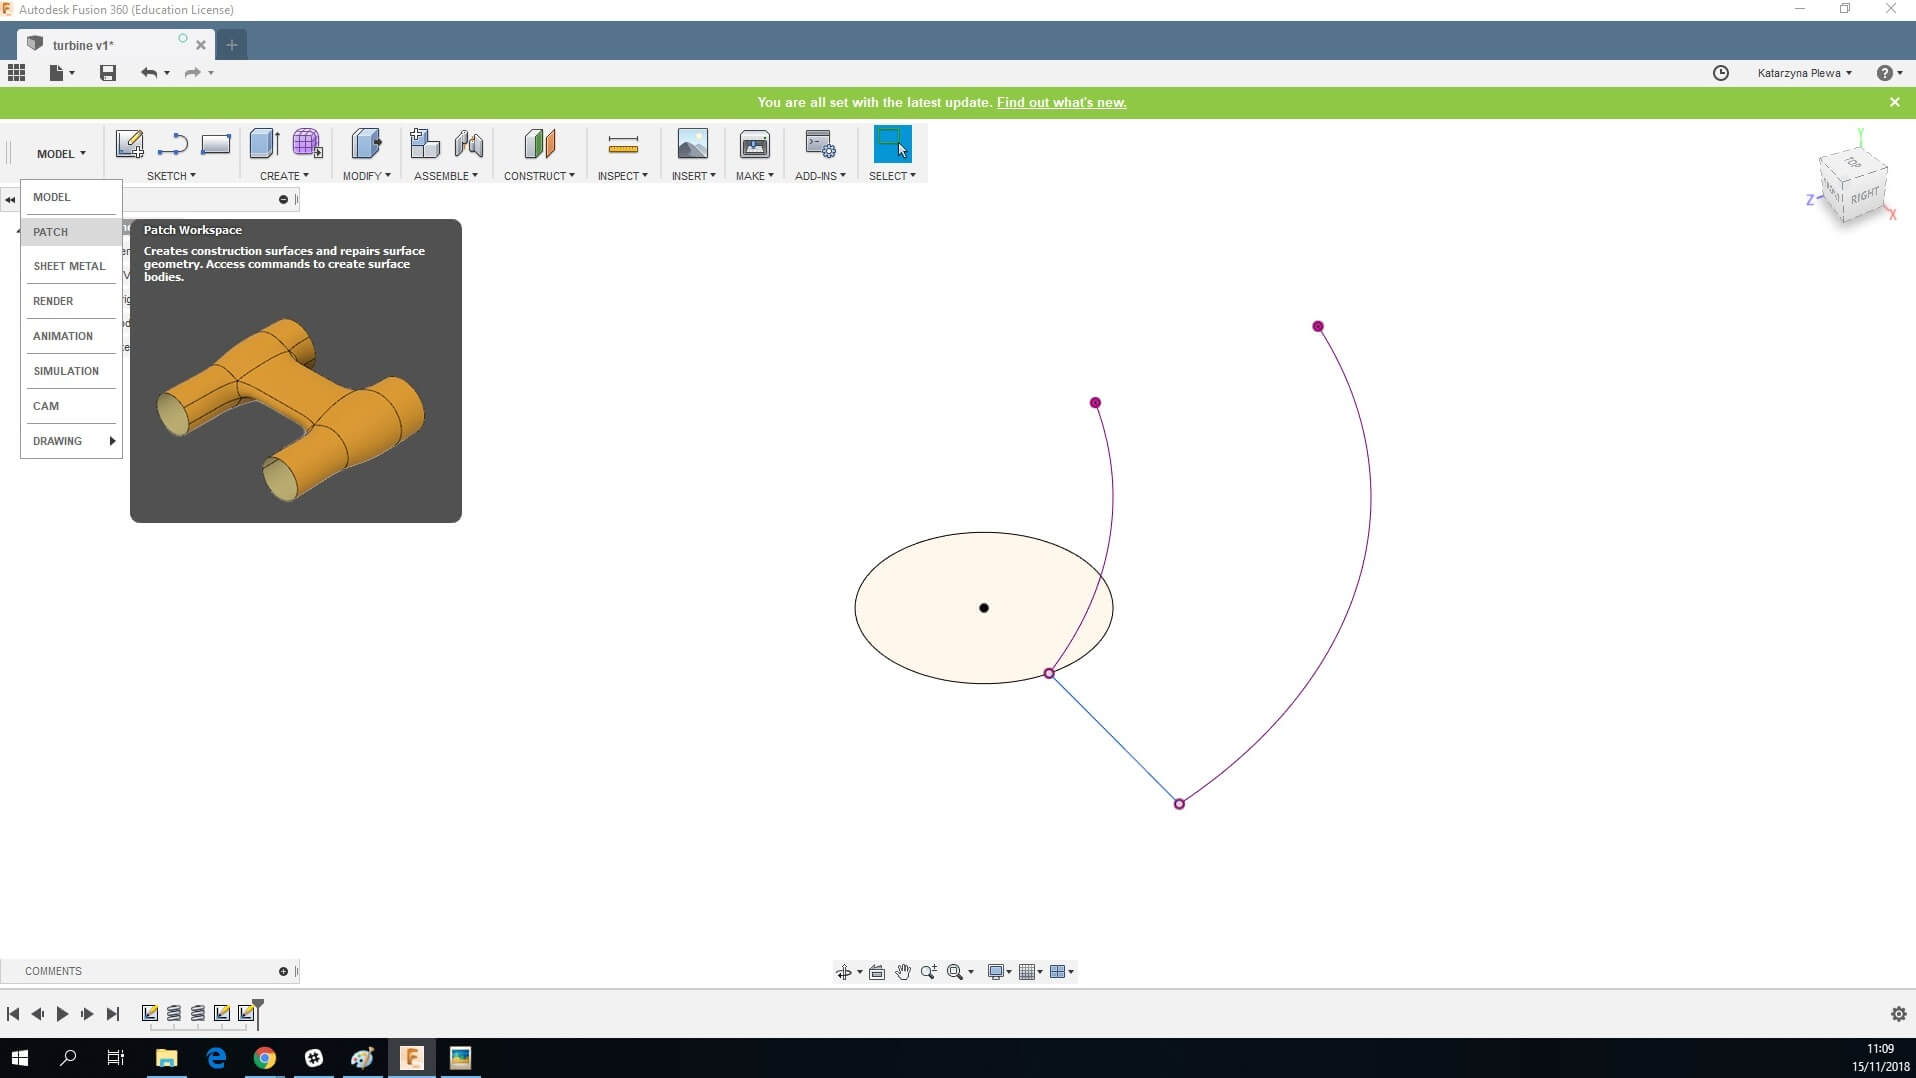
10. Under Create choose Sweep
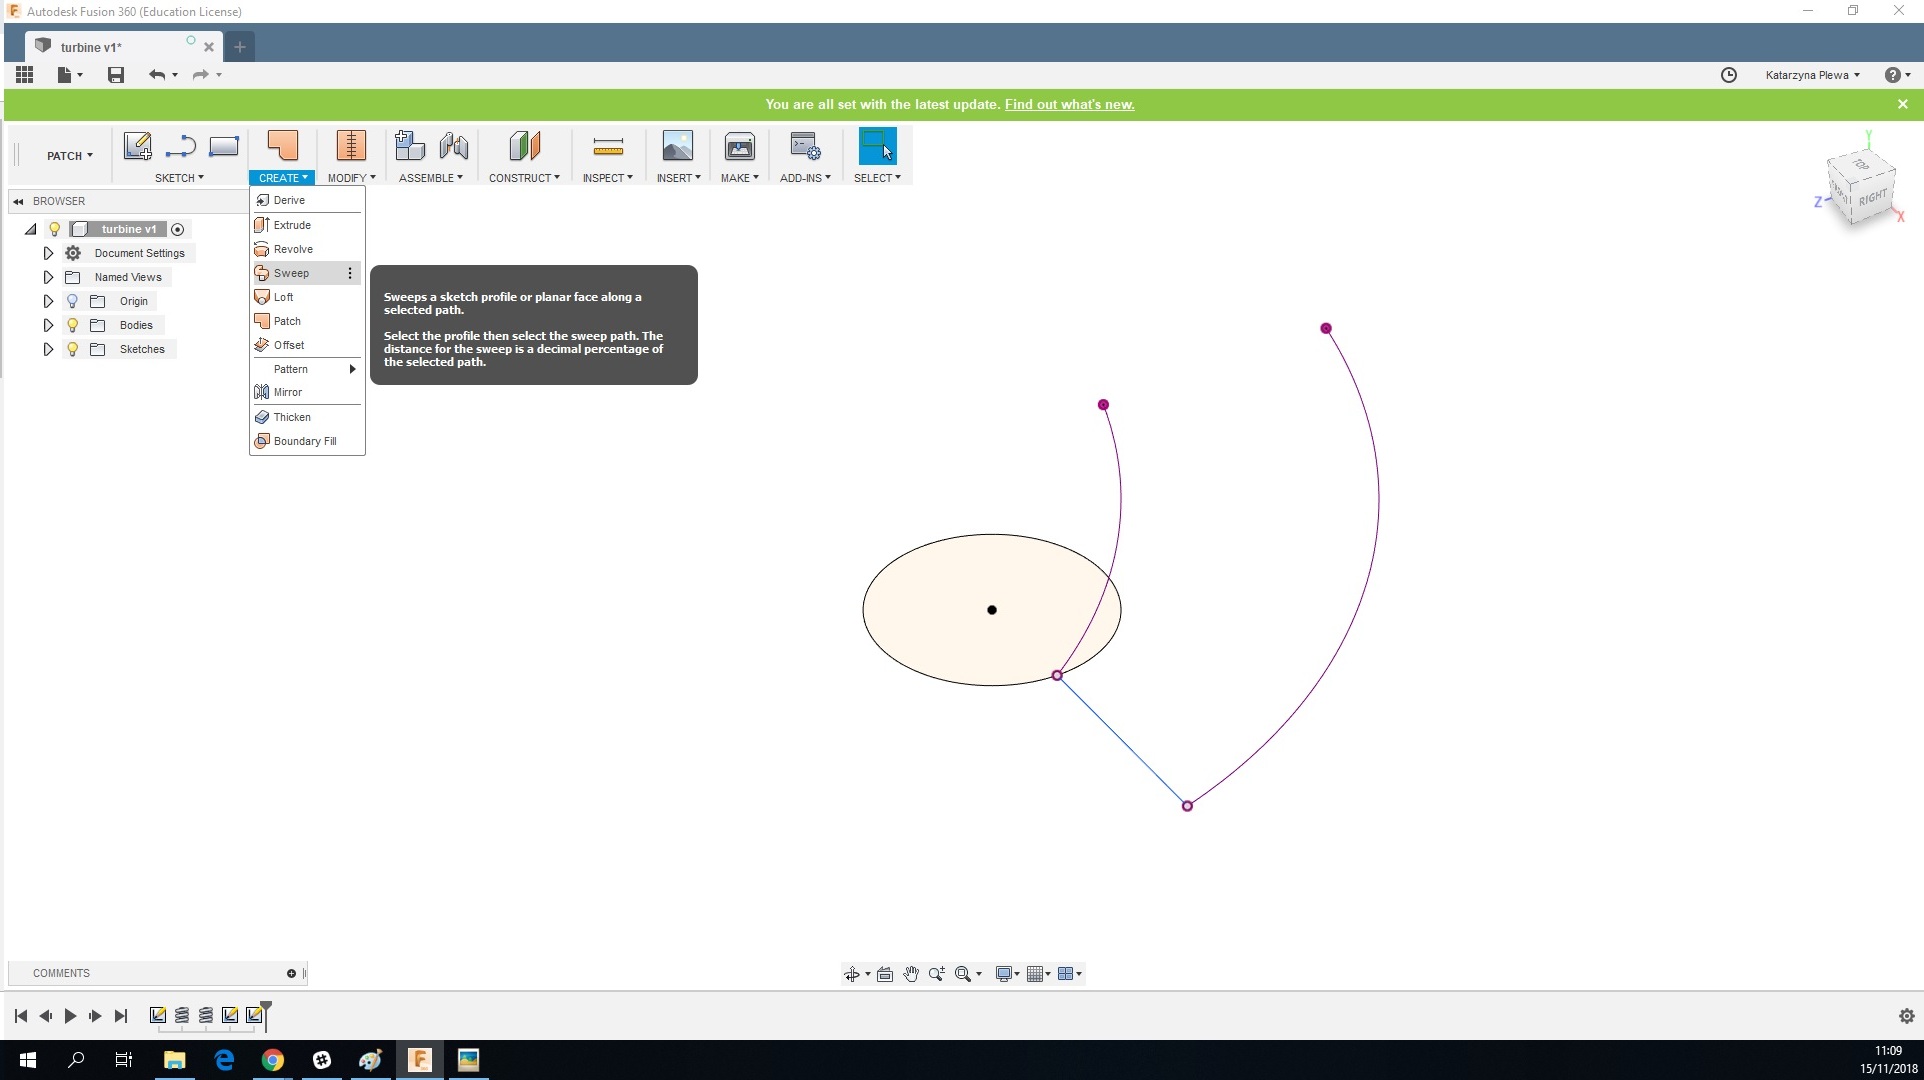
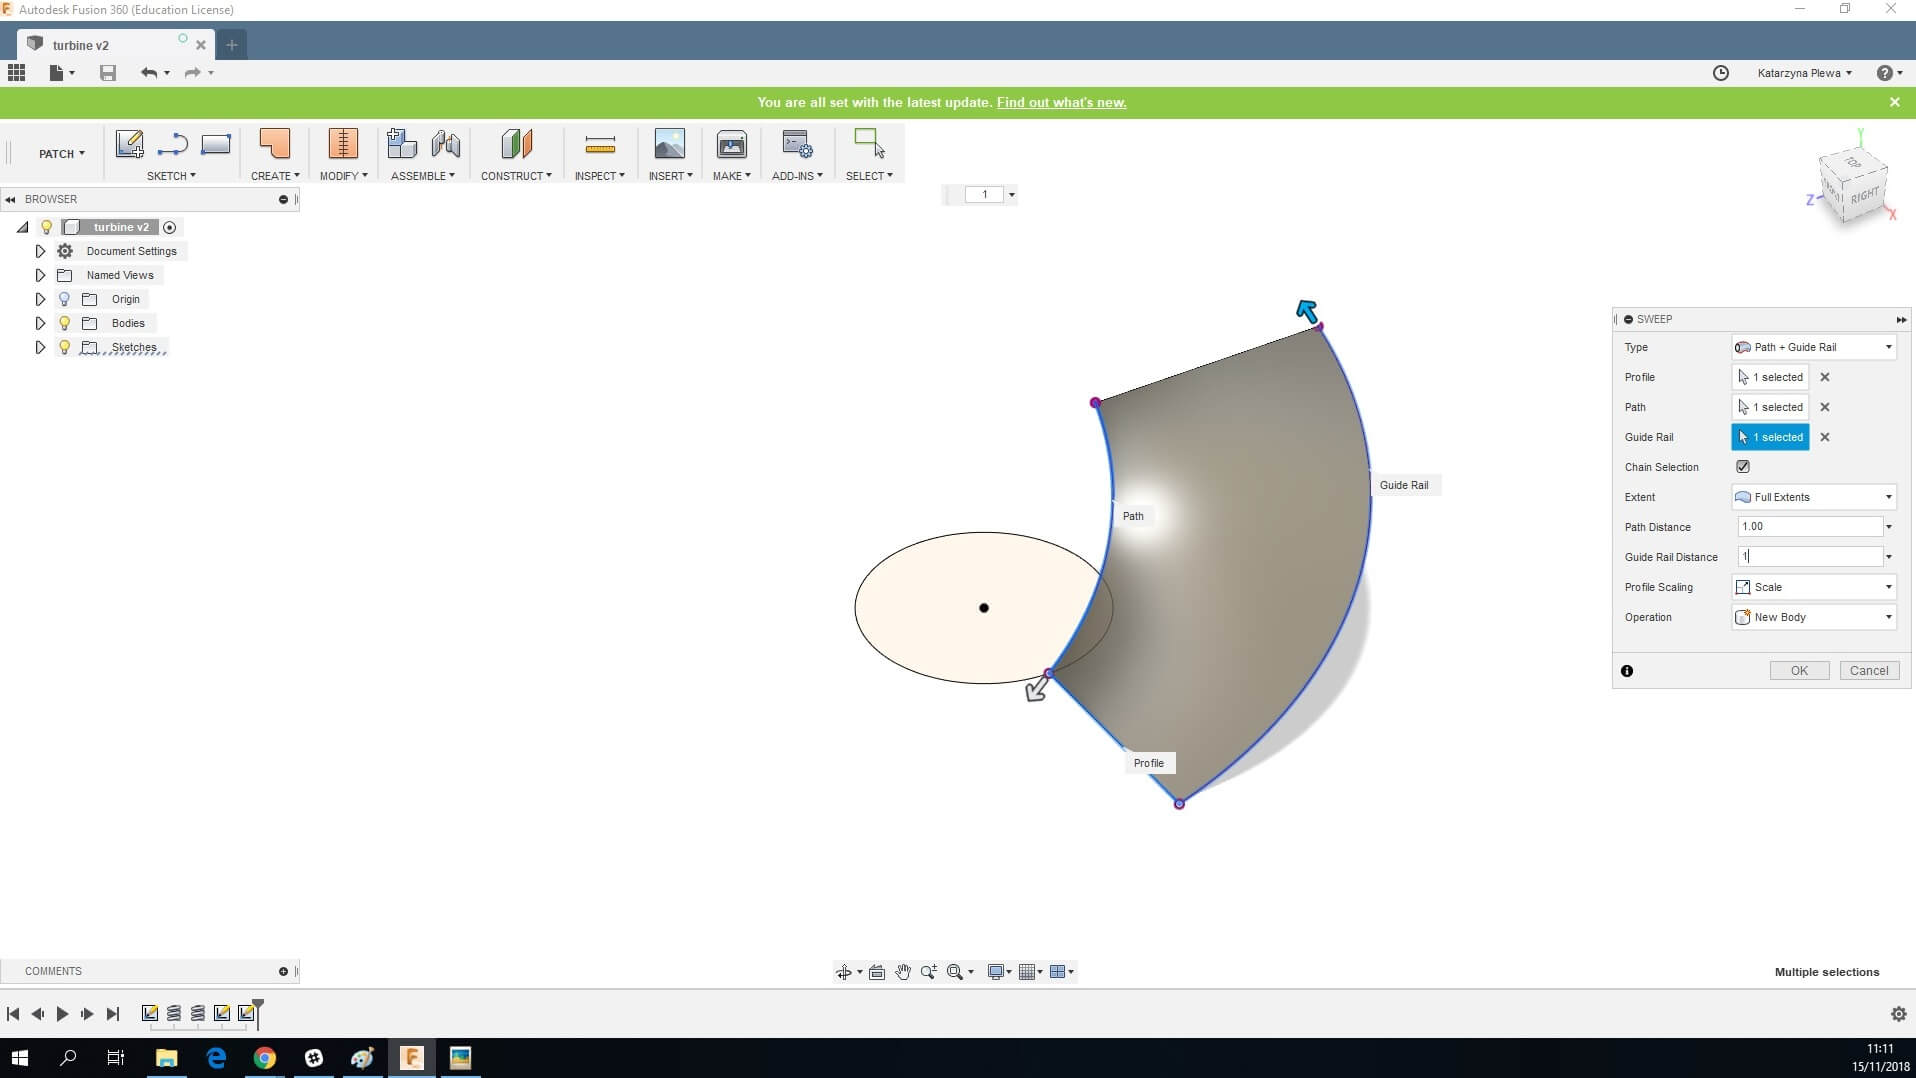
Set all the parameters to:
Type: Path + Guide Rail
Profile: Select the horizontal line
Path: Select the 50 mm Coil
Guide Rail: Select the 150 mm Coil
Chain Selection: checked
Extent: Full Extents
Path Distance: 1.0
Guide Rail Distance: 1
Profiles Scaling: Scale
Operation: New Body
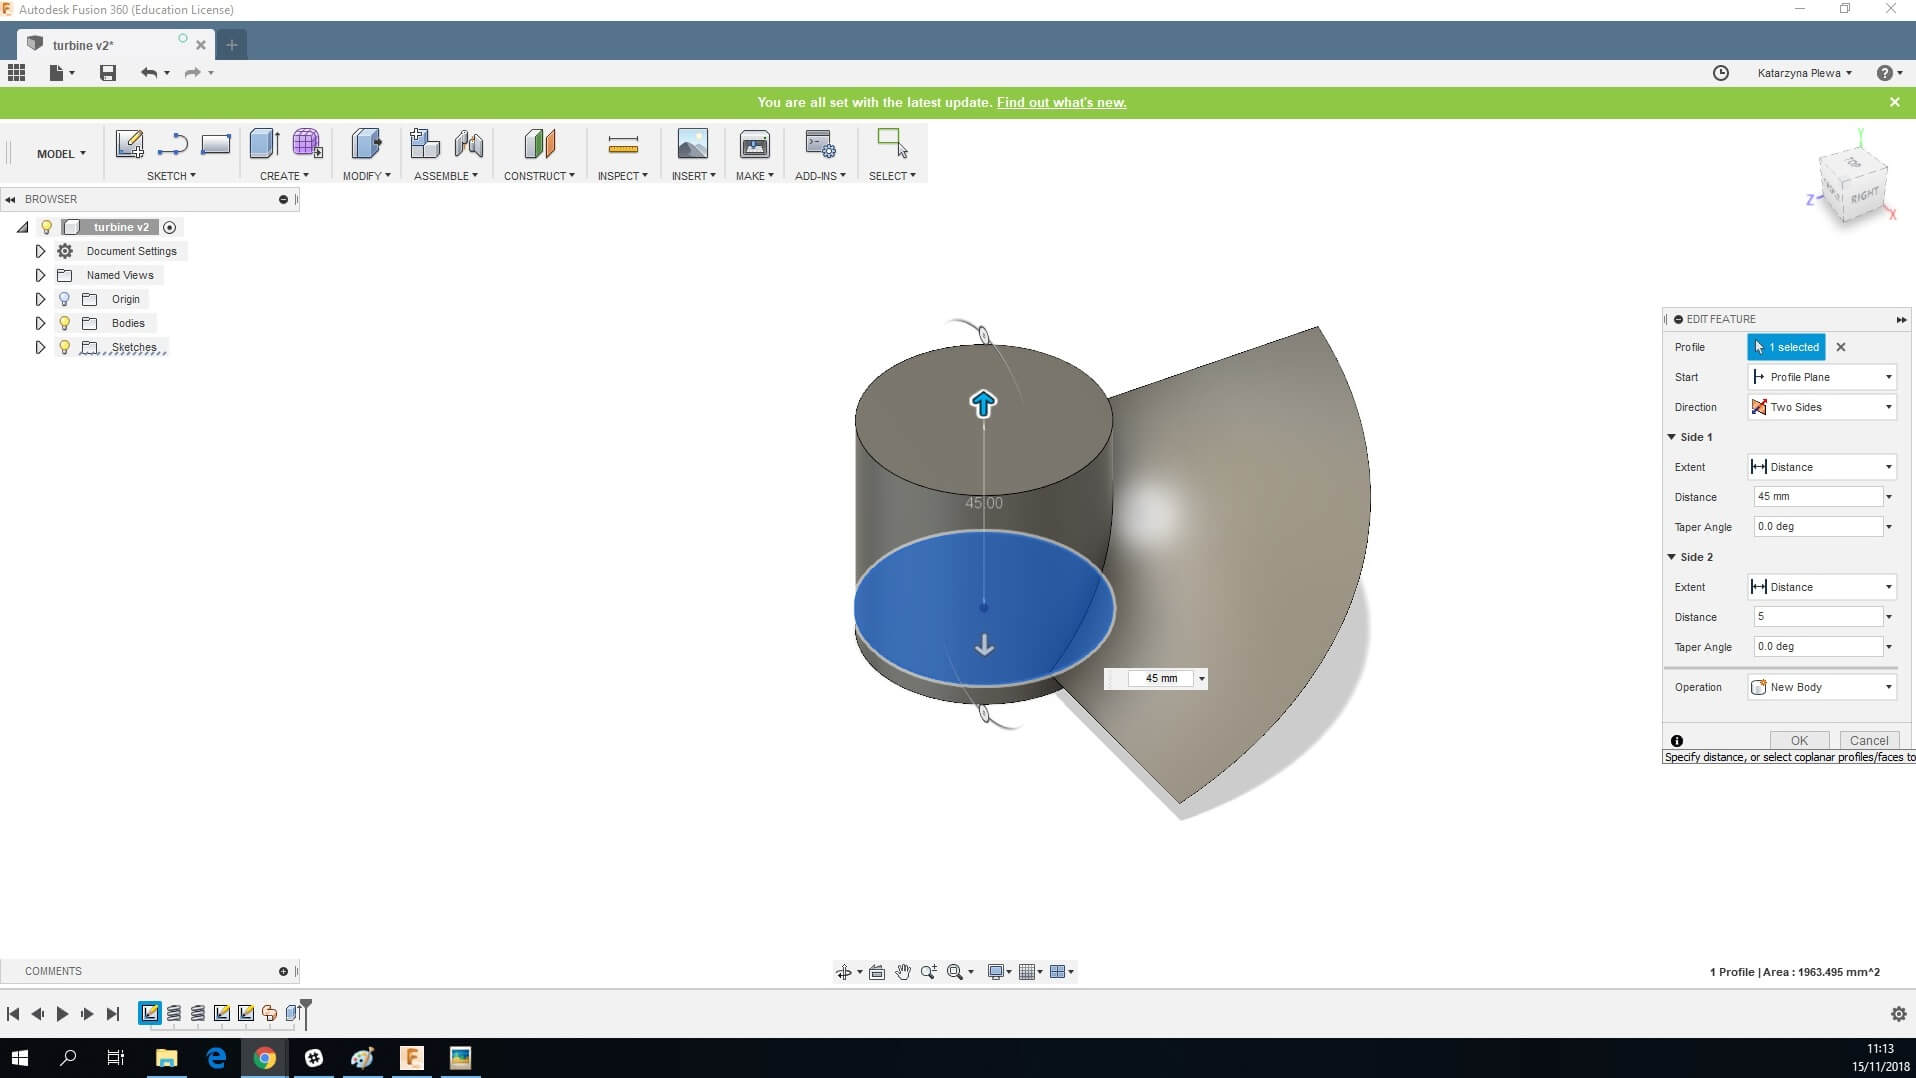
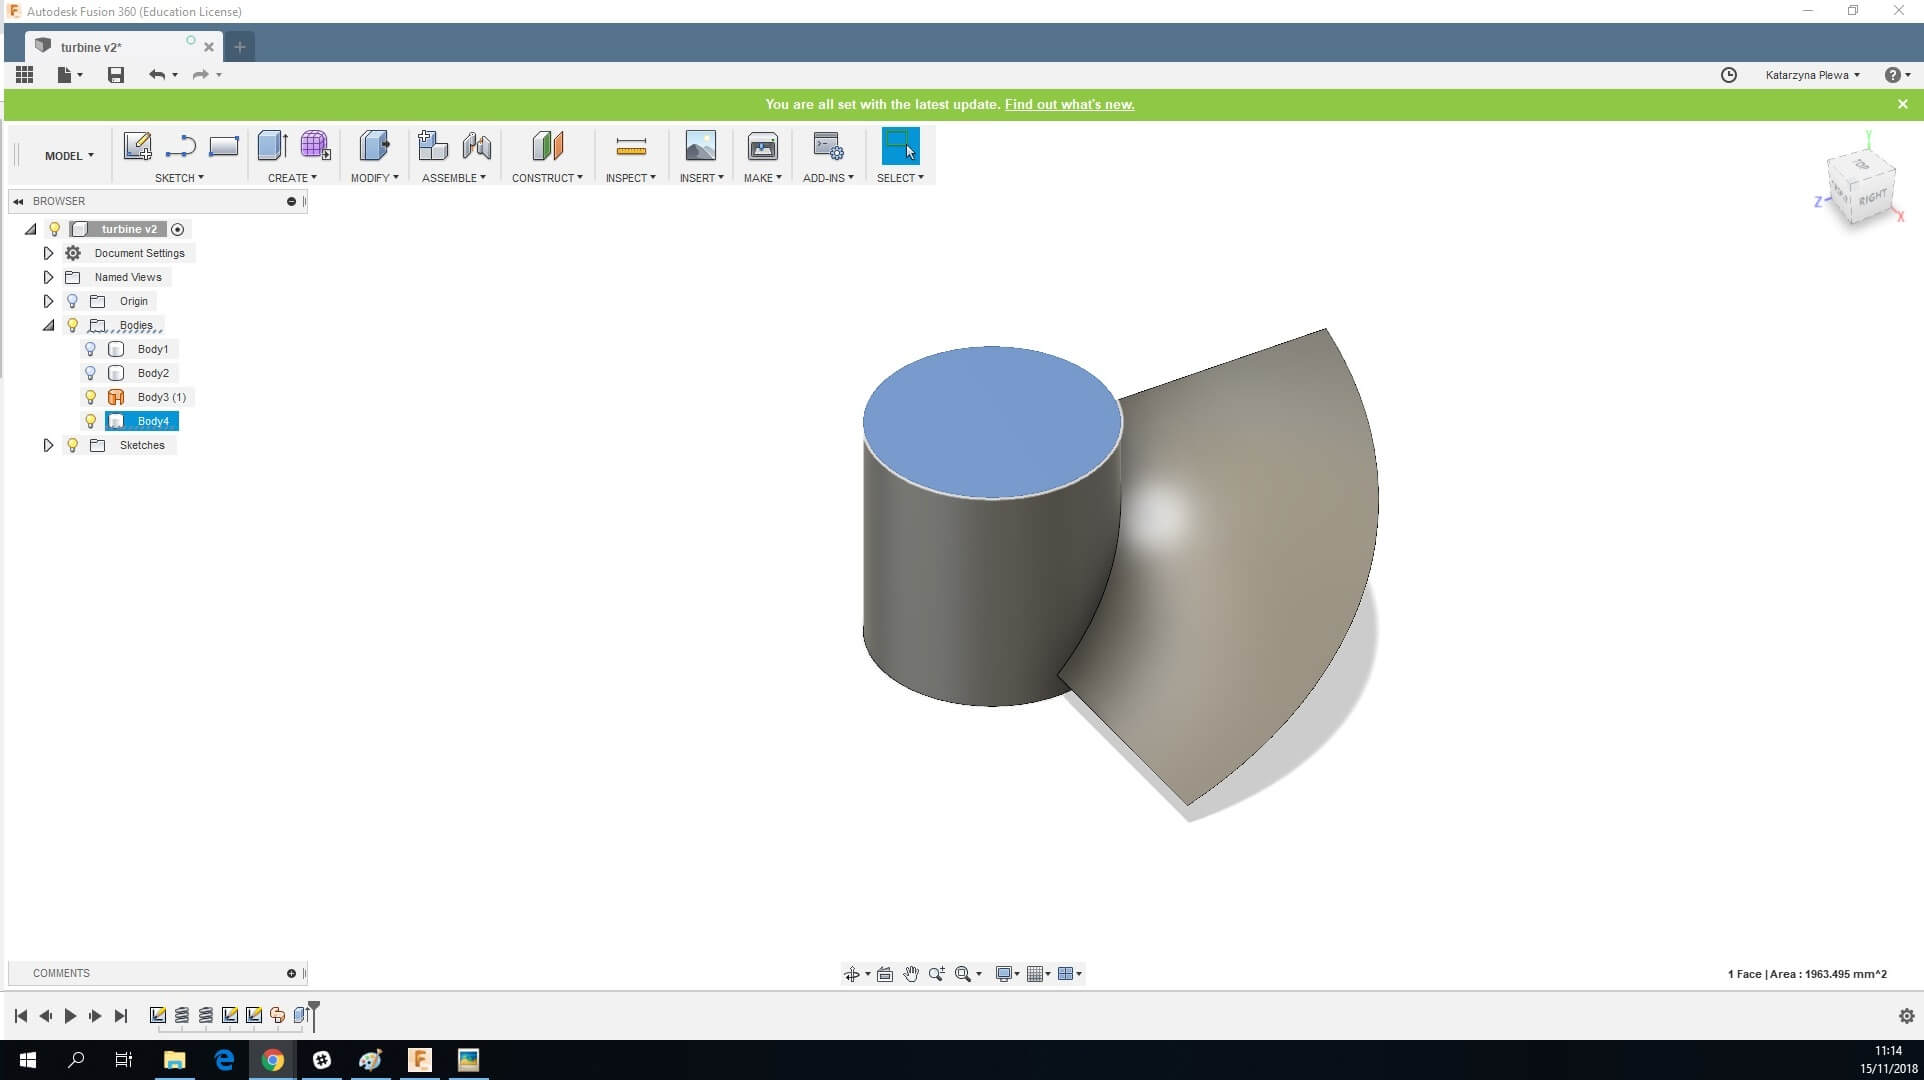
11. Now we will move on to creating the basic shape of the rotor. Go back to Model Mode. Select the circle, go to Create and Extend it in two directions. 45 mm up and 5 mm down.
12. In the next few steps, we will focus on giving the blade the right shape. Select the top on the cylinder and start a new sketch.
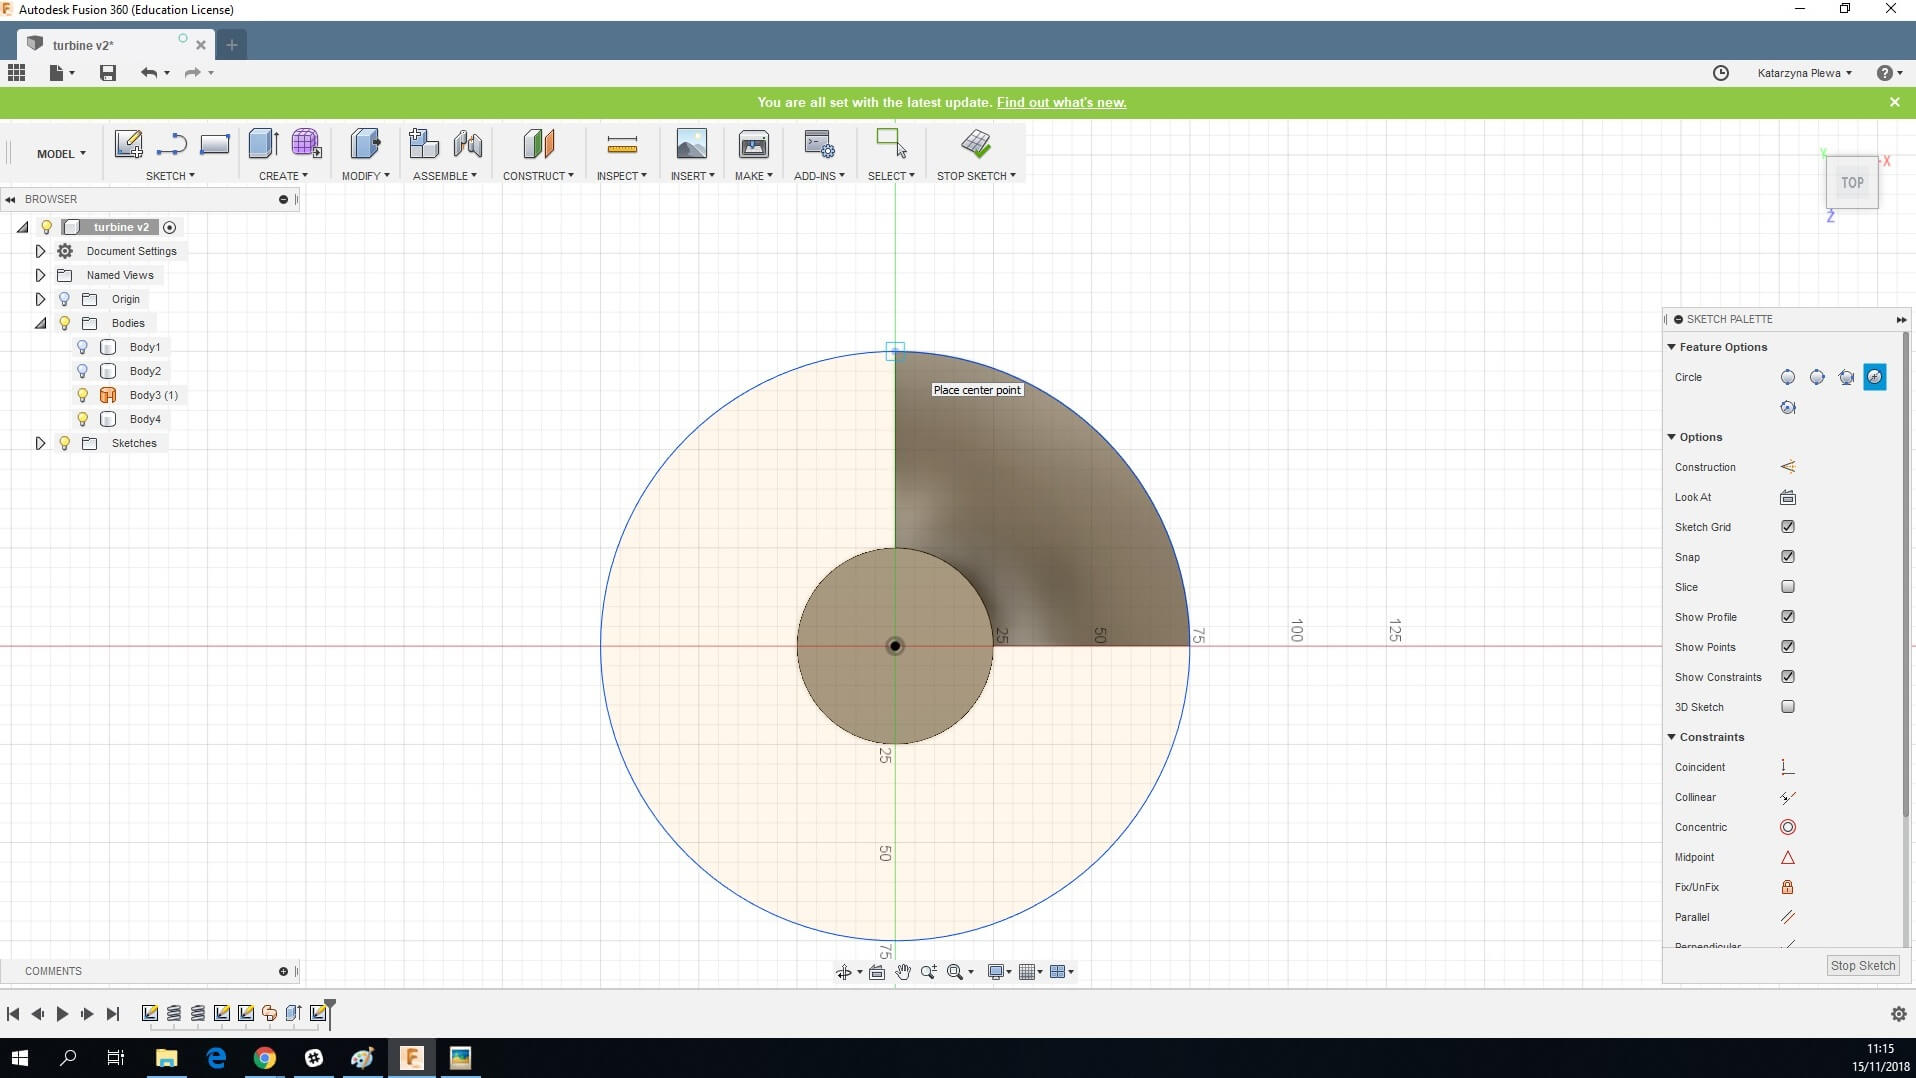
13. Create a 150 mm in diameter circle.
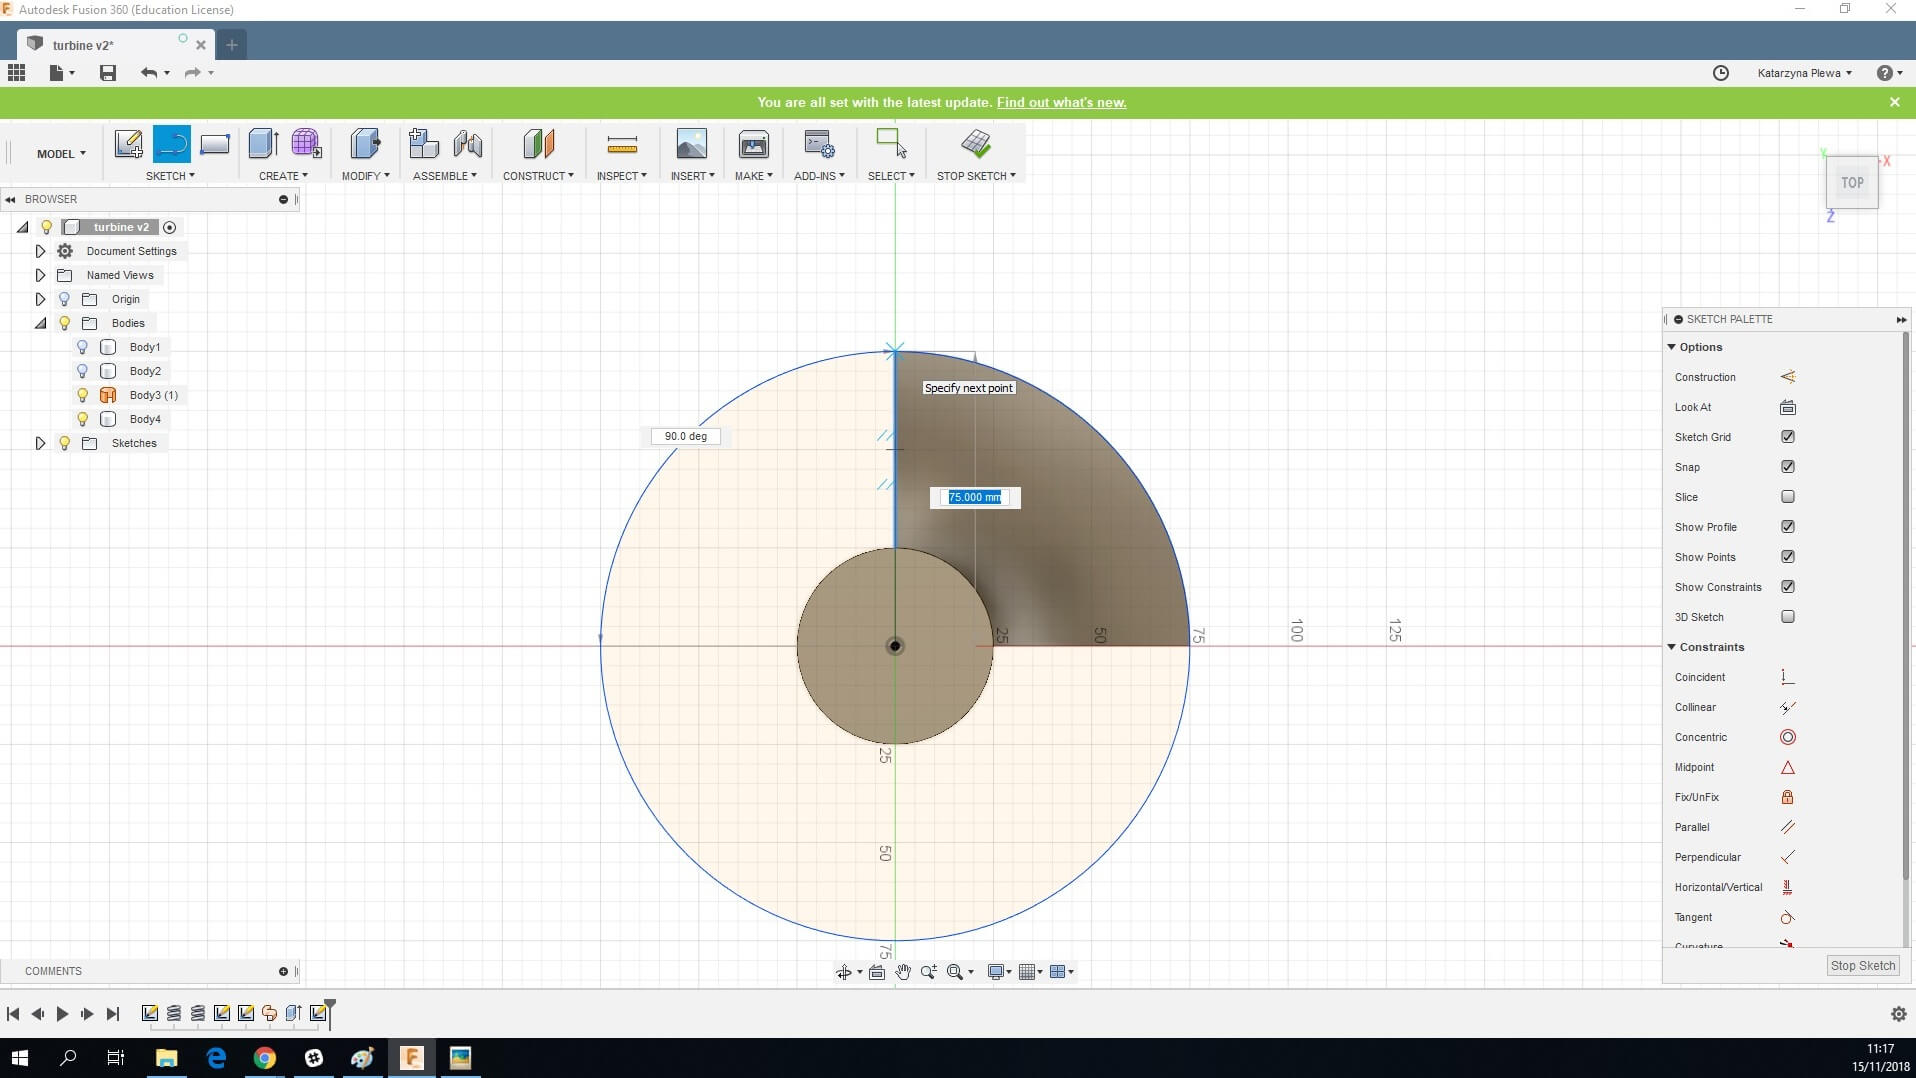
14. Create two lines from the middle of the rotor to the big circle. Make sure they are aligned with the edges of the blade and create a 90-degree angle.
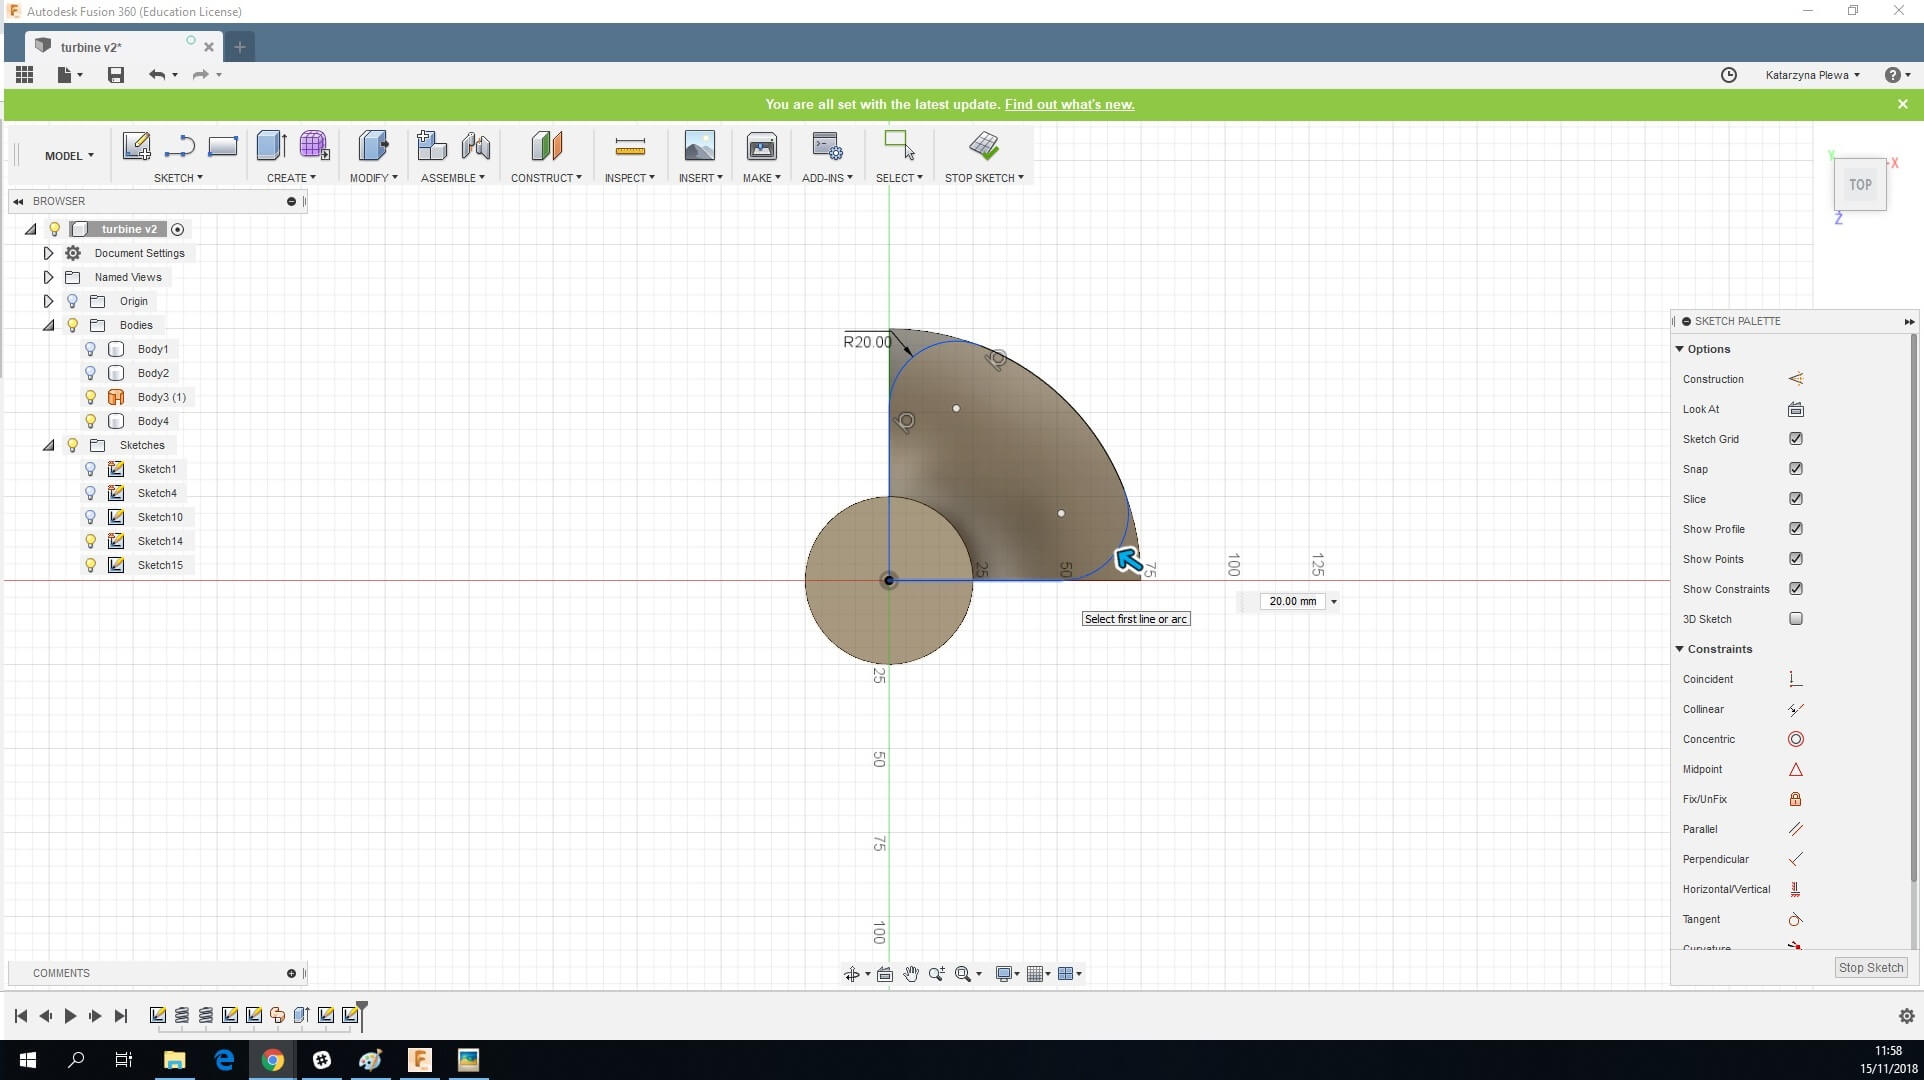
15. Now we will trim the circle. Go to Create, Trim and select the 270-degree circle.
16. Fillet the edges of the 90-degree newly created shape, our radius is 20 mm
17. Create a shape with the line tool, starting and ending from the middle point and going around the turbine. Turn the rotor body’s visibility off and stop the sketch.
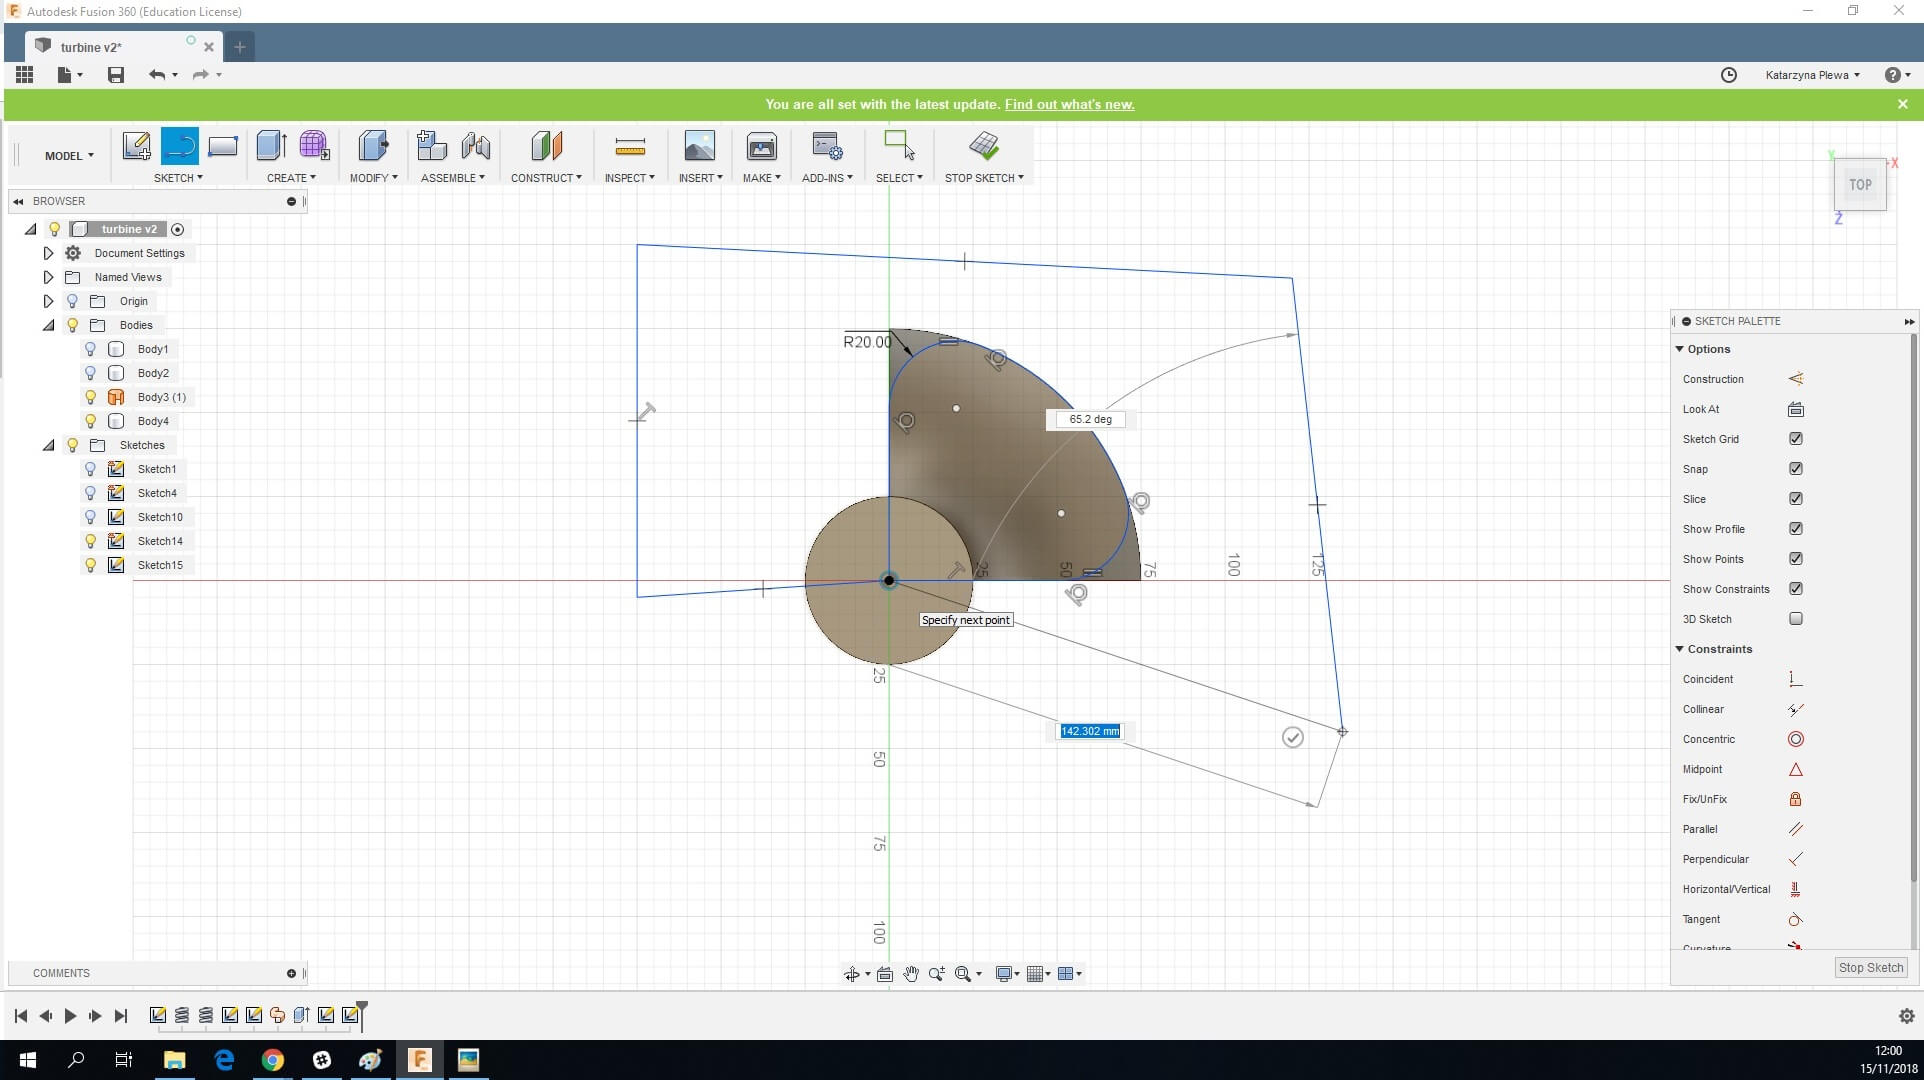
18. Select the shape inside the lines and two parts of the circle within them.
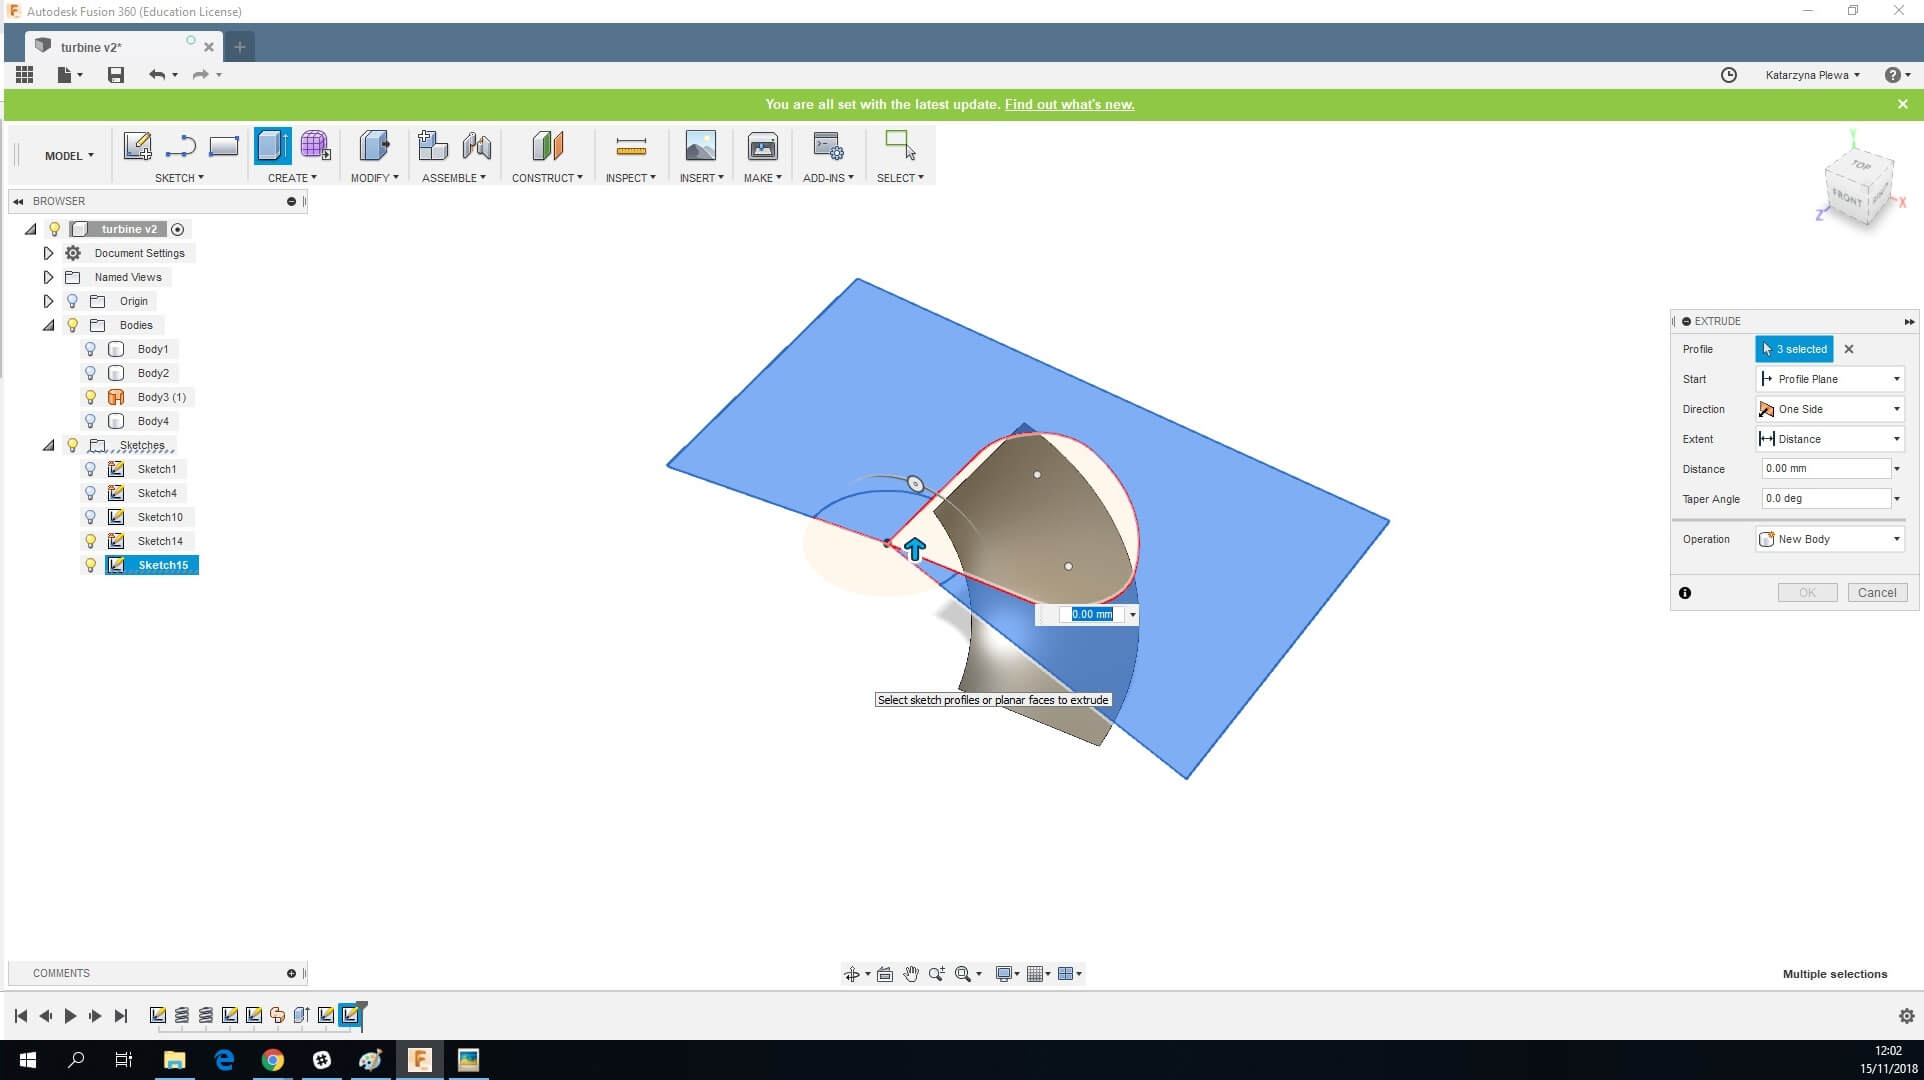
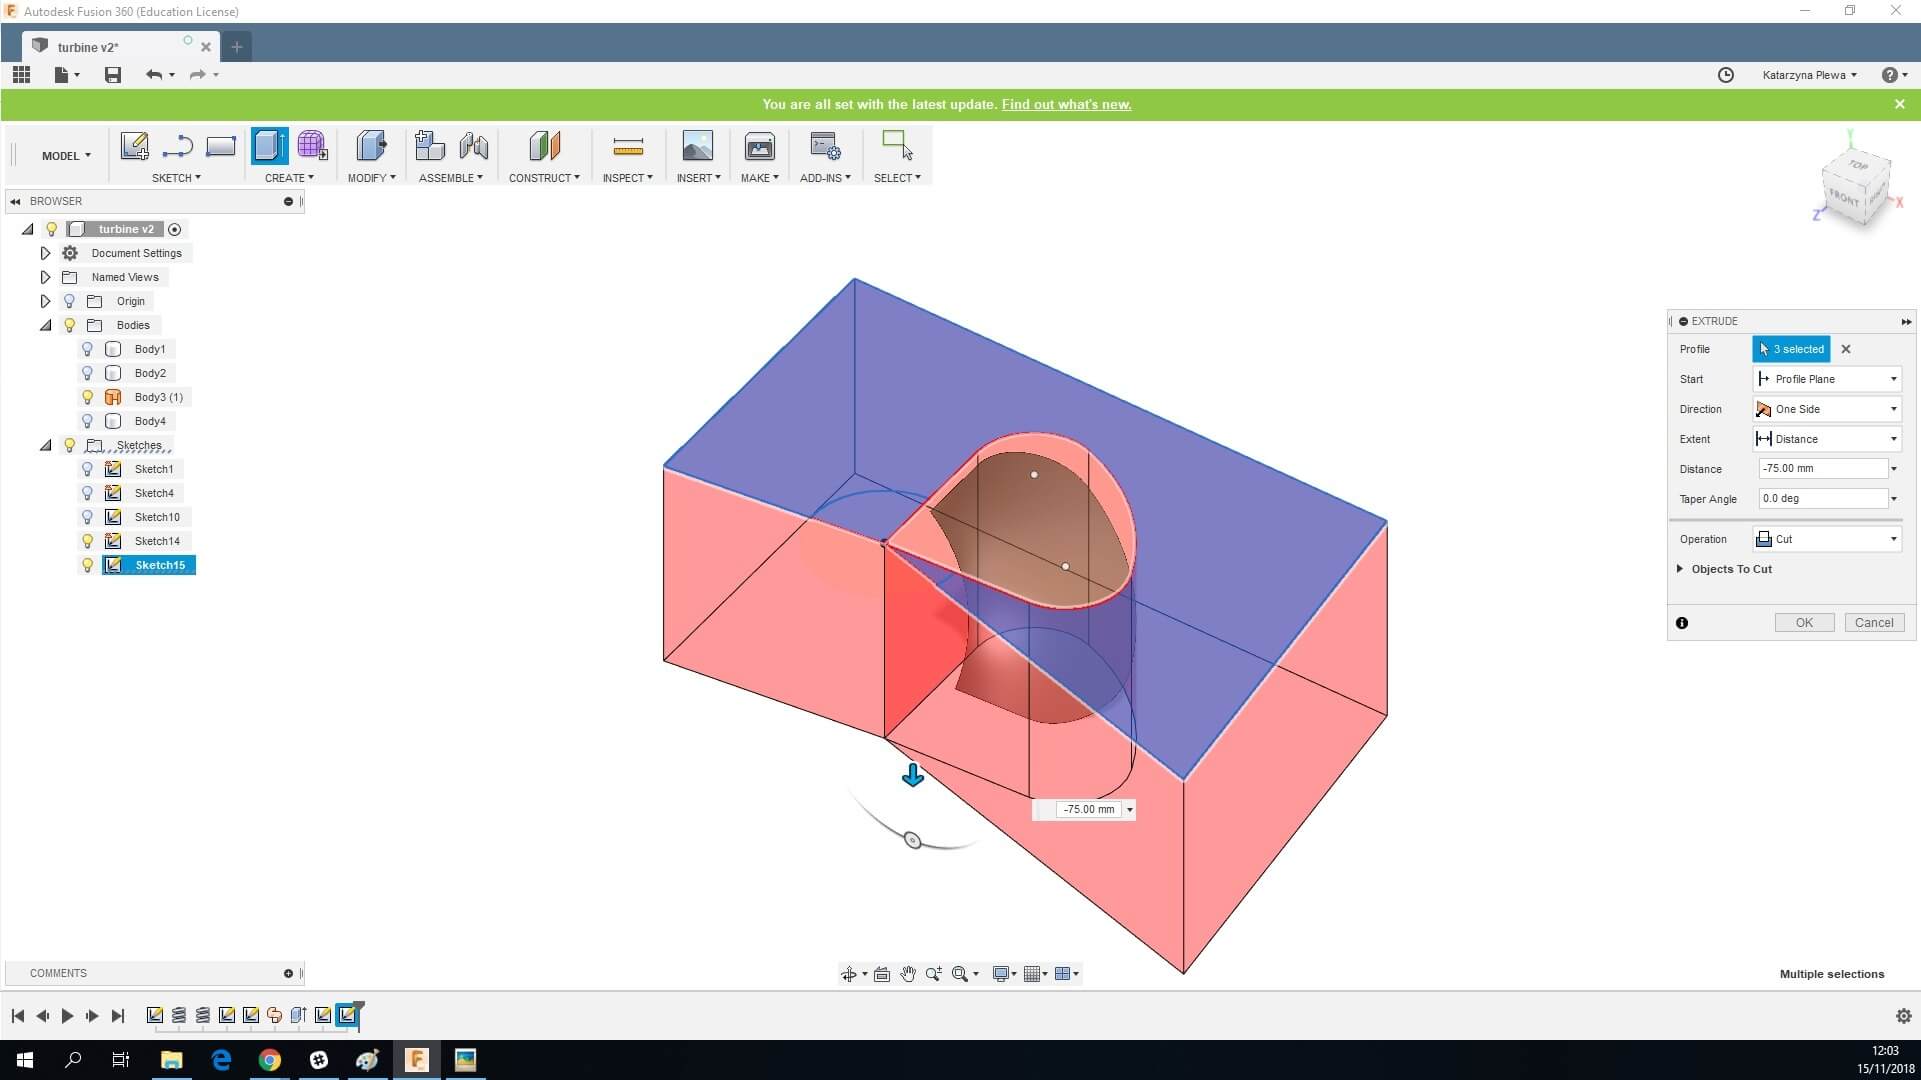
19. Extrude it and change the operation to cut. Make sure the shape goes below the turbine.
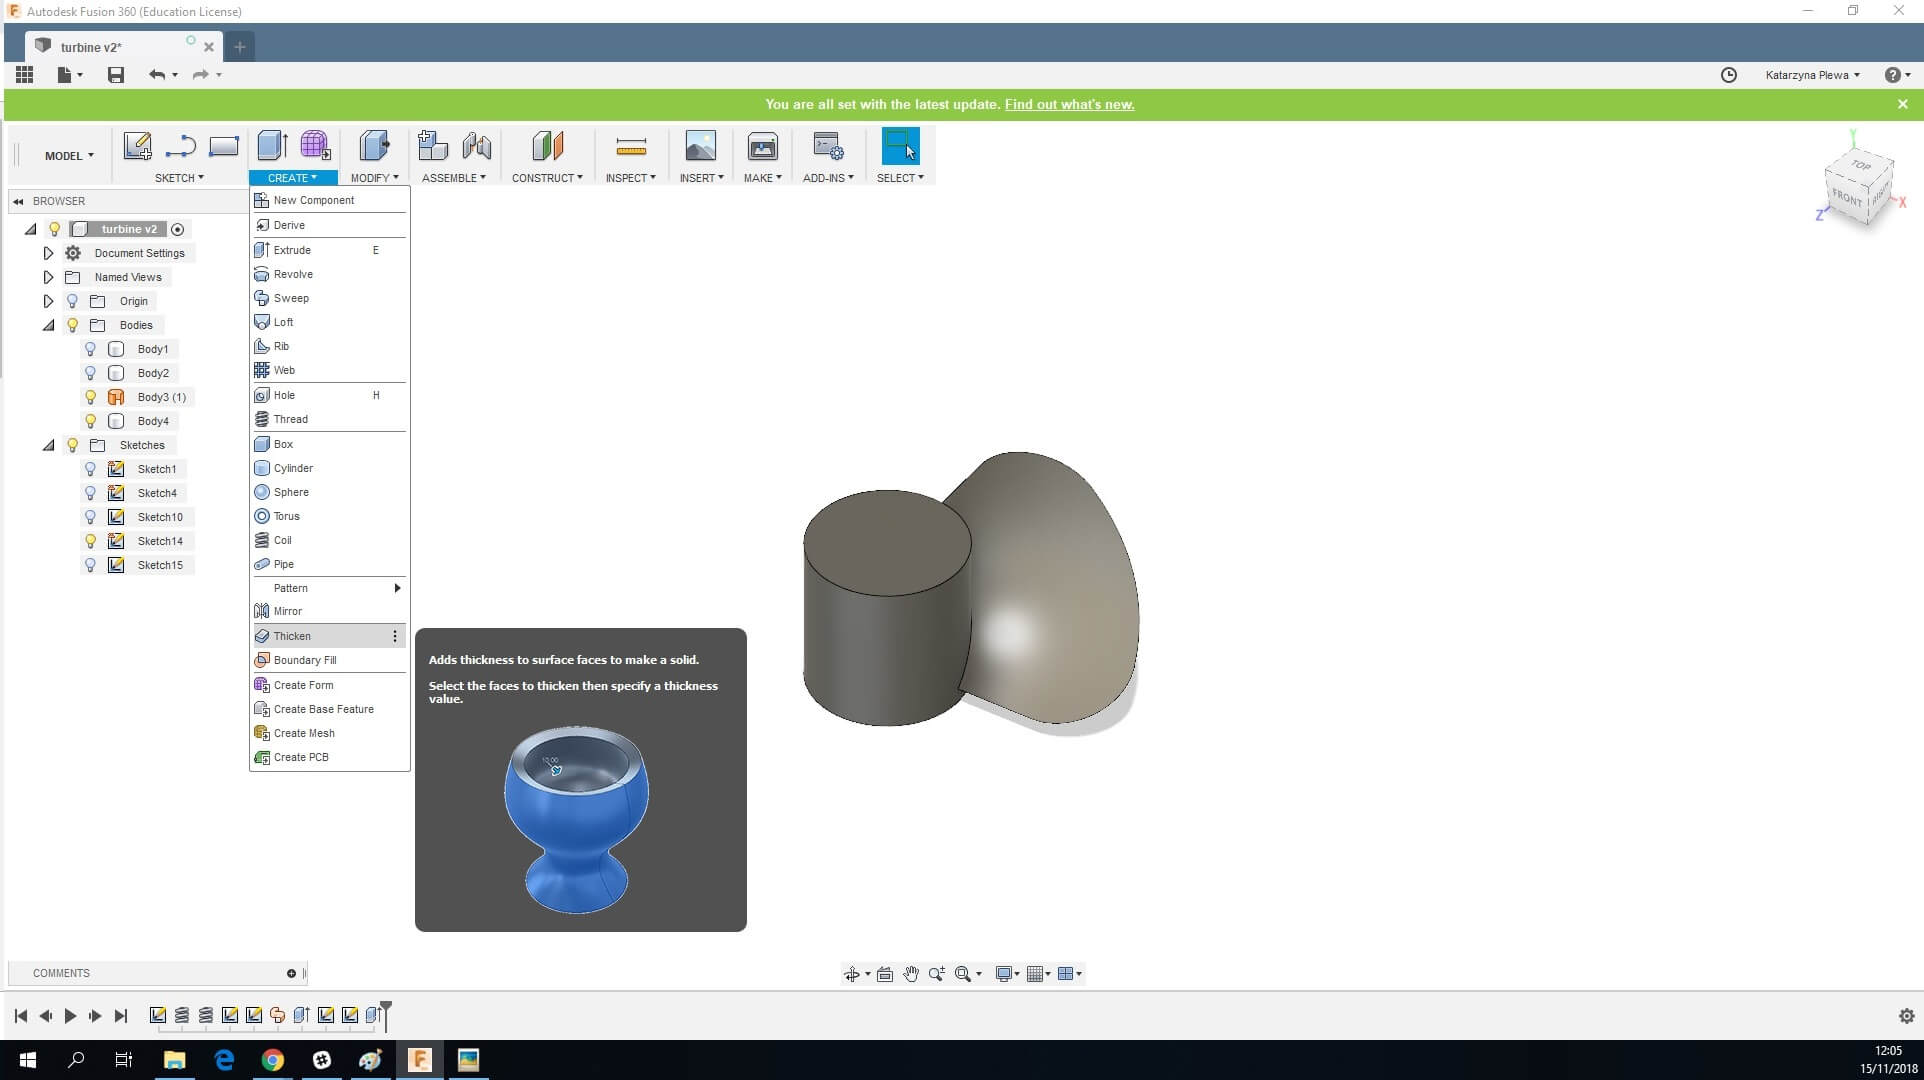
20. Go to Create and choose Thicken option. We went for 4 mm.
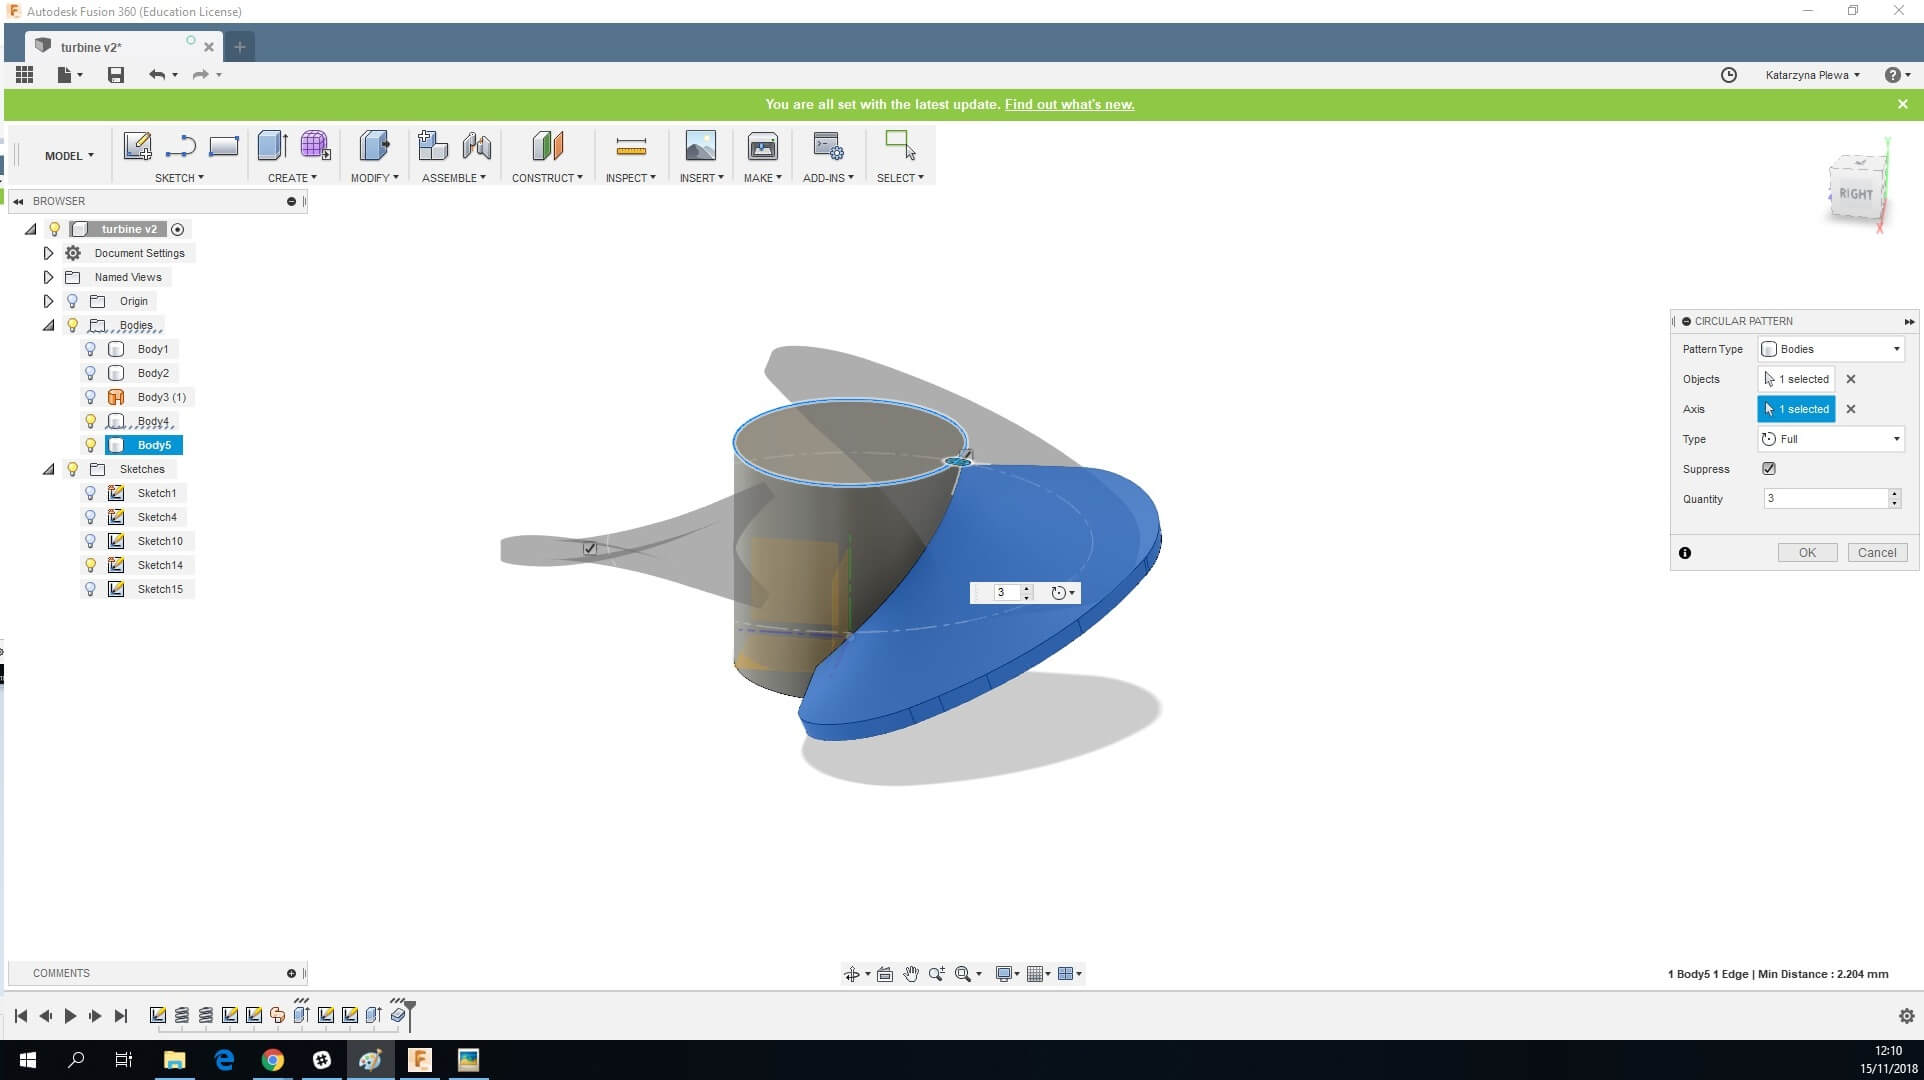
21. We will now move onto replicating the blade. Under the Create tool, find Pattern.
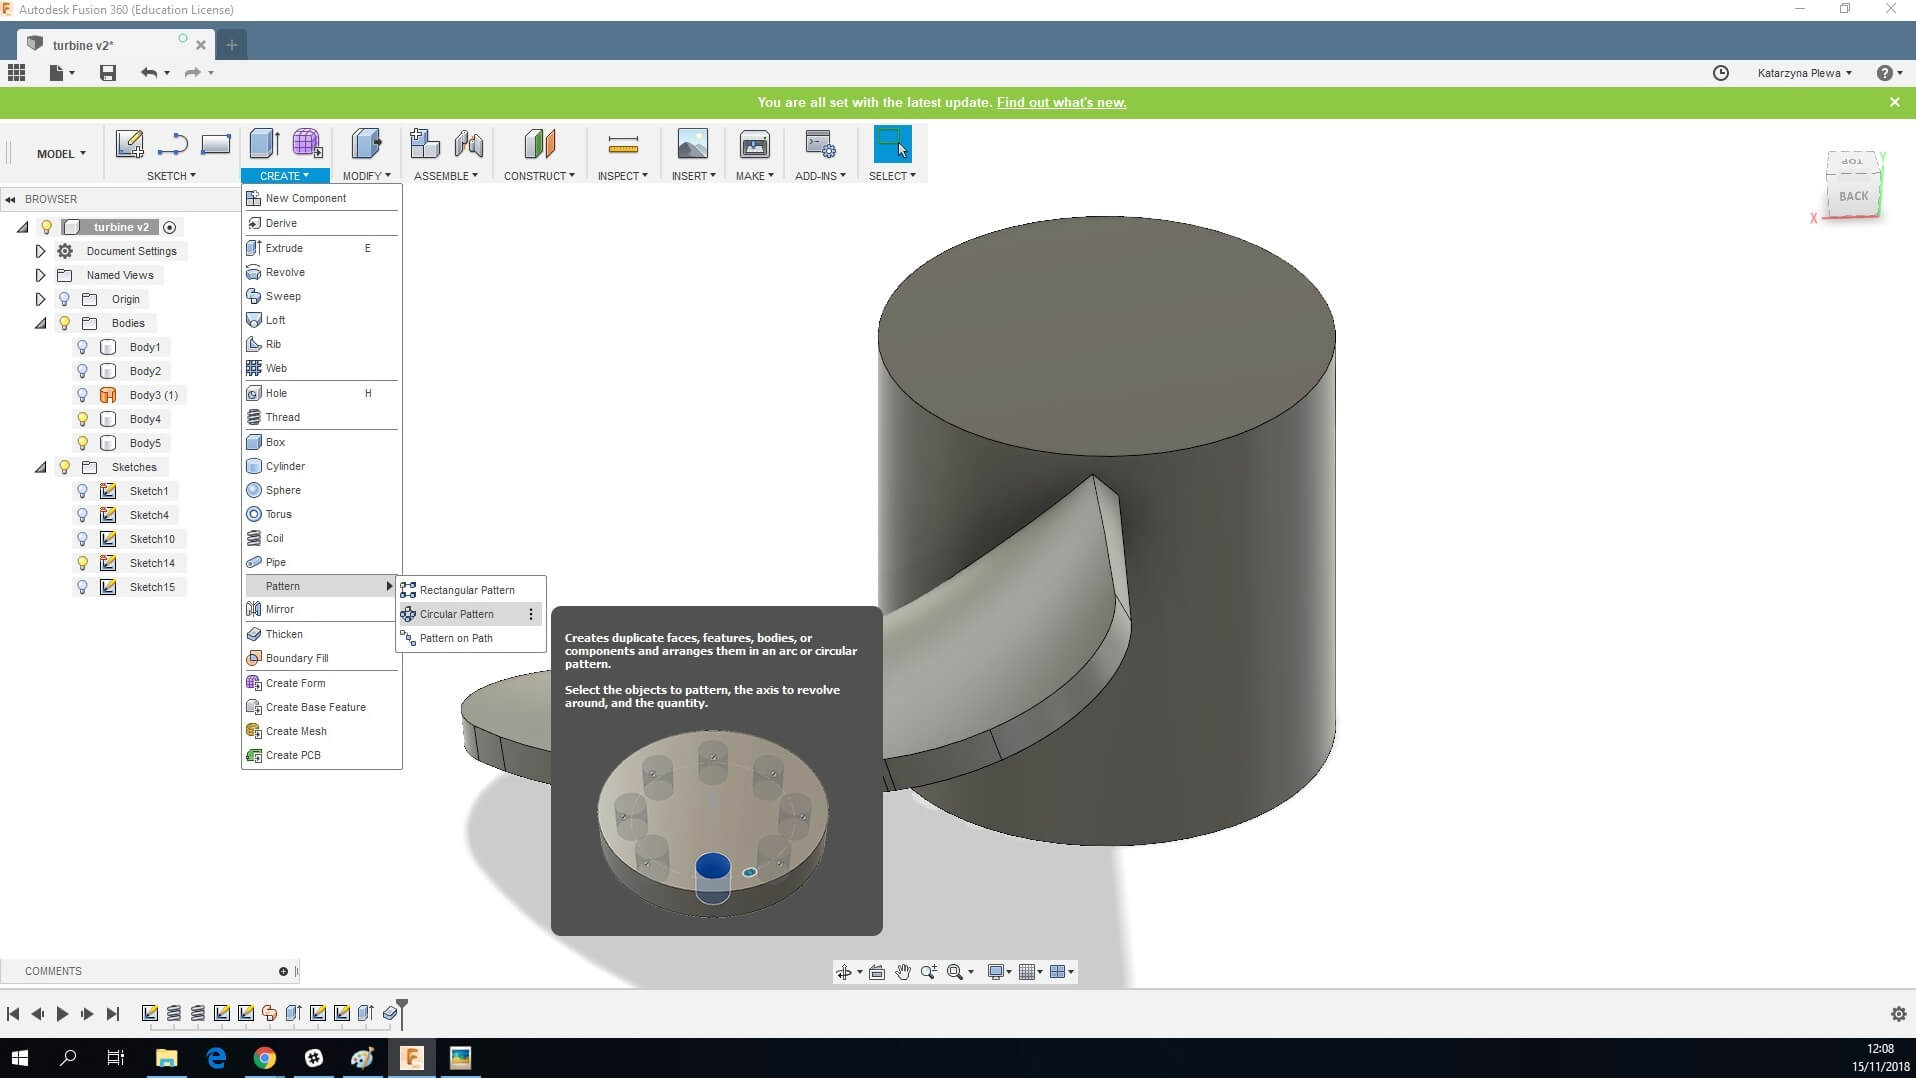
Pattern type: Bodies
Object: Blade
Axis: top circle of the cylinder
Type: Full
Suppress: checked
Quantity: 3
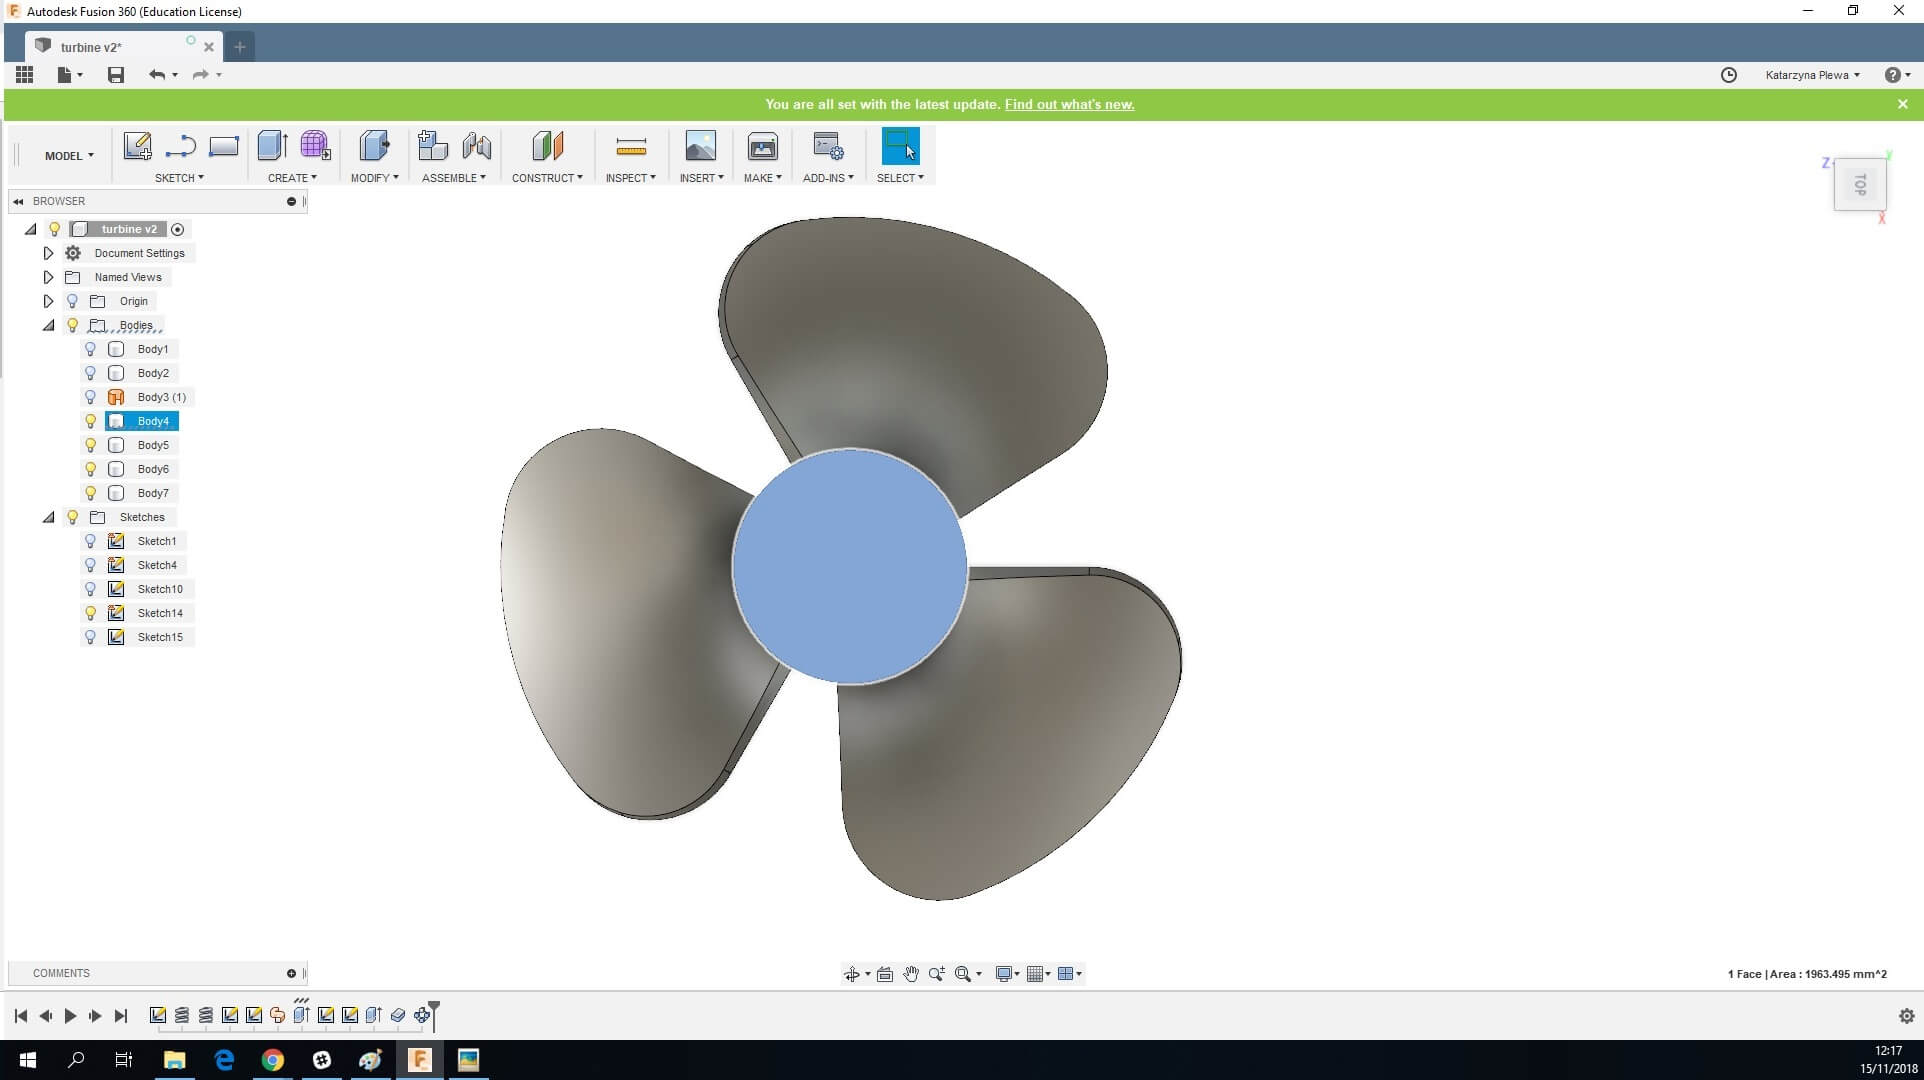
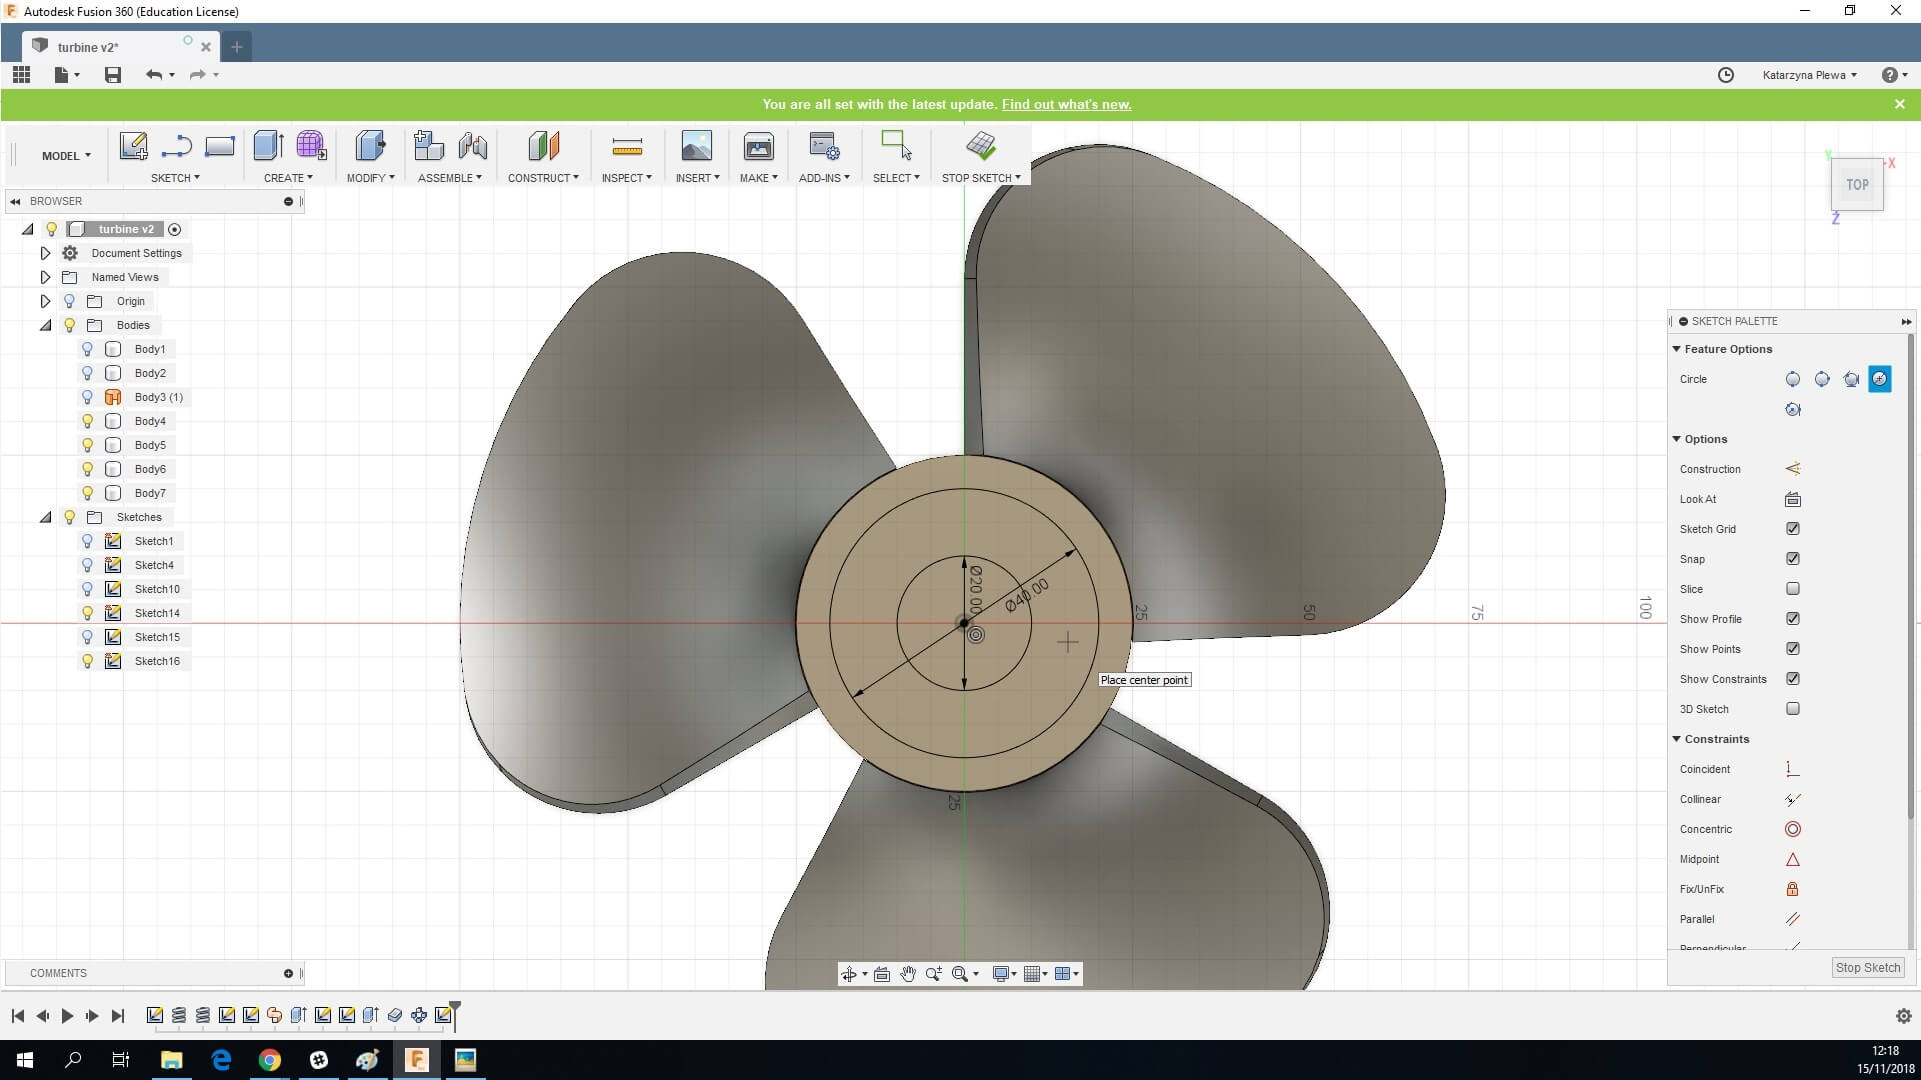
22. We have finished 3D modeling our turbine blades. In the next few steps, we will focus on other turbine components. Select the top of the cylinder and start a sketch.
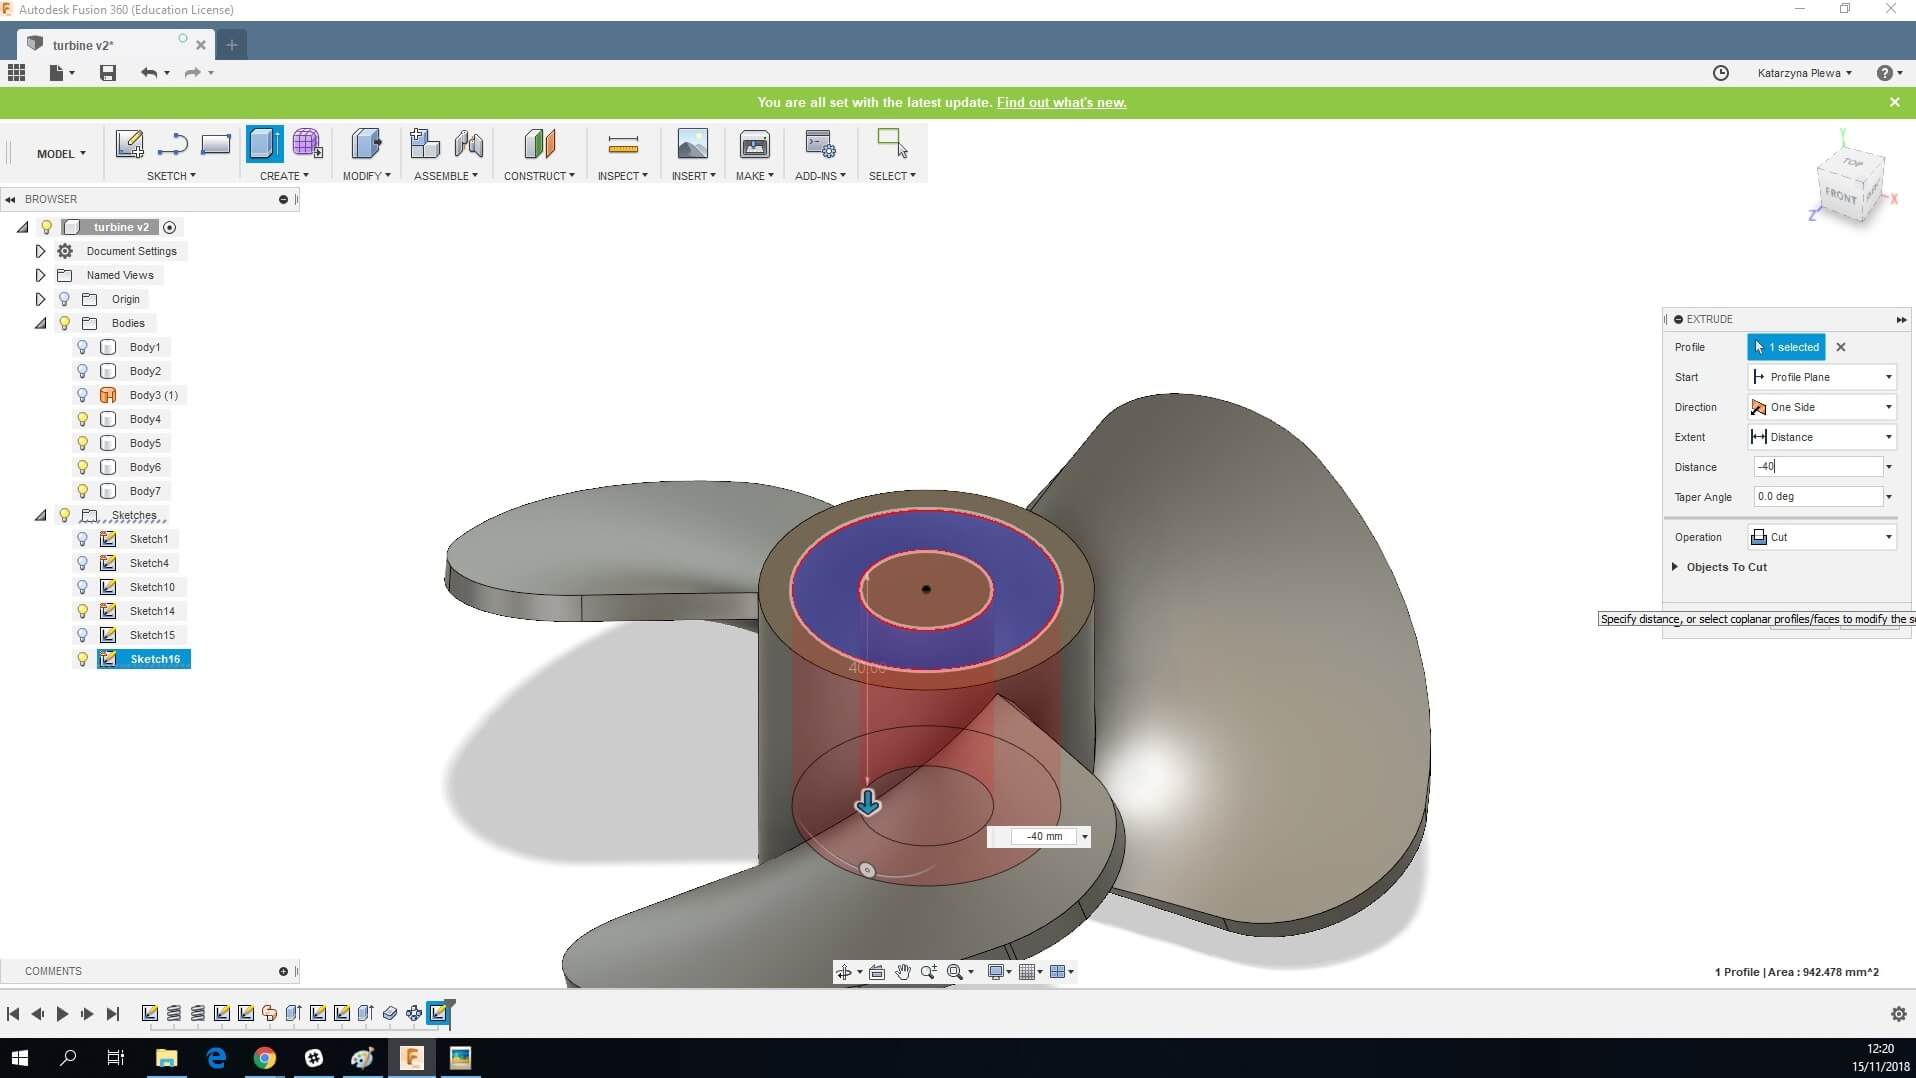
Create two circles: 20 mm in diameter and 40 mm.
23. Bring the middle ring down by -40 mm with the Extrude tool.
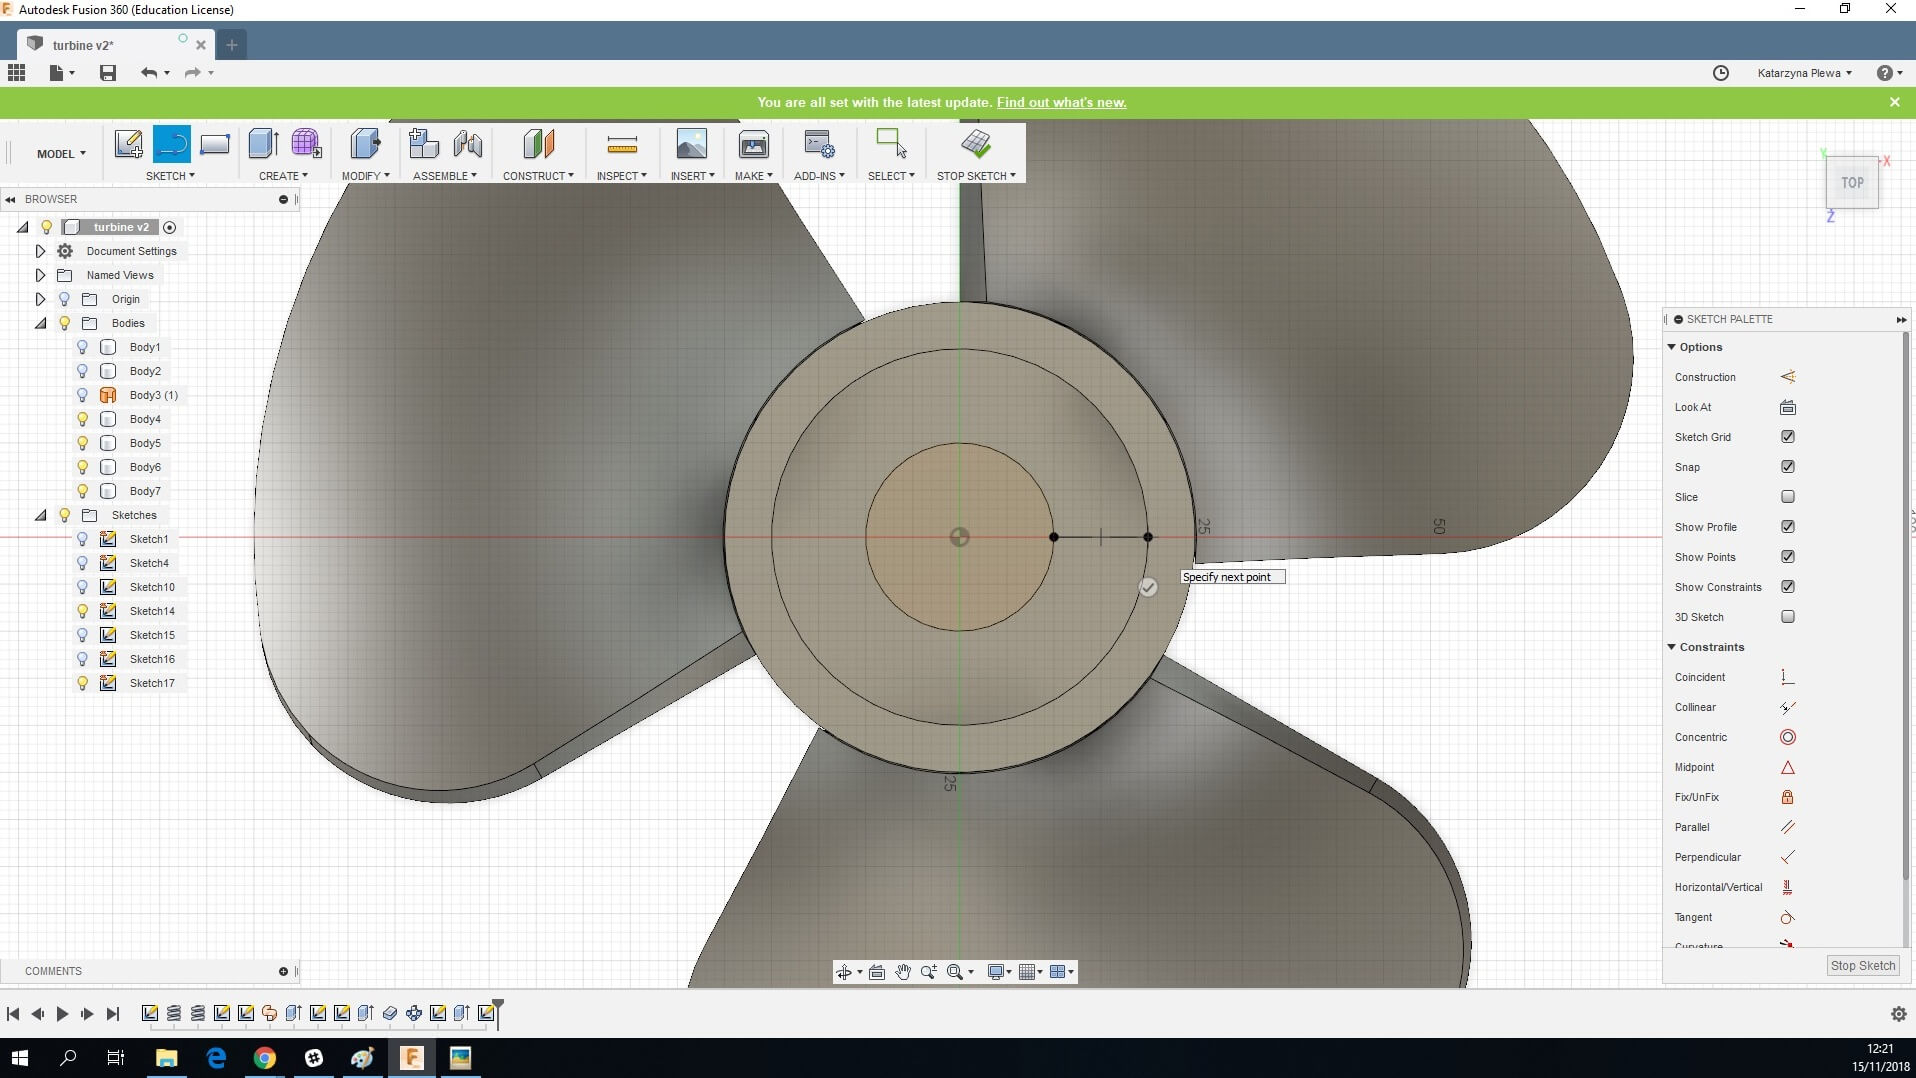
24. Select the top of the rotor and start a sketch.

Draw a line between the two circles.
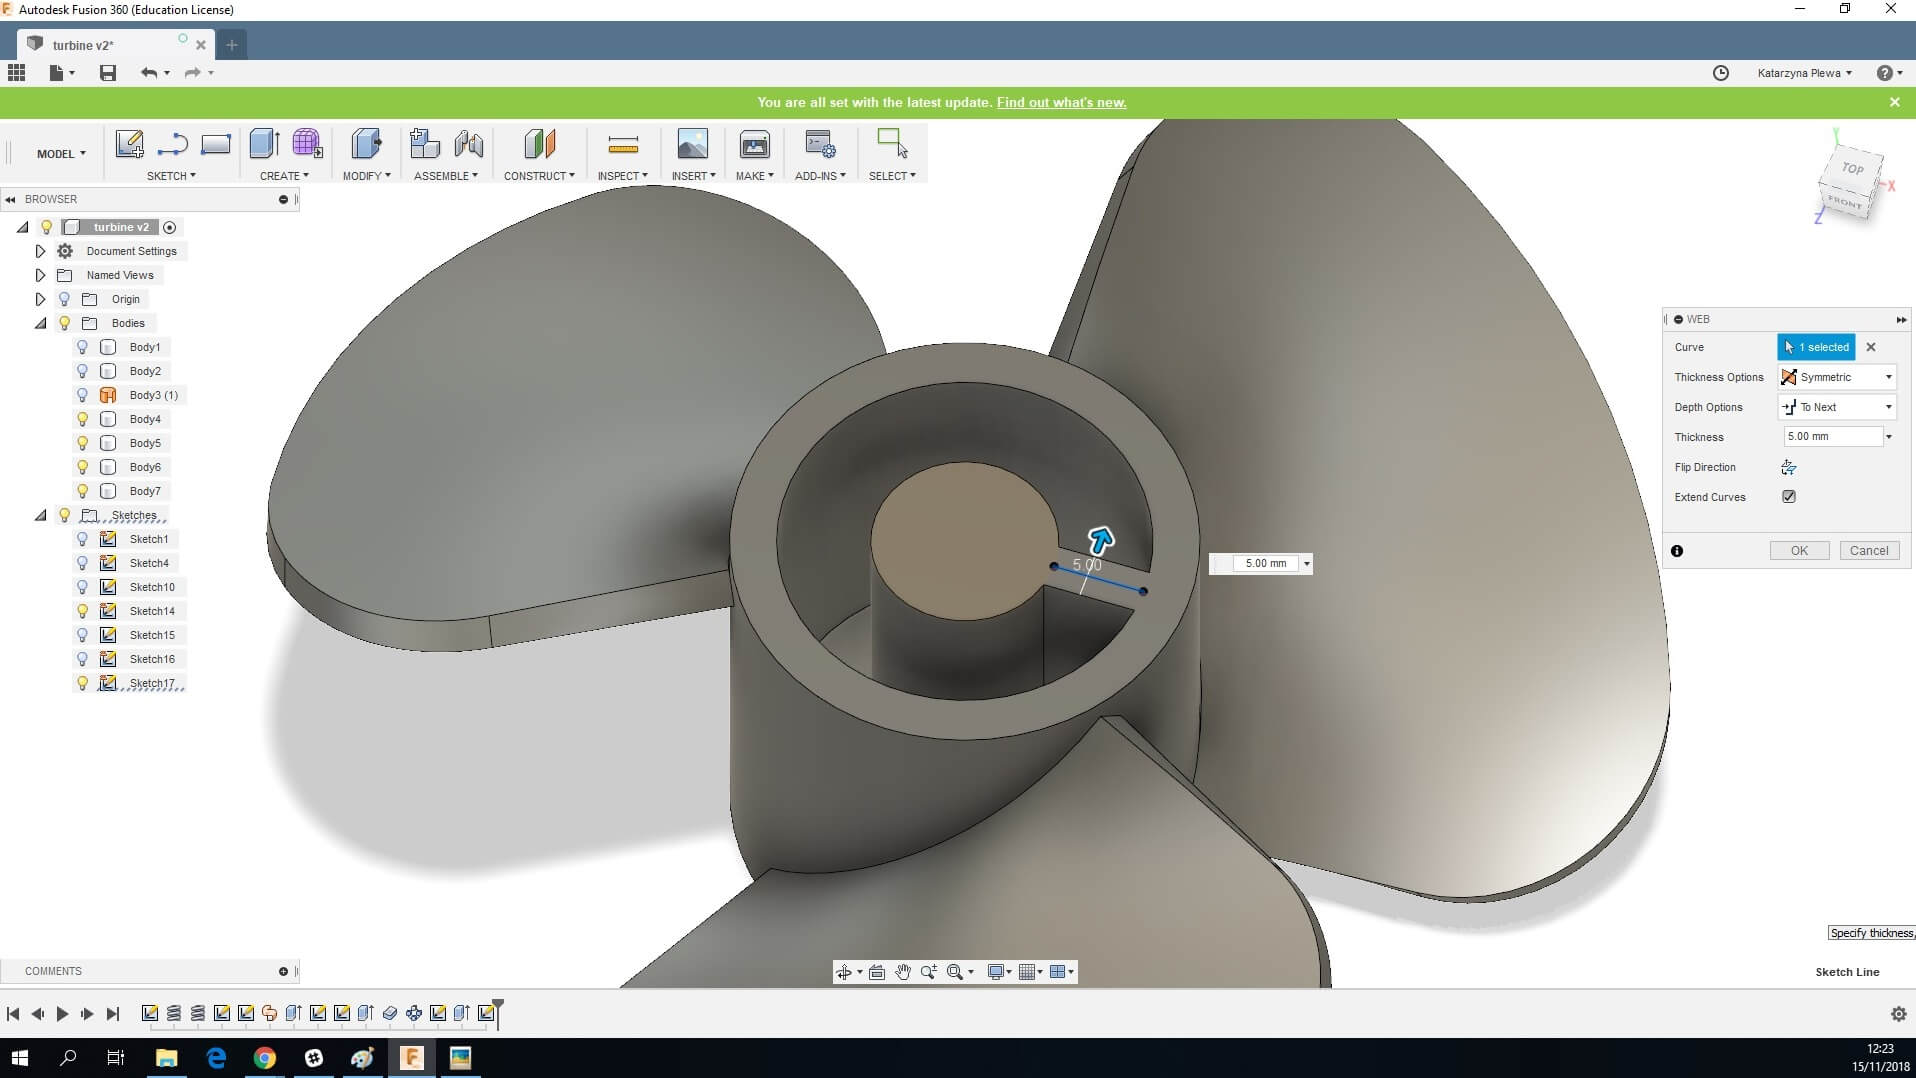
25. Go to Create and pick option Web.
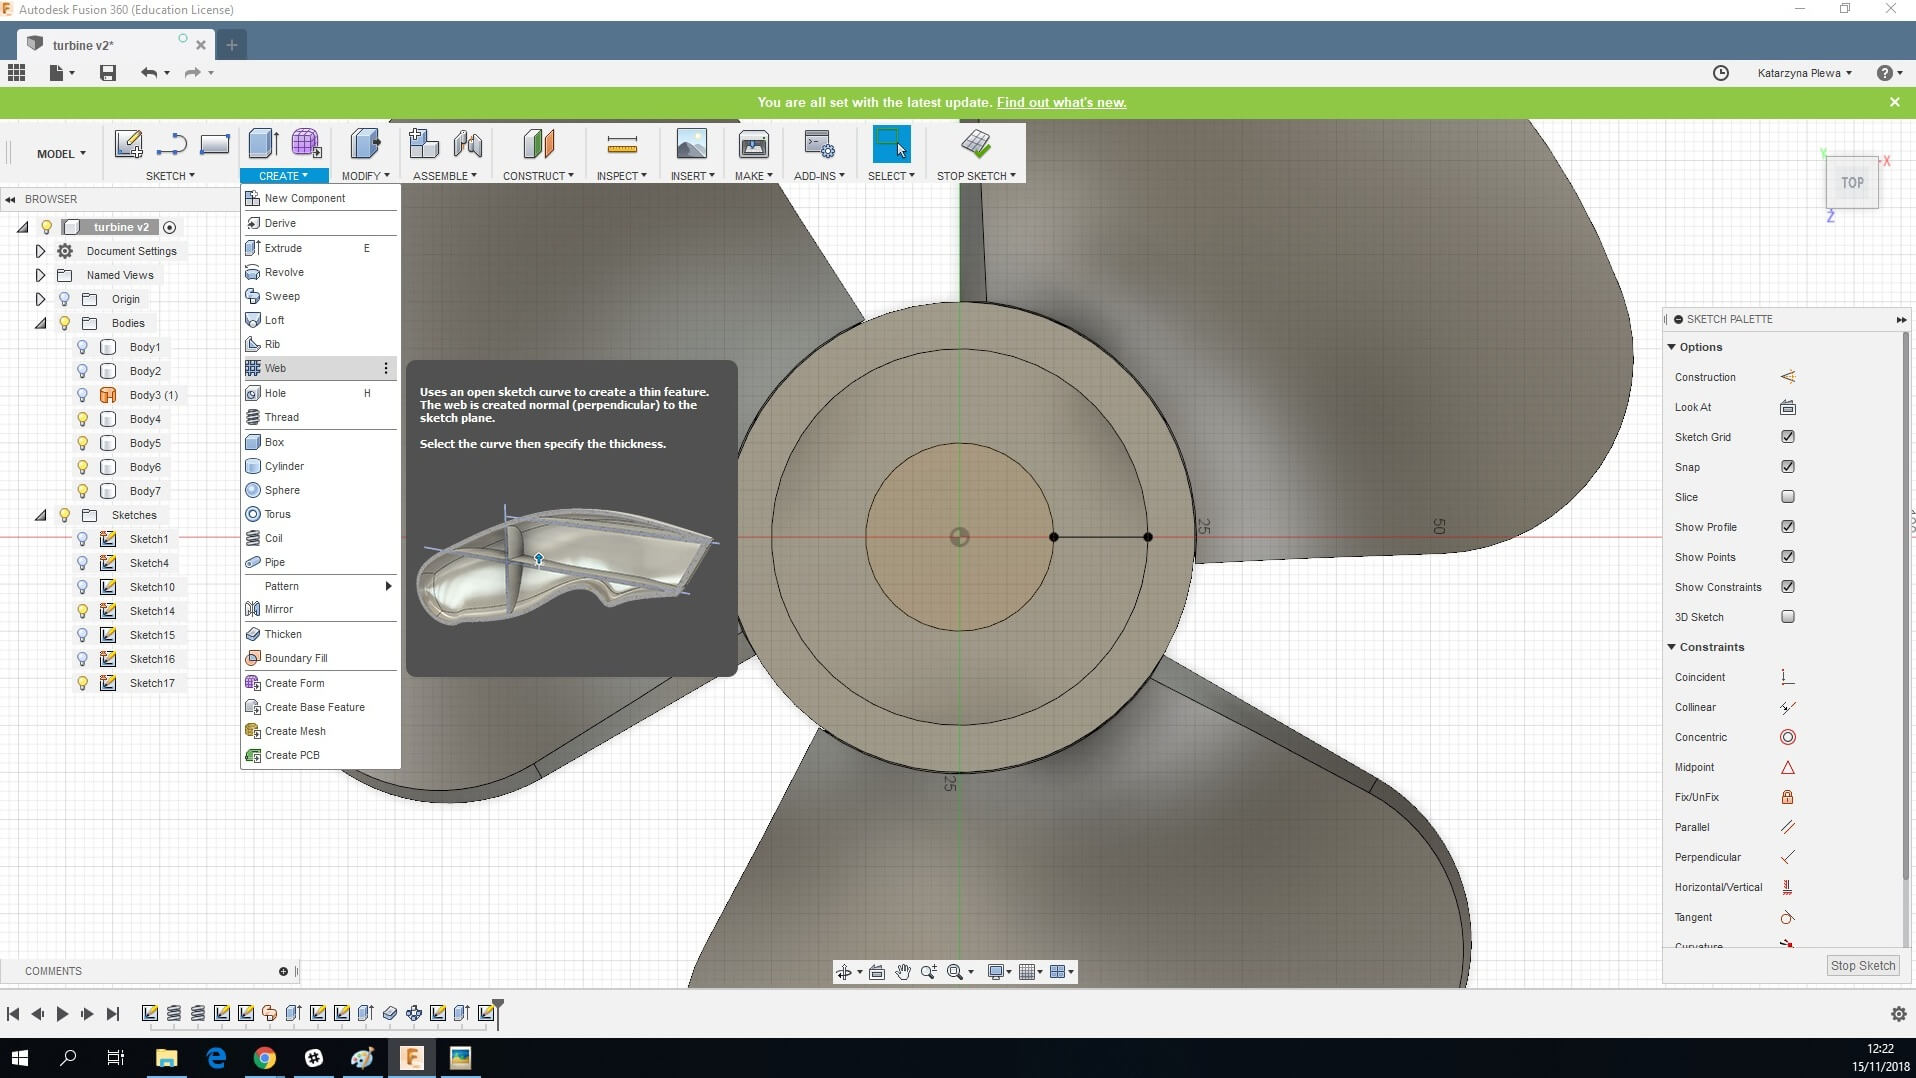
Curve: Select the line
Thickness Option: Symmetric
Depth Option: To Next
Thickness 5 mm
Flip Direction: do not click
Extend Curves: checked
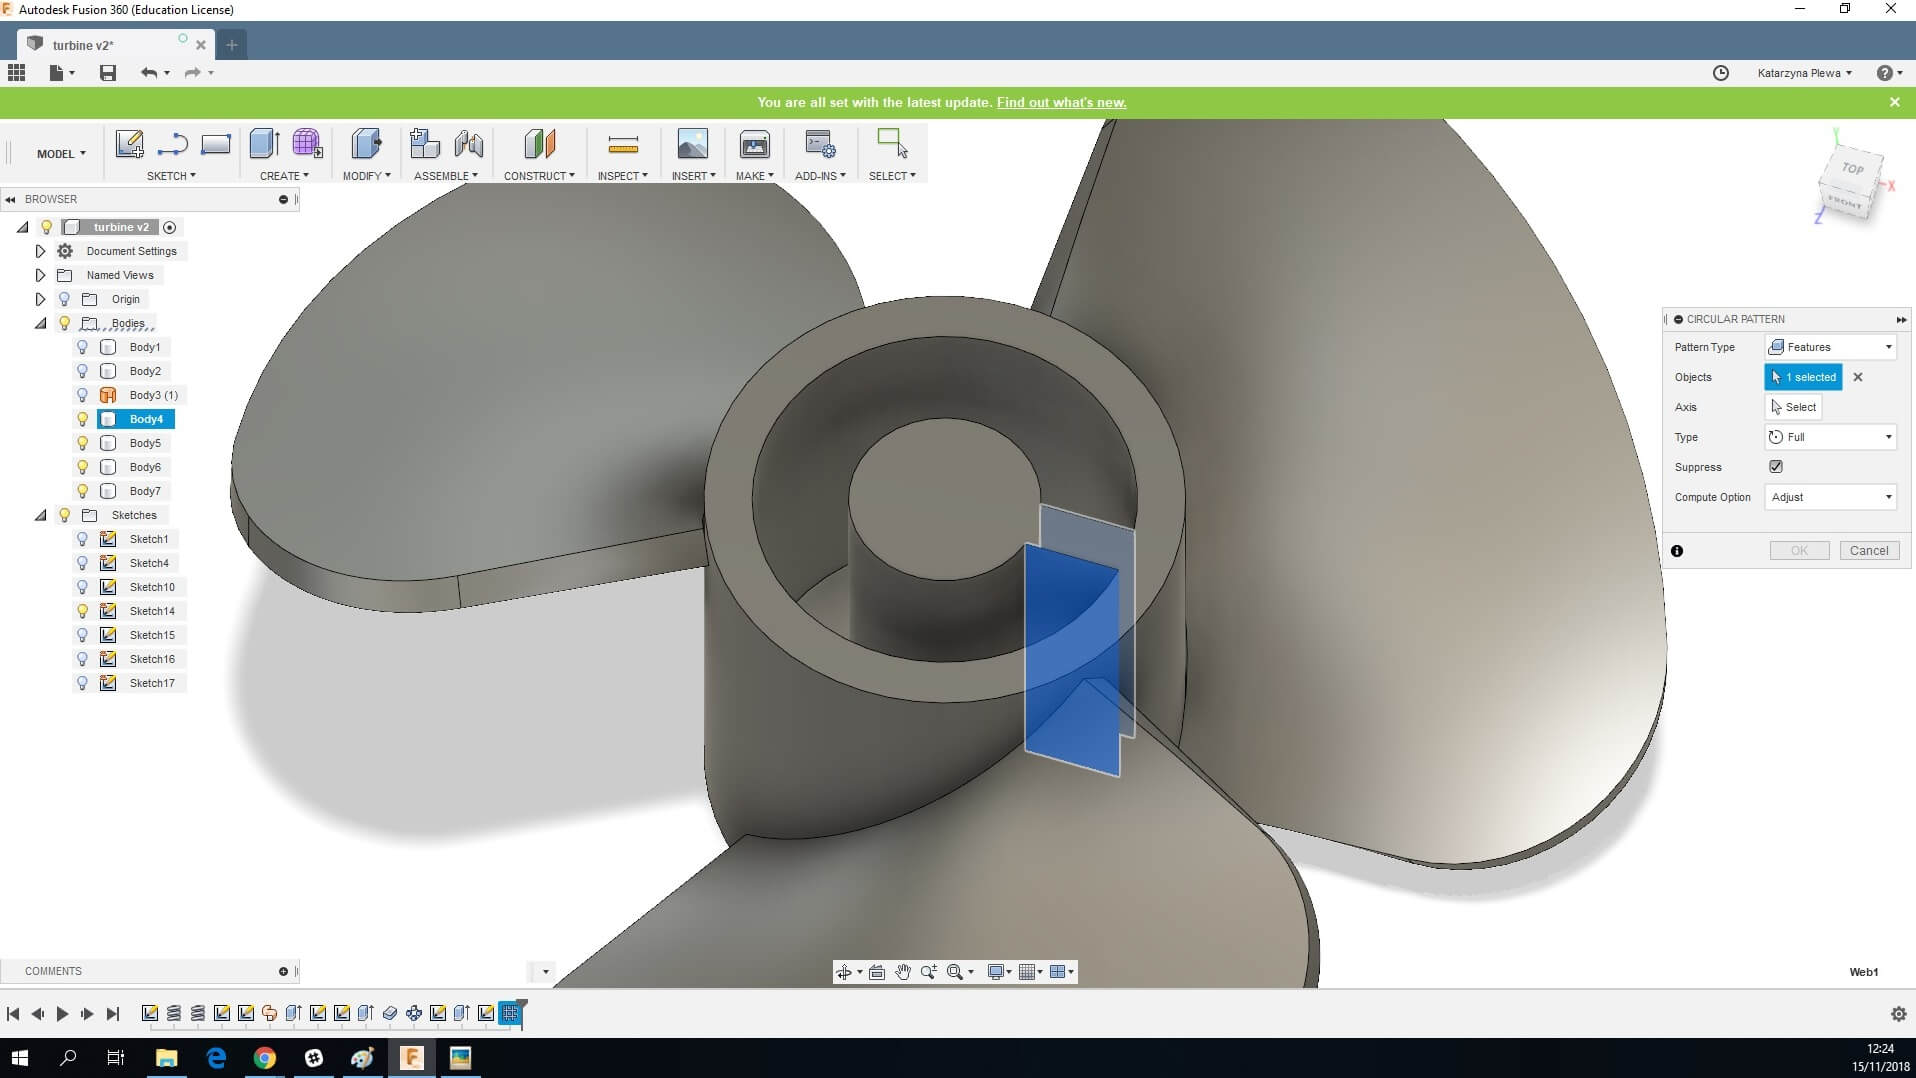
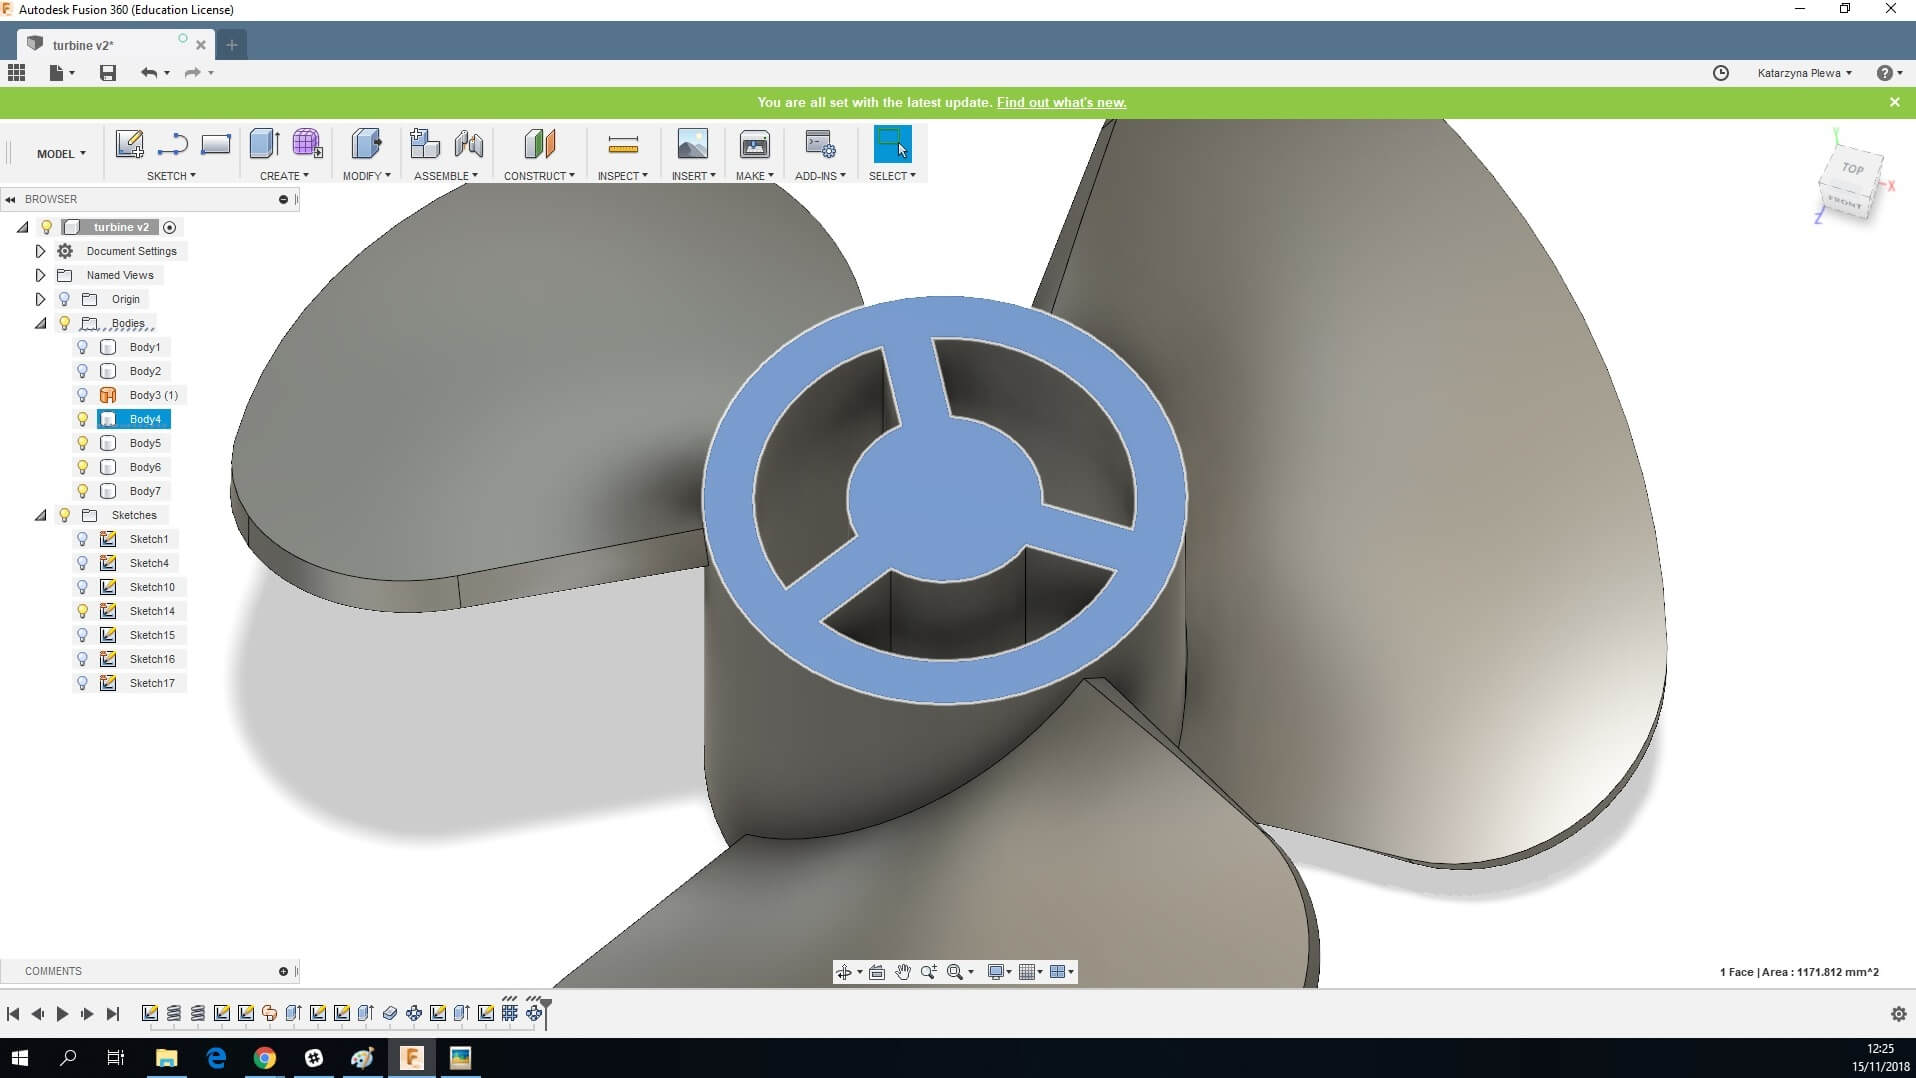
26. Use the Pattern tool again.
Pattern Type: Features
Objects: Select Web action on the timeline
Axis: Circle
Type: Full
Suppress: Checked
Compute Option: Adjust
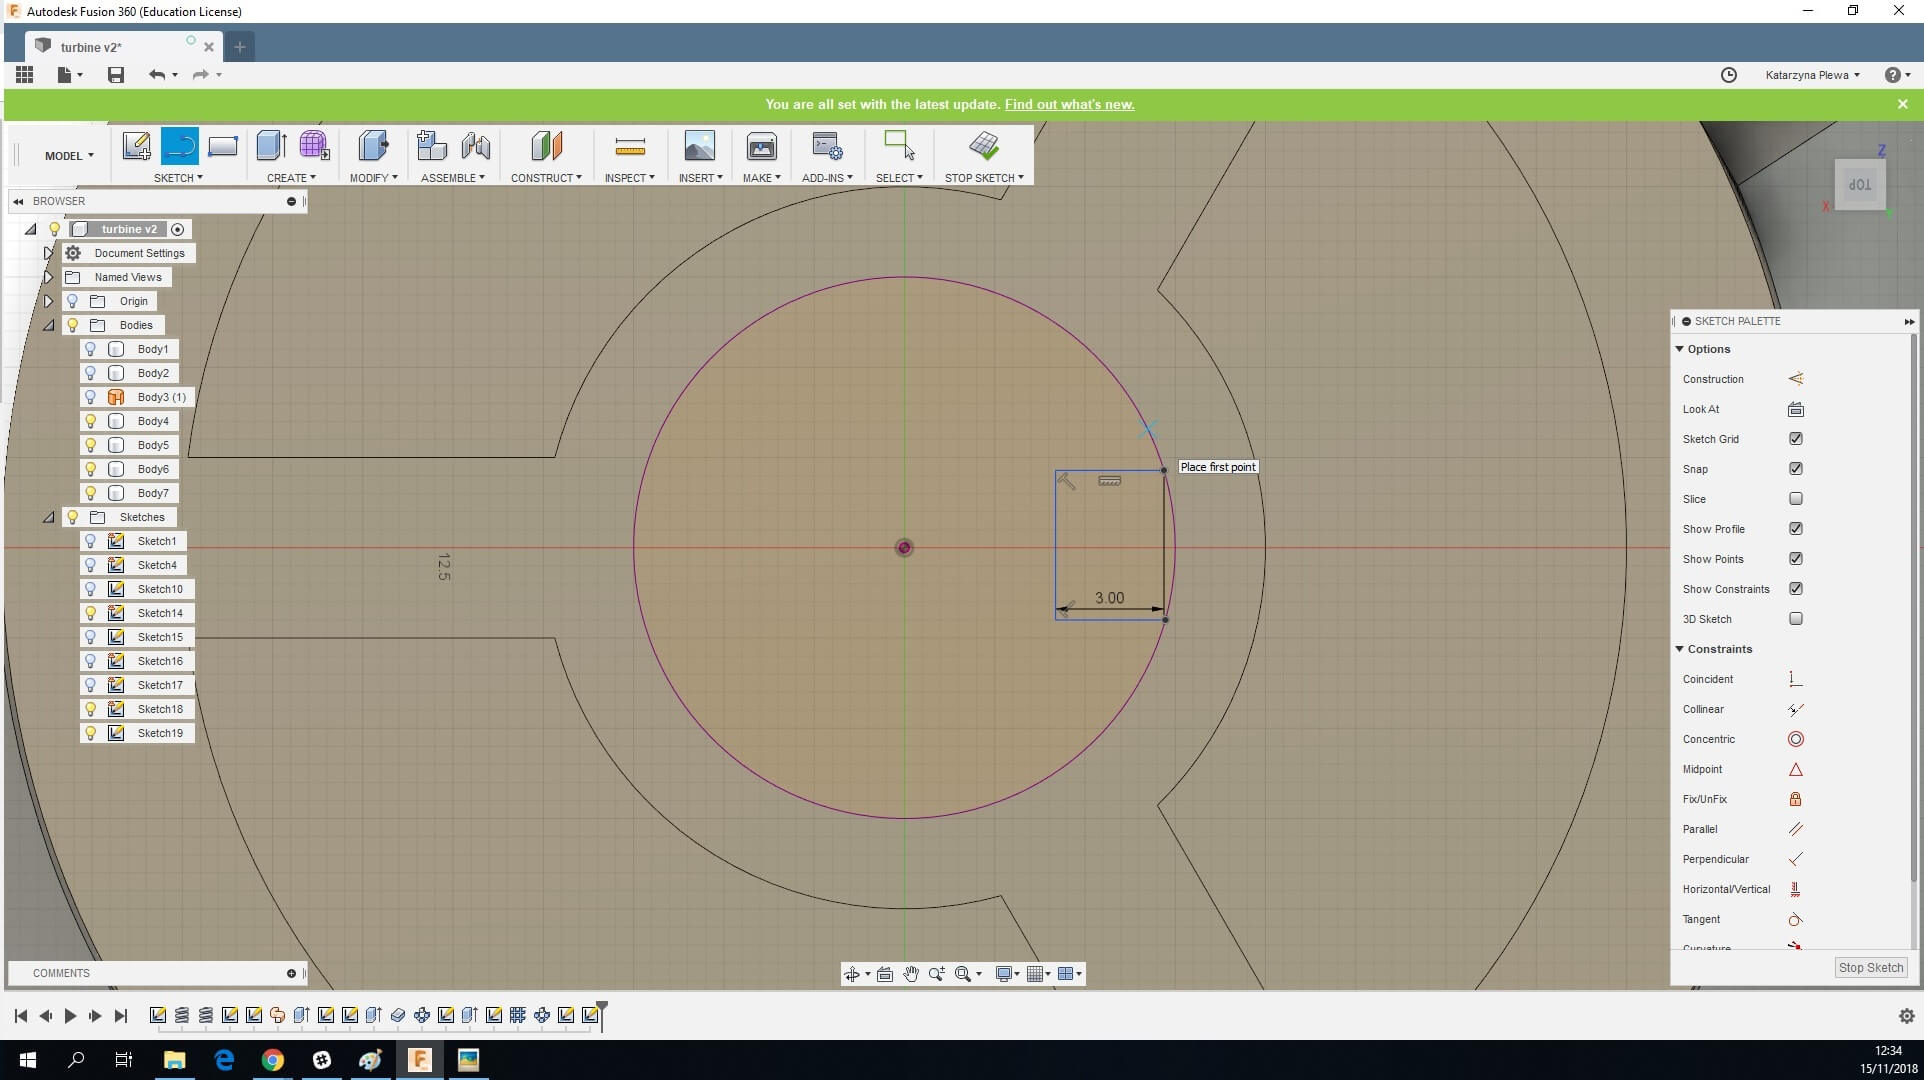
27. Select the top plane of the rotor.
Create a 10 mm circle.

Create a small knob inside the circle. You can also design any other system to attach the turbine to the motor, such as an internal thread.
28. Extrude the shape down, going through the rotor.
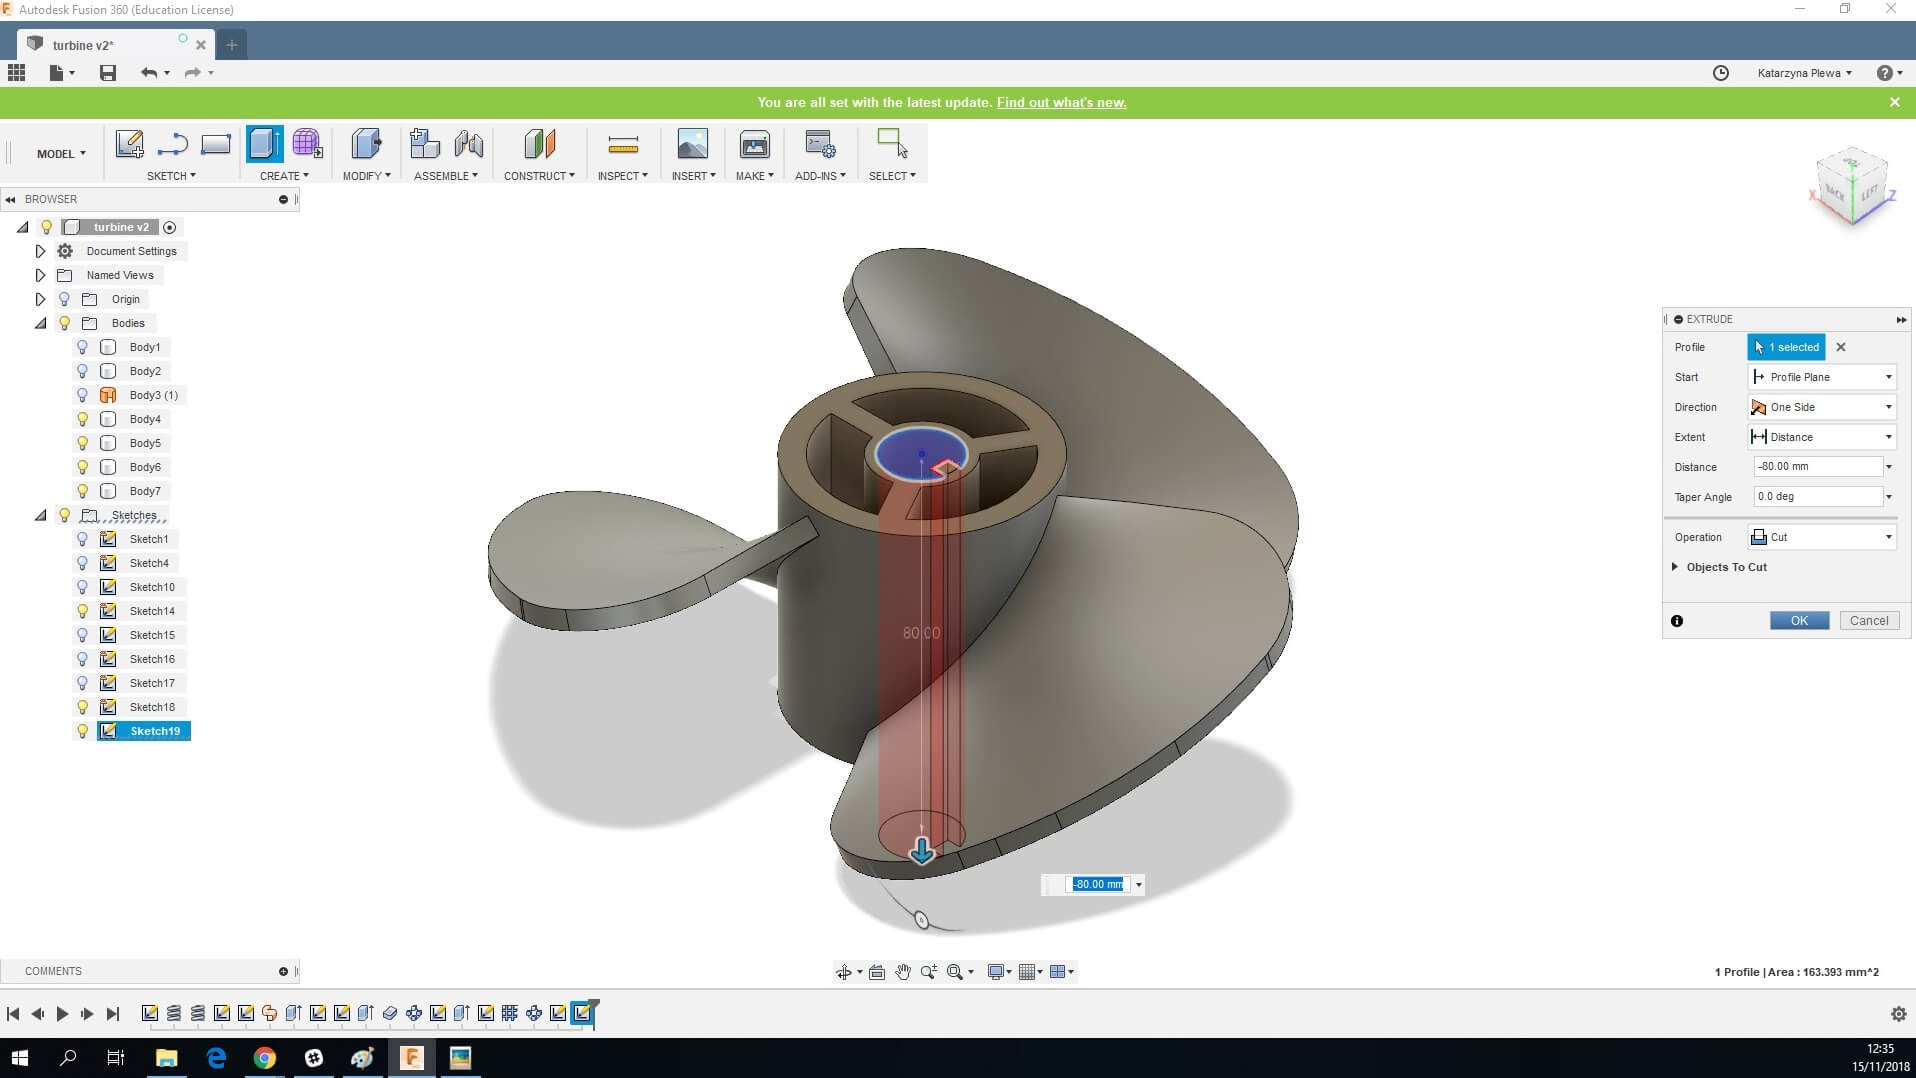
29. Select the Create tool and choose Combine. Join the rotor with all the blades. This step is crucial for 3D printing.
30. Right click on the new body and Export as STL. And it’s done! All you have to do it to upload your turbine model to our online 3D printing service.
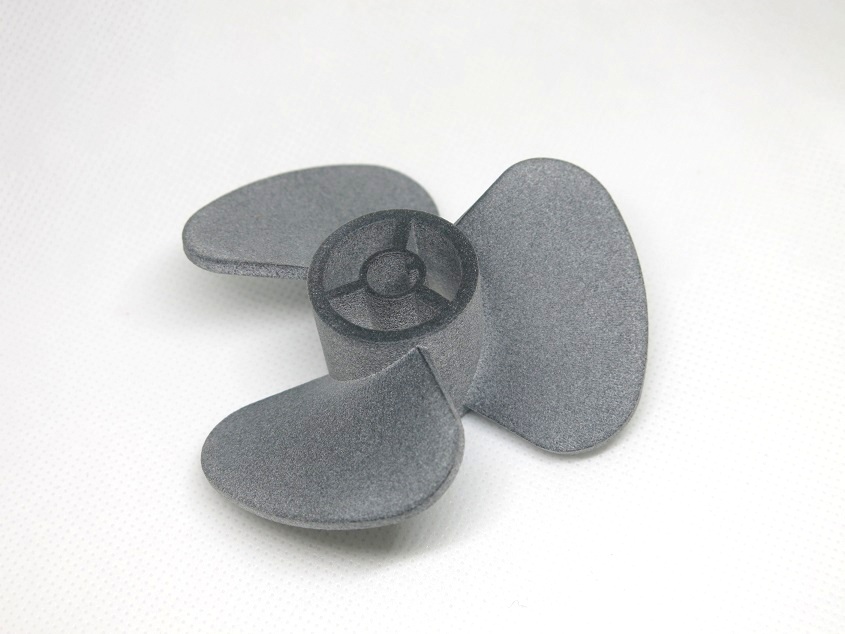
3D printing the turbine
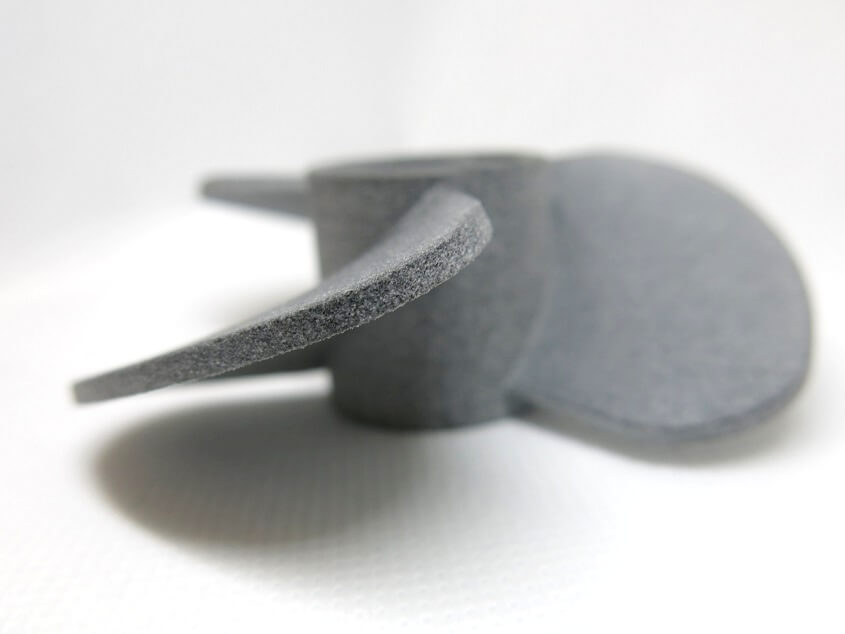
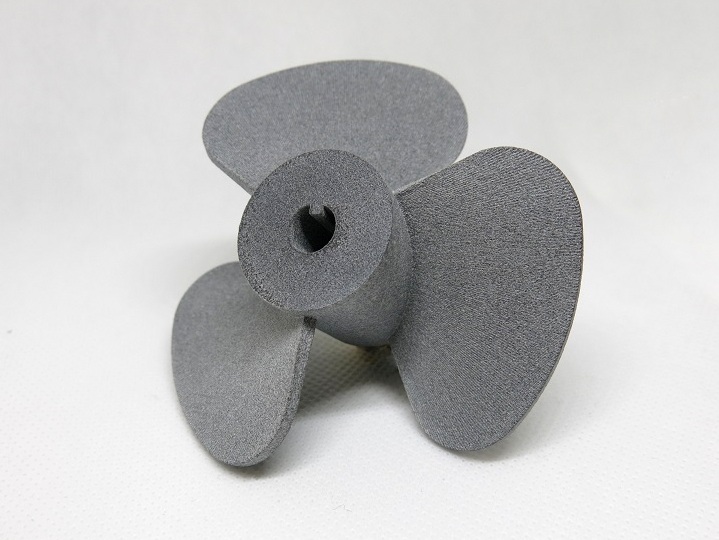
We 3D printed the turbine with Jet Fusion technology. Jet Fusion provided us with some outstanding quality results. This 3D printing technology is well known for creating your designs fast, and, at the same time keeping the highest standards. 3D printers designed by HP are among the best industrial 3D printers in the world, and that’s exactly why we invested in them. At Sculpteo we want to give you the best 3D printing experience, your production is assured to meet your expectations and manufacturing requirements.
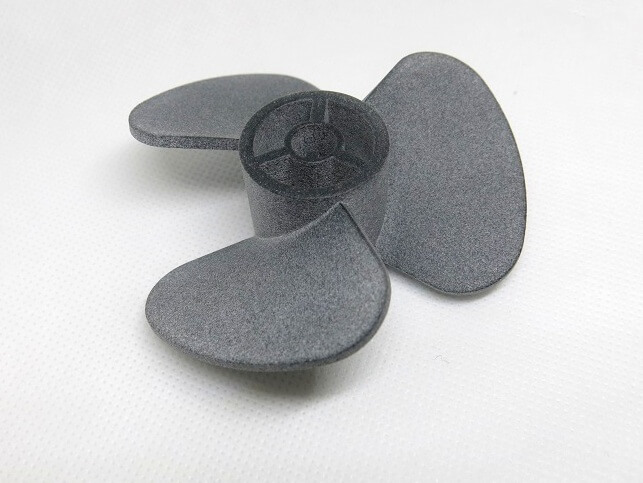
There are plenty of benefits coming from 3D printing this turbine. The obvious advantages of Additive Manufacturing are fast production, less material waste resulting in lower manufacturing costs, many different 3D technologies, from metal 3D printing to flexible plastics, and numerous materials to choose from.
Aside from the general benefits 3D printing the turbine with Jet Fusion presented us with a very robust object, the 3D printed turbine came out is the finest detail just like our 3D model. Jet Fusion material is also heat- resistant and waterproof, making our 3D printed turbine ready to use in a variety of settings.
Improve your production today!
As you can see, 3D printing gives you plenty of options to improve your manufacturing process. You’re not limited by the technology anymore, you now have the freedom to match the technology with your productions needs, not the other way around. Other manufacturing technologies won’t give you that. And with an online 3D printing service like Sculpteo, you don’t even have to worry about the manufacturing process, all you have to do is simply upload your design and we will deliver finished parts straight to your door!
Don’t forget to sign up for our Newsletter and follow us on Facebook to get the latest 3D printing Top News and tutorials!