Connect with Google
 Connect with Facebook
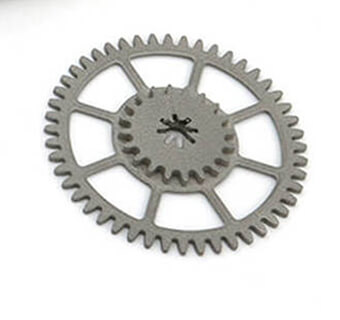
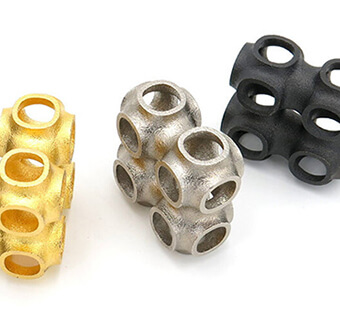
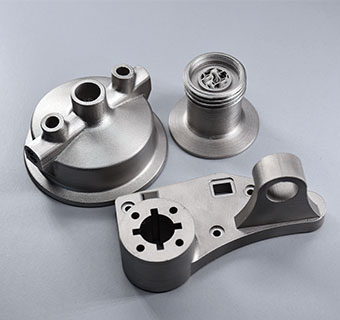
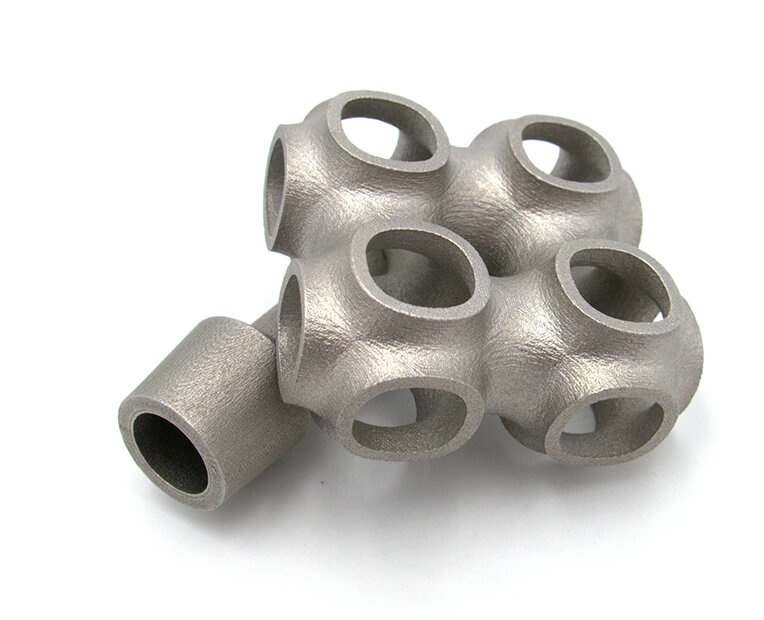
Home » 3D Printing Materials » Binder Jetting Metal Technology for 3D Printing » Stainless Steel 316L
POLYMER POWDERS
PHOTOPOLYMER RESINS
POLYMER FILAMENTS
Login
If you have any trouble logging in to your account, contact us.
Sign Up
To start 3D printing or Laser Cutting, you'll need to create an account here. Once done, you'll be able to upload your files and get live quotes of yours parts
Already have an account? Log In
Finishing options:
The polishing introduces a size restriction on your object. To learn more please check out size restrictions. Moreover, not all designs can be polished, and in some cases, you will be informed that the finishing you asked for is not available. In particular: wire-framed parts, fragile parts, thin-walled parts, and large flat parts cannot be polished; and the part containing fluid-holding type cavities cannot be polished.
| Standard layer thickness | 100 μm |
Accuracy
Using Binder Jetting 3D printers results in a 15-20% shrinkage. Our 3D printing experts take that into consideration when preparing your 3D models for 3D printing in hopes of achieving a net near shape part within 5% of the overall dimensions of the part (this would not apply to small feature). If accuracy is a high priority for you, contact our sales department for more information.
| Minimum size polished | 15 x 15 x 15 mm |
| Maximum size | 120 x 120 x 70 mm |
| Minimum wall thickness for object | 1.1 – 3.2 mm depending on build dimensions |
| Minimum wall thickness (rigid) | 2 mm |
| Minimum wall thickness stemmed elements | 0.8 mm with support |
| Minimum wall thickness particular design aspects | 2-3 mm |
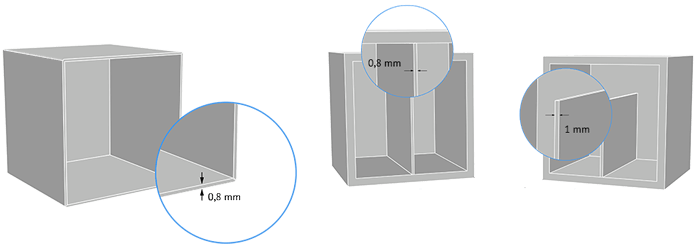
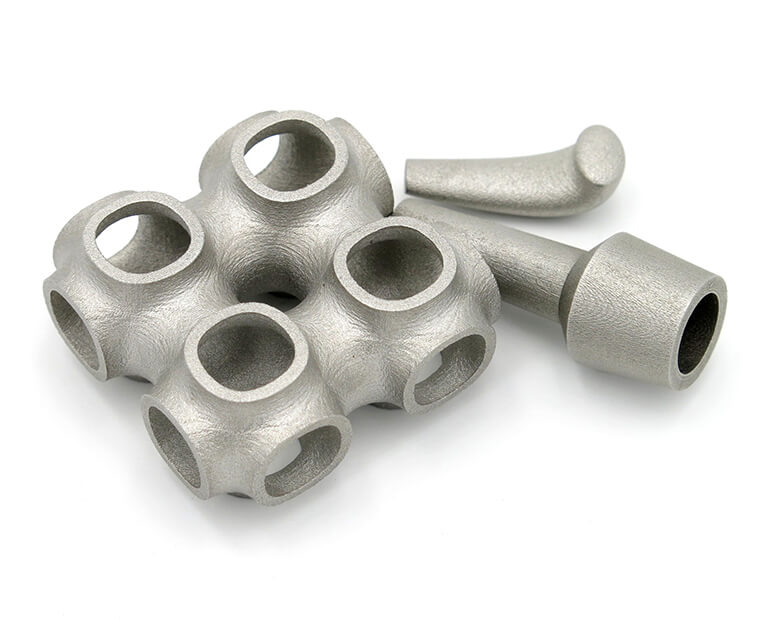
The walls of your design must adhere to a minimum thickness in order to guarantee the structure will not break. We recommend that you design your model by respecting the minimum thickness that is specific to Binder Jetting Stainless Steel 316 and which is variable depending on the size of your part.
If the walls of your model are less than 1.1 mm, you can add a support structure to maintain stability.
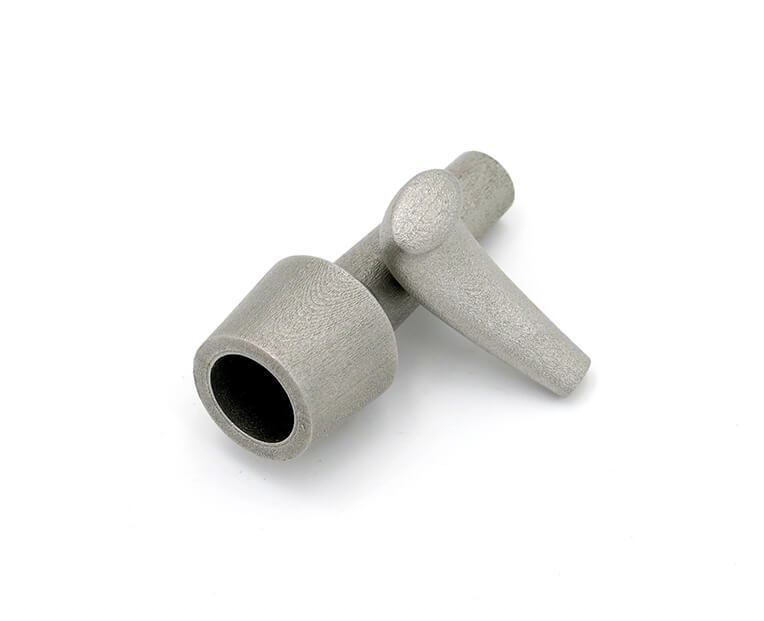
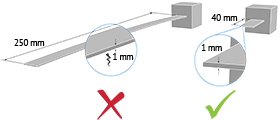
A stemmed element is a design aspect that is at least twice as long as it is thick. For unsupported and stemmed elements or parts of the design with a particular design constraint, it is also important to respect a minimum thickness of 1 mm in order to guarantee the object will not break.
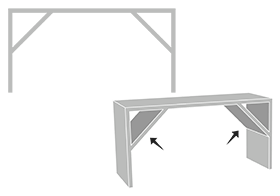
Add a support structure to maintain stability. For example, if you are modelling a bust of a person, you can attach thin aspects of the design like the ears in more places around the model’s head. Doing that will avoid cantilevered and easily breakable elements in the final print.
Thin walls supporting large, heavy stainless steel models can warp under the weight of itself.
Sculpteo offers an online solidity check tool which highlights parts of the print that may be too thin for a print. From there you are able to tweak your design in order to create an object that is an appropriate thickness. To use it, you just need to upload your 3D file , select your material and click on the “Verification” tab.
It is also important to keep in mind that the object is meant to be printed in real life. Thus if a thin aspect is supporting something that is too heavy for it, it may break – even though it is possible within the physics provided by your 3D modeling software. We recommend adding a bit of thickness to the places that will get a lot of handling, or that support the most weight.
Do not forget
Keep in mind that our solidity check tool does not detect physical aberrations such as floating parts, unstable position, parts supporting too much weight relative to their thickness, etc. Particular care must be given to the geometry of your design and the most stressed parts must be thickened.
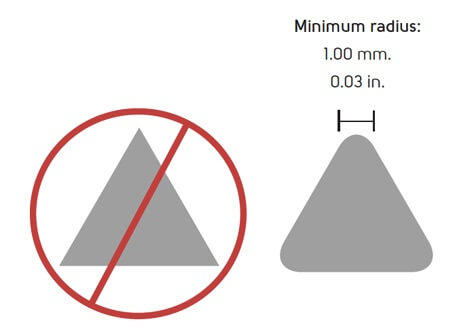
Overhangs must be designed to support their own weight. Unsupported features over 25.40 mm. (1.00 in.) will not be accepted. Fillets help support overhang structures during furnace processing.
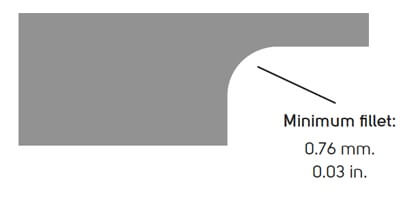
Inside edges and sharp intersections need to have a filleted edge that meets the required wall thickness minimum. Filleted edges help ensure successful part tolerances.
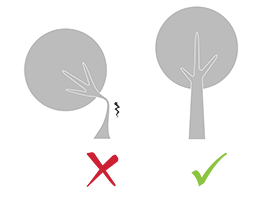
Knife edges/pointed edges will fail during the depowdering process. Fillet all knife edges with a 1.00 mm (0.03 in.) radius to avoid breakage during depowdering.
Edges that come to a point lower than the recommended tolerance are subject to rejection.
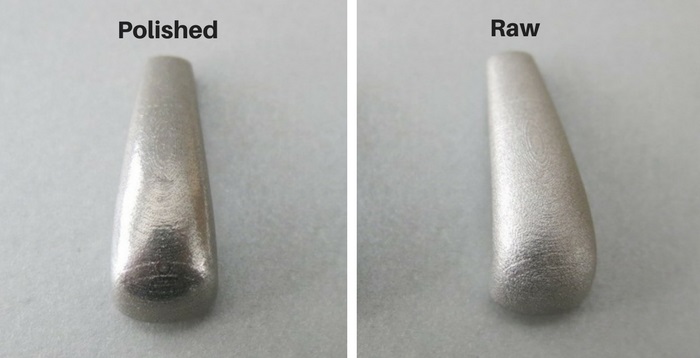
Parts will be rounded in polishing.
| Minimum size of details | 0.8 mm |
| Minimum height and width details | Embossed: 0.76 mm Engraved: 0.76 mm |
| Minimum height and width for a readable text | 0.76 mm |
| Enlargement ratio | 1/1 |
A detail’s minimum precision is mainly determined by the resolution of our 3D printers. However, during the cleaning process, a fine layer of detail can also be lost. In order for detail and text to be visible, we recommend following our recommended sizes at the very least.
It’s possible that particularly fine embossings and engravings will not be visible, as the carving could get filled with an excess of powder that is later unable to be cleaned out. If an embossing or engraving is an essential part of your design we recommend making them as deep as possible. To ensure a better powder removal (thus better detail visibility), the width of your details must be at least as big as depth.
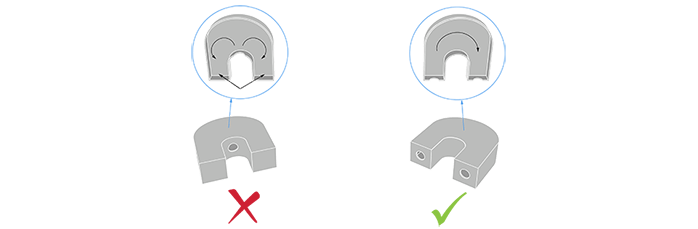
| Enclosed parts? | Not recommended |
| Interlocking parts? | Not recommended |
| Minimum clearance between parts | 0.5 mm |
| Assembly? | No |

| Hollowing? | Yes for raw parts No for plated parts |
| Minimum size of the hole | 2.54 mm |
Hollowing your stainless steel parts allows you to make them lighter, and reduce the price of printing but it is necessary to respect a minimum diameter. Otherwise, we will not be able to remove the powder completely from the inside cavity.
Our online hollowing optimization tool has the ability to calculate this automatically.
Using the tool requires adding two holes to your model, which will serve as the drain for the excess powder material within the object. The minimum size of these holes is determined by our website. Otherwise it is possible to hollow your object manually in your 3D modeling software.
| Files with Multiple Objects ? | No |

It is not possible to 3D print a 3D file containing several objects with our 3D Binder Jetting Stainless Steel printers.
It is not possible to print a 3D file containing several objects, that’s why we cannot accept files that contain clusters of multiple objects. Though, if you wish to purchase more than one identical parts, you can select the number of parts you want to order during the checkout. The more parts you order, the lower your price per part gets.
You can also use our online tools and see our tricks and tips on how to reduce your 3D printing price.
To get more information on your metal additive manufacturing service, you can contact our qualified sales team.